I just finished making this great crochet bunting. Its super cute and very easy to make. The random nature of the flowers means you can make whatever flowers you want from odds and ends of wool. It would work equally well with cotton yarn. Then just join them all up a chain stitch. I worked 20 chain stitches in between each flower, and about 40 at each end. The flowers are a mixture of stitches: all worked on magic loops and a base of 11 double crochet in the first row.
Little Miss 4 was very happy to gift it to one of her buddies as a 5th birthday present. With Christmas around the corner and at least four markets to get to, I know I am going to be making a few more of these cute little numbers.
Showing posts with label crochet. Show all posts
Monday, 11 November 2013
Wednesday, 6 November 2013
Crochet Cotton Dish Cloth
It seems like the whole world has recently taken up crocheting; and I can see why: its simple, fast, logical in design, you only really deal with one stitch at a time, and it rewards beginners with a myriad of cute designs.
My Nana first taught me to crochet when I was a child. Don't ask me how old I was, as I really can't remember. I do remember making a huge chain that stretched across the living room. Crochet dish and face clothes are currently the thing to make. Mostly because they are easy to design and customise, and quick to make in whatever pattern you choose. I used a cheerful mixture of Patons Cotton 8ply colours and a V-stitch pattern for this bright and cute gift idea.
Crochet Dish or Face Cloth
Using a 4mm crochet hook and 8ply cotton yarn work 22 chain (ch) stitches plus 3 for the length of the first treble crochet.
1st row: work 1 treble crochet (tr) into the 4th chain [miss a chain stitch, and work 1 tr, 1 ch, 1tr into the next ch] repeat the bracketed sequence until the end of the row, work 1 tr into final ch st.
2nd row: work 3 ch [1 tr, 1 ch, 1 tr through the next chain space - the centre of the V - on the first row] repeat the bracketed instruction though to the end of the row, work 1 tr into the last space.
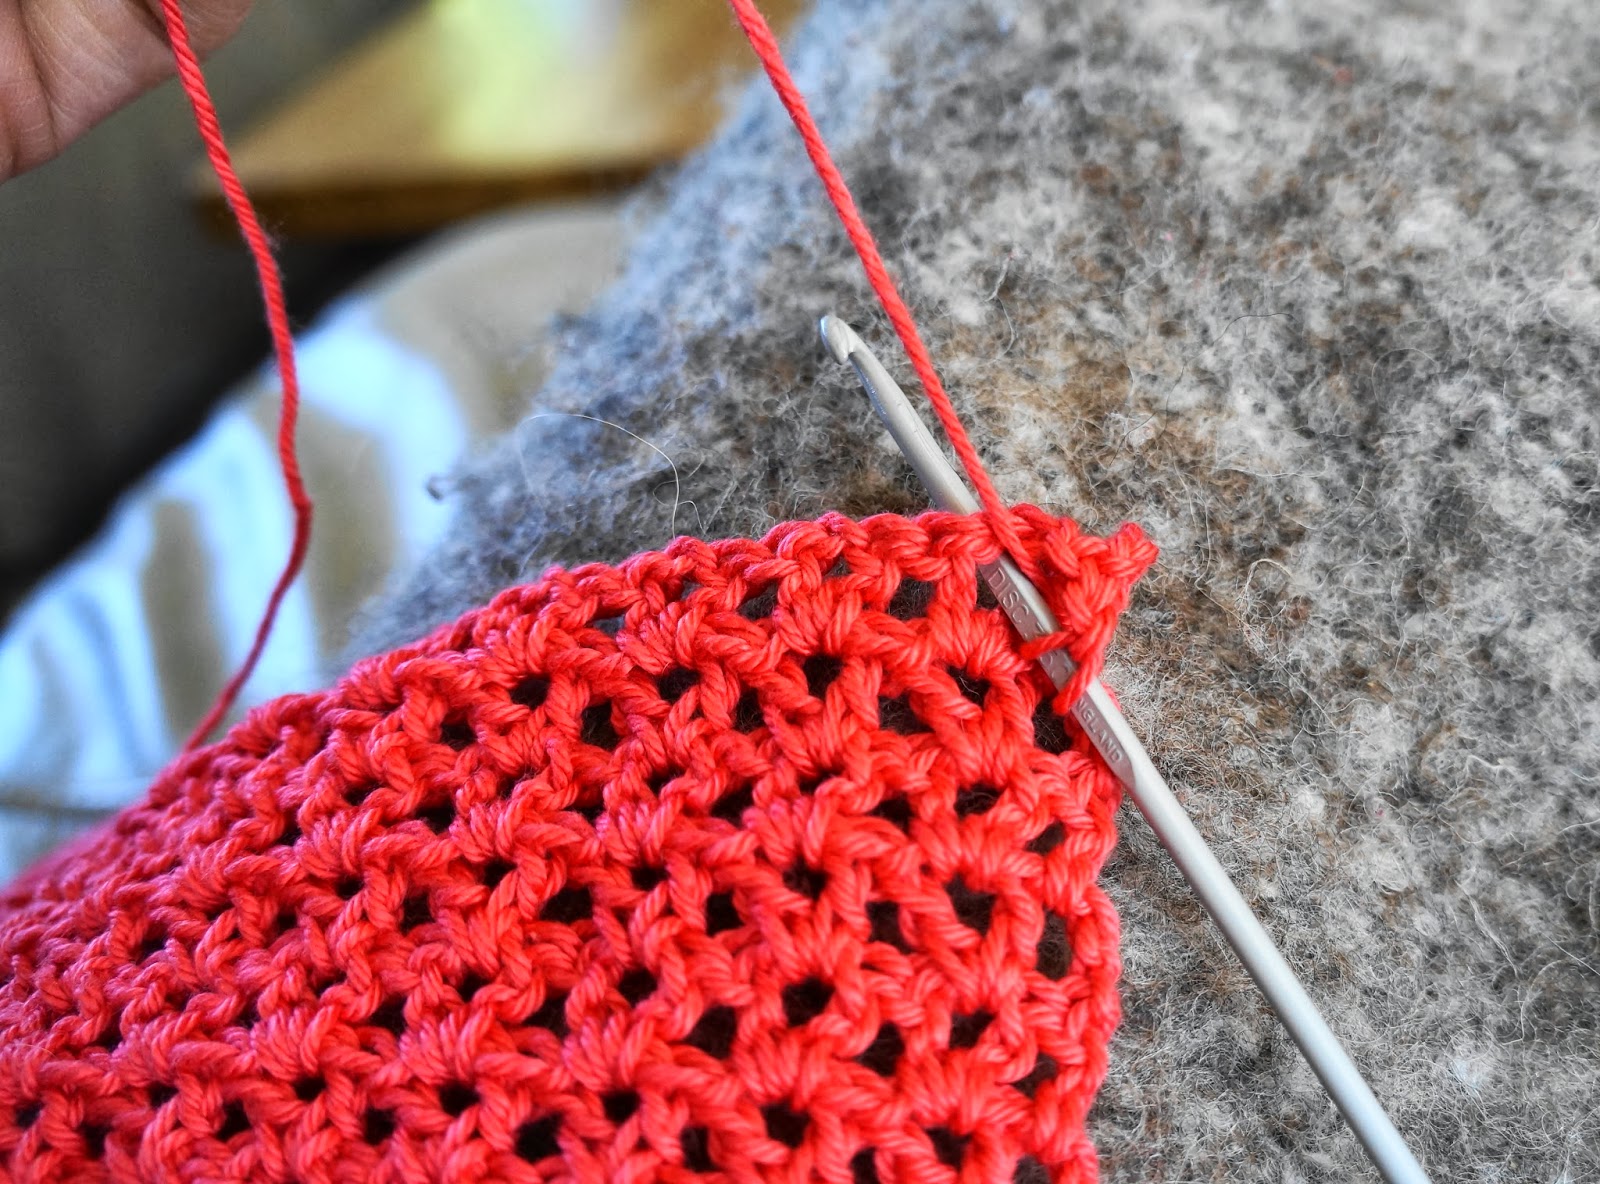
Work the thread around the entire chain, not through it - as shown in the picture.
Following rows: repeat the previous row until a square is formed - I worked 14 rows in total.
Join on a contrasting colour, and work 2 double crochet (dc) into the corner of the cloth, work 21 dc along the first side, repeat this sequence along each side until 2 rows of dc have been worked. Break the thread and pass it through the loop to finish the work. Use a darning needle to weave in the loose threads.
Give it a quick steam press and your all done in less than an afternoon's work.
My Nana first taught me to crochet when I was a child. Don't ask me how old I was, as I really can't remember. I do remember making a huge chain that stretched across the living room. Crochet dish and face clothes are currently the thing to make. Mostly because they are easy to design and customise, and quick to make in whatever pattern you choose. I used a cheerful mixture of Patons Cotton 8ply colours and a V-stitch pattern for this bright and cute gift idea.
Crochet Dish or Face Cloth
Using a 4mm crochet hook and 8ply cotton yarn work 22 chain (ch) stitches plus 3 for the length of the first treble crochet.
1st row: work 1 treble crochet (tr) into the 4th chain [miss a chain stitch, and work 1 tr, 1 ch, 1tr into the next ch] repeat the bracketed sequence until the end of the row, work 1 tr into final ch st.
2nd row: work 3 ch [1 tr, 1 ch, 1 tr through the next chain space - the centre of the V - on the first row] repeat the bracketed instruction though to the end of the row, work 1 tr into the last space.
Work the thread around the entire chain, not through it - as shown in the picture.
Following rows: repeat the previous row until a square is formed - I worked 14 rows in total.
Join on a contrasting colour, and work 2 double crochet (dc) into the corner of the cloth, work 21 dc along the first side, repeat this sequence along each side until 2 rows of dc have been worked. Break the thread and pass it through the loop to finish the work. Use a darning needle to weave in the loose threads.
Give it a quick steam press and your all done in less than an afternoon's work.
Thursday, 1 August 2013
Vintage Love - The Encraftment market is back!
The next Encraftment market is scheduled for the 7th of September. The Vintage theme is just made for us. We love vintage, and vintage loves us. Mum is always searching out vintage fabrics and apron patterns to make and I just love hand knitting, wool crafts and cute little vintage accessories. Call me old fashioned, but there is nothing better than a lovely hand-knit or piece of weaving. It speaks of love, a investment in time and attention to detail; all the good things in life when the only take out was fish and chips and big-box retail and imported tat hadn't been invented...
This is just a little selection of vintage love; made by Mum and I especially for you.
Thanks to all our friends who came to the Great British Market. We loved seeing you there.
Thanks Encraftment team for considering our application. We would love to contribute to another great market.
This is just a little selection of vintage love; made by Mum and I especially for you.
This is a 100% cotton and lace apron with back ties and side pockets.
A cuddly 100% New Zealand wool hand woven blanket worked in a traditional check. The ends will be bound with a floral fabric.
More apron love. This time it's paisley trimmed with bias binding. The bib goes over your head with the ties going through the body of the apron.
Pretty butterflies in 100% cotton with a handy front pocket.
Both tea cosies are made of 100% New Zealand wool. The cream one has crochet flowers. This one has crocheted openings and is drawn up at the top with a chain.
Snuggle with a 100% New Zealand wool crocheted blanket. This is the girly version.
More vintage aprons. This one's got a cute cross-over and lace trim.
Thinking vintage toys, back before plastic was invented and the only toys you owned were the ones your family made.
As well as all this great vintage inspired stuff, we will have all our usual crafty goodness on sale.
Thanks to all our friends who came to the Great British Market. We loved seeing you there.
Thanks Encraftment team for considering our application. We would love to contribute to another great market.
Wednesday, 6 February 2013
Knitted up a Storm
I know it's a strange time of year, in the southern hemisphere that is, to be knitting up a storm, but I am on a mission to complete my stash of long time unfinished projects. Every crafter has unfinished items lurking in the cupboard. Things started with great enthusiasm then shelved because something more pressing comes along.
This was my Christmas Holiday project; I took it away with us and knitted on the days when the weather wasn't so memorable. Now I have finally got around to sewing it together and crocheting the edges.
I think I got this pattern from a Tender Centre in a box with a whole collection of others. More patterns than I could probably ever knit in a lifetime.
The wool came from my stash as well. I'm not even sure you can still buy this one, or if it's still made in New Zealand. I have it in the cupboard for more than 10 years.
It knits up on 7mm needles. They were quite clunky to work with until I got used to them. It is super quick to knit up and finished in no time.
I used a double crochet stitch on a 4mm needle around the collar and cuffs. Rather than automatically opting for the black, I decided on a bright, cheerful pink. Instead of working the button hole into the cardy, I crocheted a loop on the edge.
Couldn't be bothered making a special trip to the fabric store to find one button, so I turned over my haberdashery stash and found a cool 70s style button.
This was my Christmas Holiday project; I took it away with us and knitted on the days when the weather wasn't so memorable. Now I have finally got around to sewing it together and crocheting the edges.
I think I got this pattern from a Tender Centre in a box with a whole collection of others. More patterns than I could probably ever knit in a lifetime.
The wool came from my stash as well. I'm not even sure you can still buy this one, or if it's still made in New Zealand. I have it in the cupboard for more than 10 years.
It knits up on 7mm needles. They were quite clunky to work with until I got used to them. It is super quick to knit up and finished in no time.
I used a double crochet stitch on a 4mm needle around the collar and cuffs. Rather than automatically opting for the black, I decided on a bright, cheerful pink. Instead of working the button hole into the cardy, I crocheted a loop on the edge.
Couldn't be bothered making a special trip to the fabric store to find one button, so I turned over my haberdashery stash and found a cool 70s style button.
The mohair fibre is so light and fluffy, and extremely warm on a chilly evening. I have a good few balls left over; Little Miss Three thinks its lovely and now wants a fluffy cardy of her own.
Sunday, 11 November 2012
A Crochet Nana Blanket to Make Grandma Proud
Oh what dedicated women our forbears must have been. Its easy to forget that once upon a time, the only way to get most things was to make them yourself. Many skills now forgotten by the general populous were basic requirements for every household, and a matter of intense pride for those that mastered them. Every woman could knit a cardigan, darn a sock, crochet a blanket or sew themselves a stylish dress to wear to the town dance on a Saturday night. The skill of the crafts woman was evident in the clothes they and their family wore everyday, the furnishing of their home and the food on the table. There was no alternate place to source the basics of life. No high street shops or handy takeaways for those girls to turn to after a particularly hectic day. I am by no means suggesting we go back to that way of life. While it might sound distantly romantic, it was in reality just darn hard work for the average woman.
Now that most of the developed world has the benefit of an automatic washing machine, electric stove and other various assorted appliances, why not connect with social history and spend some of your spare moments indulging in an old fashioned craft?
See my previous blog for instructions on how to complete the Nana squares that are the foundation of this blanket. You can either plan the dimensions before hand, or just make as many as you feel like and decide on the size later. The choice of colours is completely optional. I chose to limit the colour palate and then randomly combine the colours of each square.
Once you have all your squares, lay them all out in the required order. I arranged mine so no boarder colours repeated side by side. Time to get sewing...
I used a simple lashing stitch to sew each square together using a wool darning needle. Use a colour that matches one of the squares. Start at one end of the blanket and sew around two or three sides of each square until most of the sides are connected. Then go back and sew up the odd ones that have been missed.
With all the sewing up completed, crochet a boarder around the outside. I used three rows of double crochet stitch - alternating the colours of each round. Be sure to crochet three extra stitches in the corner or they will curl inwards.
Now that most of the developed world has the benefit of an automatic washing machine, electric stove and other various assorted appliances, why not connect with social history and spend some of your spare moments indulging in an old fashioned craft?
The weather was so nice on Saturday I sat under the umbrella in the garden.
While this blanket was thrifty in terms of materials - using left over balls of wool and various oddments, it was labour intensive. The squares themselves are quick to crochet, but it takes quite a few to fill out a reasonable sized blanket. If you add up the number of squares x the time spent on each one the result might be surprising. The sewing up takes some time; however it's worth spending a little longer to ensure a tidy end product.
Good work Grandma. I'm not sure how you found the time to make whole bedspreads of squares; especially with the coal range to stoke, scones to make, lambs and chooks to feed, butter to churn, workers to feed and five children to look after.
And we thought we invented multi-tasking.
Monday, 29 October 2012
Crochet Nana Squares
Once the sole preserve of Nana's and Great Aunts, the crochet square is becoming the blanket material of choice for Mummy's around the globe. It has many positive attributes. Its warm and snugly, thanks to the air trapping properties of its textured finish; it comes in a variety of cheerful colours; its environmentally friendly, because it uses up all the odd bits of left over wool; and it reminds you of outings with your Nana and Poppa because they always carried one in the back seat of the car.
Overcome by a wave of nostalgia, I decided it was about time for a Nana craft revival:
I used a 3.5mm crochet hook and scraps of 8 and 12 ply yarn. If your using 12 ply, restrict it to the same number of rounds per square or the squares will end up different sizes.
Start by forming a loop and working 6 chain (ch). Join to the end to form a loop.
Now work in rounds:
Round 1: Work 3 ch, 2 triple crochet stitches (tc), 2 ch, 3 tc, 2 ch, 3 tc, 2 ch, 3 tc, 2 ch, join the chain to the first group of stitches to form a circle.
Round 2: Turn the work over and crochet the next row on the other side of the work. Change colours.
Work 3 ch, 2 tc passing the hook under the chain from the previous row, 2 ch, 3 tc through the same chain, 2 ch, 3 tc through the second corner of chain stitches, 2 ch, 3 tc, 2 ch, 3 tc through the third corner, 2 ch, 3 tc, 2 ch, 3 tc through last corner, 2 ch, 3 tc, 2 ch, join onto the first group of stitches.
Round 3: Turn the work over and crochet the next row on the other side of the work. Change colours.
Work this round in the same way as the previous one. The only difference being that one extra set of 3 tc is worked in the middle of each side of the square as shown in the photo.
Round 4: Turn the work over and change colours. Work using the same pattern as the previous rounds, but add another set of 3 tc into each side of the square, as pictured.
Use a blunt tipped darning needle to work the loose ends of the wool back into the square.
Pressing the square with a warm steamy iron will help to form an even shape and texture.
The Nana squares can be left this size and joined together using the darning needle and matching wool; or an extra row can be crocheted around all the squares, and then they can be sewed up using the darning needle and matching wool.
Mixing the colours with alternating dark, light, dark, light colours and combining different tones of the same colour will make the blanket more attractive.
They are quick to make, so its easy to accumulate enough for a snugly blanket. One of the main advantages is that they are easy to carry around and complete where and whenever the mood takes you. No large project to juggle with your Cafe coffee and cake. Accumulate enough and you will be making your own enviable Nana car rug.
Overcome by a wave of nostalgia, I decided it was about time for a Nana craft revival:
I used a 3.5mm crochet hook and scraps of 8 and 12 ply yarn. If your using 12 ply, restrict it to the same number of rounds per square or the squares will end up different sizes.
Start by forming a loop and working 6 chain (ch). Join to the end to form a loop.
Now work in rounds:
Round 1: Work 3 ch, 2 triple crochet stitches (tc), 2 ch, 3 tc, 2 ch, 3 tc, 2 ch, 3 tc, 2 ch, join the chain to the first group of stitches to form a circle.
Round 2: Turn the work over and crochet the next row on the other side of the work. Change colours.
Work 3 ch, 2 tc passing the hook under the chain from the previous row, 2 ch, 3 tc through the same chain, 2 ch, 3 tc through the second corner of chain stitches, 2 ch, 3 tc, 2 ch, 3 tc through the third corner, 2 ch, 3 tc, 2 ch, 3 tc through last corner, 2 ch, 3 tc, 2 ch, join onto the first group of stitches.
Round 3: Turn the work over and crochet the next row on the other side of the work. Change colours.
Work this round in the same way as the previous one. The only difference being that one extra set of 3 tc is worked in the middle of each side of the square as shown in the photo.
Round 4: Turn the work over and change colours. Work using the same pattern as the previous rounds, but add another set of 3 tc into each side of the square, as pictured.
Use a blunt tipped darning needle to work the loose ends of the wool back into the square.
Pressing the square with a warm steamy iron will help to form an even shape and texture.
The Nana squares can be left this size and joined together using the darning needle and matching wool; or an extra row can be crocheted around all the squares, and then they can be sewed up using the darning needle and matching wool.
Mixing the colours with alternating dark, light, dark, light colours and combining different tones of the same colour will make the blanket more attractive.
They are quick to make, so its easy to accumulate enough for a snugly blanket. One of the main advantages is that they are easy to carry around and complete where and whenever the mood takes you. No large project to juggle with your Cafe coffee and cake. Accumulate enough and you will be making your own enviable Nana car rug.
Saturday, 6 October 2012
Crafty Crochet Balls
Continuing the theme of stash busting, these cute little projects are a perfect little doddle to occupy the few spare minutes of your day. All that's required is a few spare scraps of yarn, a 3.5omm crochet needle, a darning needle and a hand full or two of stuffing.
I adapted the pattern for these from a school library book. It suggested altering the colours, so the end result looks like a traditional beach ball pattern. I might try that next time; but for now, all that joining sounded like a hassle when I wanted to complete this quick smart.
The wool I have used is from The Wool Company in Taihape. All New Zealand wool, grown, spun and dyed in NZ. They have a fantastic mail order system via their web site: www.thewoolcompany.co.nz
Instructions:
- Make a foundation row of 16 chain
- Row 1: 1 chain (ch), skip 1 chain, 4 double crochet (dc), 8 treble crochet (trc), 4 double crochet, turn.
- Row 2: 1 ch, 4 dc into next 4 dc, 8 trc into next 8 trc, 4 dc into next 4 dc, turn.
- These 2 rows form a pattern, and are repeated 9 times to form a ball shape.
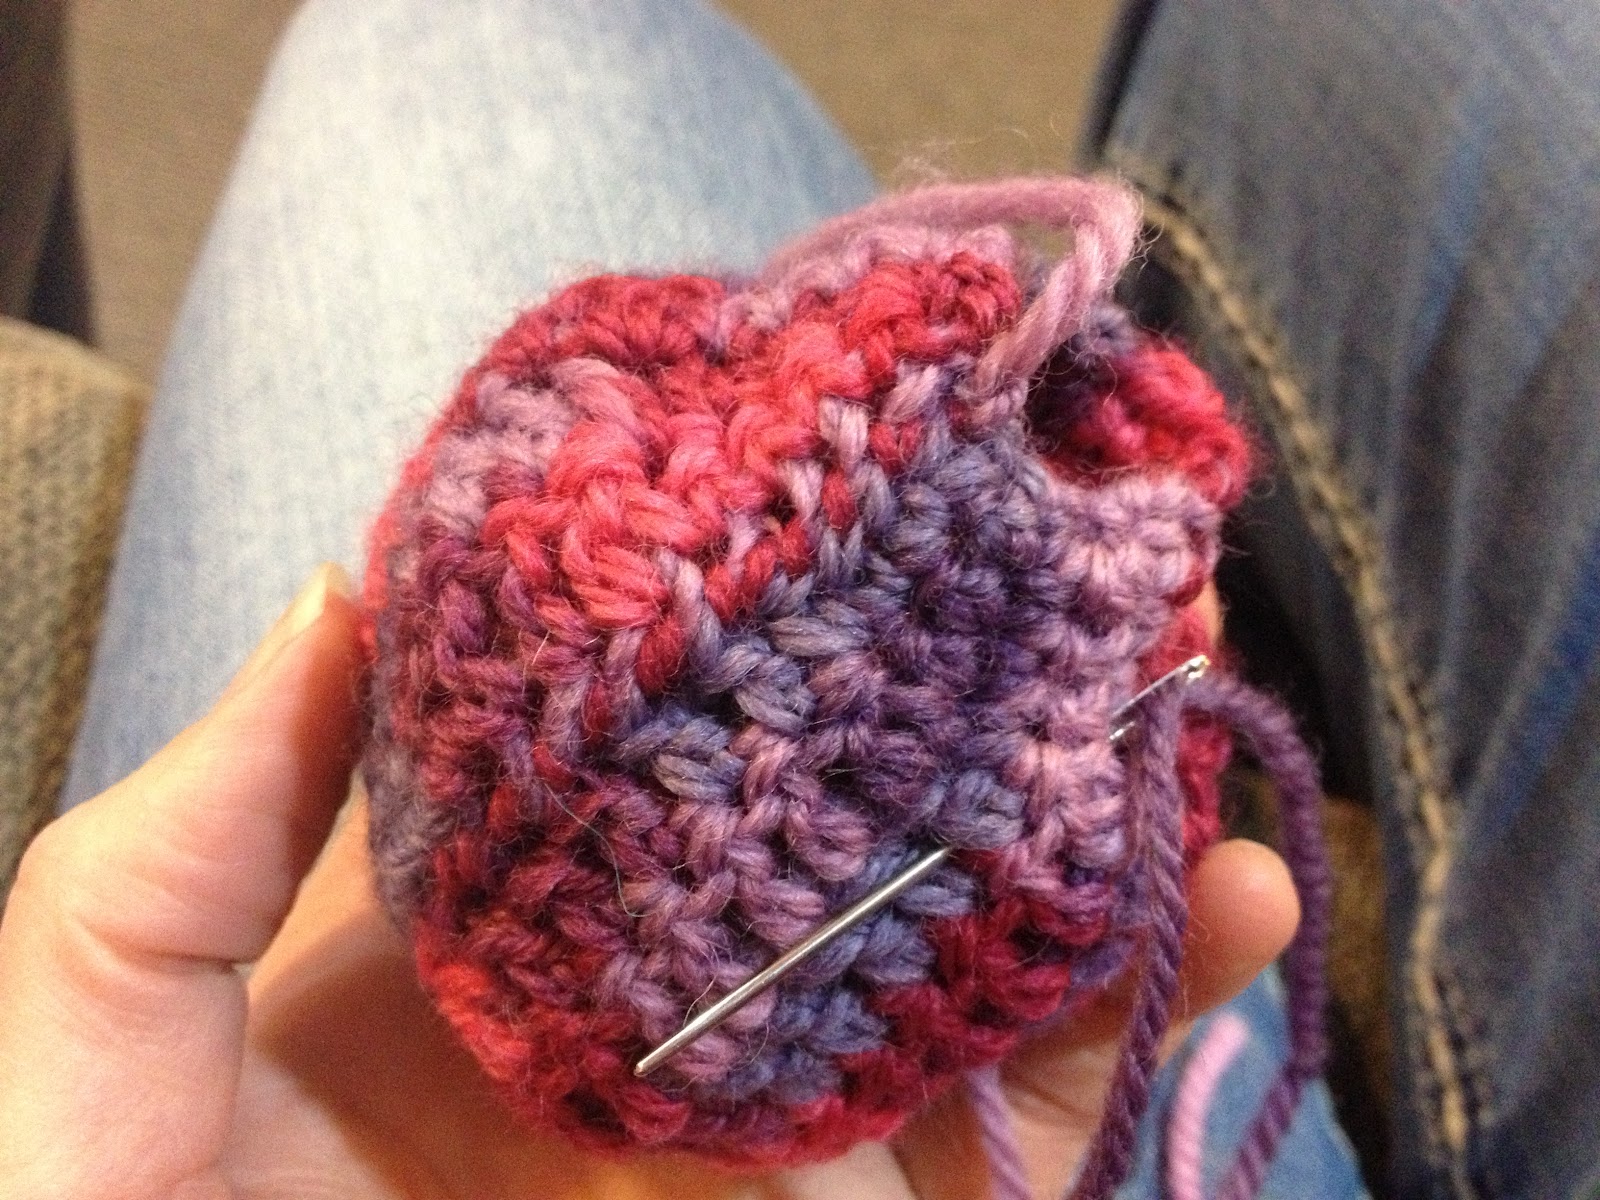
Use a blunt pointed darning needle to sew a running stitch around the end of the ball; pull it tight to gather the end.
Sew the side of the ball together.
Leave the other end open and fill the ball with stuffing.
For the first one I used old scrapes of yarn collected from the ends of my weaving projects. It seemed like such a waste to throw them away. I am, however, not quite sure how this will hold up to washing, as the wool will need to be perfectly dried after washing to prevent it from later deterioration.
For the blue ball I resorted to using poly stuffing, as i know this can easily be washed after little fingers have spread their grimy message.
Stuff the ball as tightly as you can, as the stuffing will soften over time.
Now sew a running stitch around the open end and draw it up tightly. Sew a couple of times over the end and finish off by stitching over a couple of time in the same place. Stitch the end into the ball and cut off so it sinks in unseen.
Roll the ball around to form a nice even shape.
The multi coloured wool stuffing blends into the overall colour of the ball better than the poly stuffing.
And its done; all in no time at all.
I dare you not to become addicted to making these cute, quick little masterpieces.
Sunday, 9 September 2012
Pretty Little Cardy
Nothing looks prettier than a little girl in a hand knitted cardigan. All smiles and blooming optimism. Hand knits always speak of care and attention, time spent in crafting something special for a treasured child.
This one uses colour and a relatively simple pattern to excellent affect. It was quick to knit with no shaping in the armhole or sleeve. I have used a New Zealand Merino and Cashmere blend made in NZ by Zealana.
The pattern is by Touch Yarns: 'Child's Patchwork Cardigan', design number TY0601. Touch is another excellent New Zealand yarn company that manufactures in NZ from New Zealand wool.
The pattern calls for five colours. In typical spare of the moment stash gathering fashion, I only bought four colours: Pale Jade, Kowhai, Rose Petal and Milford Fiord. At $14 a ball, this is no cheap cardy; so instead of buying another colour I decided to be a little creative with their distribution. Thus proving you don't have to stick to the pattern colour guides to achieve a great result.
| The colour join as seen on the wrong side of the work |
To join the colours on the back be sure to wrap the second colour around the first at the join. Otherwise you will end up with two separate pieces of knitting.
I knitted the sleeves at the same time, as I find it saves time on measuring later. Because of all the stripe colour changes and working from both ends of the balls to avoid having to ravel off and break the yarn, this turned into a spaghetti nightmare. It was worth it in the end, however it made this part of the project hard to work on over coffee and cake in my favourite cafes.
As you can see I ran out of pink before the sleeves were finished! Oh well .... unique customisation.
Sewing the shoulder seams together usig mattress stitch.
The neck all ready to have the band cast on.
Knitting the neck band.
Sewing the sleeve on. Pinning it with safety pins makes it easier to sew with no sharp pins to work around.
I decided to depart from the pattern and make a couple of crocheted flowers to decorate the front.
Large Flower
Work 6 chain st. then join into a loop.
1st row: work 1 chain, then 12 stitches double crochet through the centre; join to the beginning stitch.
2nd row: work 1 chain, then 2 double crochet into each stitch. Join to beginning stitch.
3rd row: work 8 chain and join into the circle at 3rd stitch. Repeat 8 times.
Small Flower
Work 4 chain st. then join into a loop.
1st row: work 1 chain, then 8 stitches double crochet through the centre, join to the beginning stitch.
2nd row: work 1 chain, then 2 double crochet into each stitch. Join to beginning stitch.
3rd row: work 6 chain and join into the circle at 2nd stitch. Repeat 8 times.
I also made this butterfly by crocheting a chain, then filling it in with double crochet.
Sewing it onto the cardy keeps its shape.
Little Miss 3 said she wanted butterfly buttons. Luckily I managed to find the right size and colour, so she was thrilled with her new cardy! Happy little girl!
Subscribe to:
Posts (Atom)