Monday 31 March 2014

Apple, Feijoa and Raspberry Crumble Recipe

The leaves are turning and the easterly wind is getting bitey. My summer wardrobe and I are in denial, and it's down to the few rays of bright sunlight that grace us each day to keep the winter at bay. Time to turn to the warmth of a more substantial autumnal pudding and the last of the summer raspberries. 

Apple, Feijoa and Raspberry Crumble

The fruit:
4 granny smith apples
4 feijoas
1 cup frozen raspberries
2 tablespoons caster sugar
1/2 teaspoon cinnamon

The crumble:
1 cup flour
1 cup rolled oats - use the whole ones rather than the quick oats
3/4 cup brown sugar
1 teaspoon mixed spice
1/4 teaspoon salt
100g butter - melted

Make the crumble topping first: Combine the flour, oats, brown sugar, spice and salt in a bowl. Mix in the melted butter. The mixture should look like sandy crumbs.


Now prepare the fruit: Peel, core and slice the apples. Sprinkle the fruit with the caster sugar and cinnamon. 

The sugar will sweeten the fruit and stop it from discolouring. 

Peel and slice the feijoas, and mix them into the apples and sugar with the frozen raspberries. 

Place the fruit into an oven proof dish and top with enough crumble mixture to form a generous coating. Any left over crumble mix can be frozen for later use. It doesn't require thawing so can be used as a quick and tasty dessert solution. 


Bake in a hot oven - about 190deg. C - until it starts to turn golden and the fruit is bubbling at the sides of the dish.

We served ours with cream and ice cream. 

Sunday 30 March 2014

Easter Egg Hunting - Thanks Whittakers!

 We spent a great Saturday morning chasing around after the Whittaker's Big Egg Hunt. We had an early appointment, so instead of going home before swimming, we got our hunt on! I downloaded the app and we were off. The app's map is hard to follow, so its a good idea to get the one from the web site. We found this one at The Pallet Pavilion: Wongi Wilson's Hua Manu.

Our next stop was the central city, and after a quick stop to feed the ducks and eels, we found this one in City Mall: Ben Pearce's Shards.

 We really liked this one in the Re:start Mall: Daniella Hulme's Hybrid.

Little Miss loved her egg hunting expedition. Though it took us a little while to convince her that she didn't get to eat any chocolate yet. 

Another find at Re:start Mall: Megan Geliza's Sliver.


This is one of my favourites.Boy 
Sam Mather's Big Birds.

We all loved this one! Having come in from Cashel street, it took us ages to locate Beck Wheeler's Ester Lavista in the Lichfield street window of Ballantynes. This egg is so detailed and complex. The rabbit is actually made of fabric.

Next stop Cathedral Square, there are four eggs to find here. This is the one, Healing Hands, made by Hannah Jensen and the children at Starship Hospital.

 Christian Nicholson's Diary of a young boy.
 Y
A very clever concept, also in Cathedral Square: Ben Foster's Egg Horse. 

Fane Flaw's GOO GOO G'JOOB, also found in the square.

Our next stop on the egg tour was the Museum. I haven't been there in a very long time. What a great place. Little Miss was as happy looking at the exhibits as she was egg hunting; with the dinosaurs being her favourites. This is Robin Neate's Untitled. 
We also found Roger Boyce's Terra Incognita in the Geology section.  

We had a great morning egg hunting. It was time to get to swimming, so we will be back next weekend to finish our egg hunt. We still have the Gardens, Cardboard Cathedral and Latimer and Cranmer Square to go. 

Thank you Whittakers and the company sponsors for a great Easter initiative. I'm sure it will make plenty of cash for Starship Hospital.

Saturday 22 March 2014

Making Scrunches for our School Girl

Even though it's bed time, and she is in her pyjamas, Little Miss 5 had to try on her new school uniform regulation blue scrunchy. She is just loving being at school now. She goes off everyday so excited to be there. The other day she declared that: "Wearing my uniform makes me feel special" 
I'm pleased I started early with the uniform labelling, as it seems to be never ending. While it was quite satisfying to label dresses, hat, tie and shirts, once I got down to socks and sport socks the novelty had well and truly worn thin. We are adjusting to having hair tied up each day. Having had short hair for most of my life, I am on a steep learning curve of buns and plaits. 

Here are the instructions for making your own uniform scrunchy. Most of you will remember these from the 80s!

I sewed a name tag into the short edge seam. Having gone to trouble of making them, we don't want them going missing.
Here is the pattern I used: It is 24cm by 14cm including 1 cm seams. 
The short edge is cut out on the fold, so the piece of fabric end up measuring 48cm x 14cm.  
Expect to get 4 scrunches from a 25cm length of 125cm wide fabric.

I found this 100% cotton 'broadloom' at Fabric Vision. It comes in lots of colours so finding your regulation uniform colour shouldn't be too difficult.


Fold the fabric strip over lengthwise and using a 1cm seam, sew the strip together leaving a 5 to 6cm gap at each end. 

This gap is important as it allows the ends of the band to be joined.


Turn the strip in the other way so the seams are enclosed on the inside.


Taking care not to twist the length of scrunchy, pin the ends together. 

Make sure the right sides of the fabric are together, and sew using a 1cm seam. It is slightly awkward, but just move the seam into position as you sew. 

I sewed LM5s cloth name tag into this seam.
Push the seam into the scrunchy as pictured.
Straighten out the scrunchy. This is what it should look like.
Cut a 19cm length of 8mm wide elastic and attach a safety pin as shown.
Pin the other end of the elastic onto the scrunchy so it doesn't disappear into the hole. Use the safety pin to thread the elastic through the scrunchy.
Now join the elastic by pinning it together and sewing using a few stitches on the machine. The elastic should overlap by 1 cm each end. It doesn't matter if the elastic is twisted inside the scrunchy. It will still work ok.
Fold the 1 cm seam allowance into the hole in the scrunchy seam and press into place. Top stitch the seam closed as shown. 

If you don't want the seam visible, it could be hand stitched. 

My time budget doesn't allow for this, and the seam is not noticeable when it is worn.
All done and ready to wear to school the next day. She loved it so much she wore it swimming! It survived.

Happy sewing xx

Sunday 16 March 2014

Cakes for the School Fair

We have had a great weekend, with the highlight being yesterday's long awaited school fair. Little Miss 5 and her school buddies were positively bursting with excitement at all the fun fair activities on offer. With both of us busy helping out, our little blossom got to spend some quality time with Nana; then later some close friends of ours took over, so she had twice the fun of the fair! 

I made some cakes to go with the Devonshire Tea tent's bill of fair. This Chocolate Mud cake is always a favourite! For this one I made a chocolate butter cream, instead of the Toffee icing. The Passion fruit and fresh cream sponge roll sold out. With so much to do prior to the fair, the tutorial for this one will be coming later! 

I actually sold the Gluten Free Spiced Apple Cake in the first picture as a whole cake. The lady that brought it was so impressed with the piece of GF Chocolate Mud Cake she had, that she got the other cake as well. I left the walnuts out of the one for the fair: always worried about the nut allergy thing.

 My food class at school helped out by making these Chocolate truffles

This is the Gluten Free Chocolate Mud Cake. This cake received high praise from the people who tried it. I was so pleased they liked it. It's always a pleasure to make great cakes for the gluten free among us. No one should miss out on good cake. I used the GF Chocolate Mud Cup Cake recipe, but baked in a round tin at 170deg. C for 1 1/2 hours. Worth the wait, as the texture is amazing. I frosted it with the Toffee Frosting boiled to only 135deg so it stayed white. The Carrot Cake in the back ground is a good old classic standby recipe that I make all the time for so many occasions. It works just as well as cupcakes. 

Needless to say today has been a quiet day in our house! Thanks so much to all the amazing people that worked so hard to make the fair happen, and all the people who helped me out on the day. You were all stars! xx 

Quince Cupcakes

Better late than never... Here is the recipe for the Quince Cupcakes I made for Little Miss 5's birthday party. My lovely colleague Linda brought us over a bag of quinces from her tree. Quince is a beautiful, old fashioned fruit. It's hard and gritty texture make it impossible to eat raw. Traditionally it is made into jelly or paste, or it can be slow roasted. Last year I made a quince cake. This year I thought the cupcake version would be a great party treat.

Quince Cupcakes

1 cup caster sugar
2 eggs
3/4 cup canola oil
1 1/2 cups grated quince
1 heaped cup of flour
1 teaspoon baking soda
1 teaspoon ground ginger
1/2 teaspoon salt

Beat the eggs and sugar together until light and fluffy - just like a sponge mixture.

Now fold in the oil. 


Fold in the grated quince, no need to peel it first.

Sift together the flour, soda and ground ginger. Fold the dry ingredients into the batter. 


Place the mixture into cupcake cases. Fill each case only half way. 
Bake for 10 to 15 minutes until well risen and golden brown. 


Lemon Frosting


200g butter
1 cup icing sugar
2 tablespoons boiling water
the juice of 1 lemon

Cream the butter and icing sugar until pale and fluffy. With the beater motor running, add the boiling water and beat until fully incorporated. Add the lemon juice and beat again. 
Once the cupcakes have cooled, use a piping bag and round nozzle to decorate the cakes. 

Because it was a girly's party, I topped them with round pink sprinkles. 

Hope you're all warm and dry. xx

Monday 10 March 2014

Our Little Blossom turns Five

It has been a wonderful weekend for our family. Our darling little blossom turned five and we had a great party hosting all her fabulous little buddies. 


Things were a little frantic on Sunday morning, and both us had been cooking for the best part of two days prior to the party. Little Miss got up really early with a mind full of party activities. 


There is nothing better than sharing some cake with your best buddies.


I made a rosewater sour cream cake decorated with cream cheese frosting. I didn't take any tutorial photos, as time was too short!

 Butterflies were the order of the day.


 I made Profiteroles, Lemon slice, Chocolate Mud cup cakes, the Cookie Jar selection, Jellies with fruit and Quince cupcakes - I'll be blogging those soon. Mum made some Chocolate crackles, just like when we were children!


 The man-of-the-house made all the savoury treats and cut the fruit selection.


Party Dancing and musical cushions time! We had a great time with all our friends. Thanks so much to you all for making this such a special day! School days here we come...

Tuesday 4 March 2014

Delicious Biscotti for The Party

It's a big and exciting week at our house as we gear up to Little Miss' big 5th birthday. Just like one of our previous play dates, she wants a cookie jar as part of the party food; so I've got a head start by making the Biscotti early. We have a buddy with a nut allergy, so these ones are all fruit, but you can substitute some of the fruit for almonds if you please. This recipe uses a meringue base for a lighter, crispier biscuit.

Biscotti - Meringue Based

3 egg whites
a pinch of cream of tartar
100g caster sugar
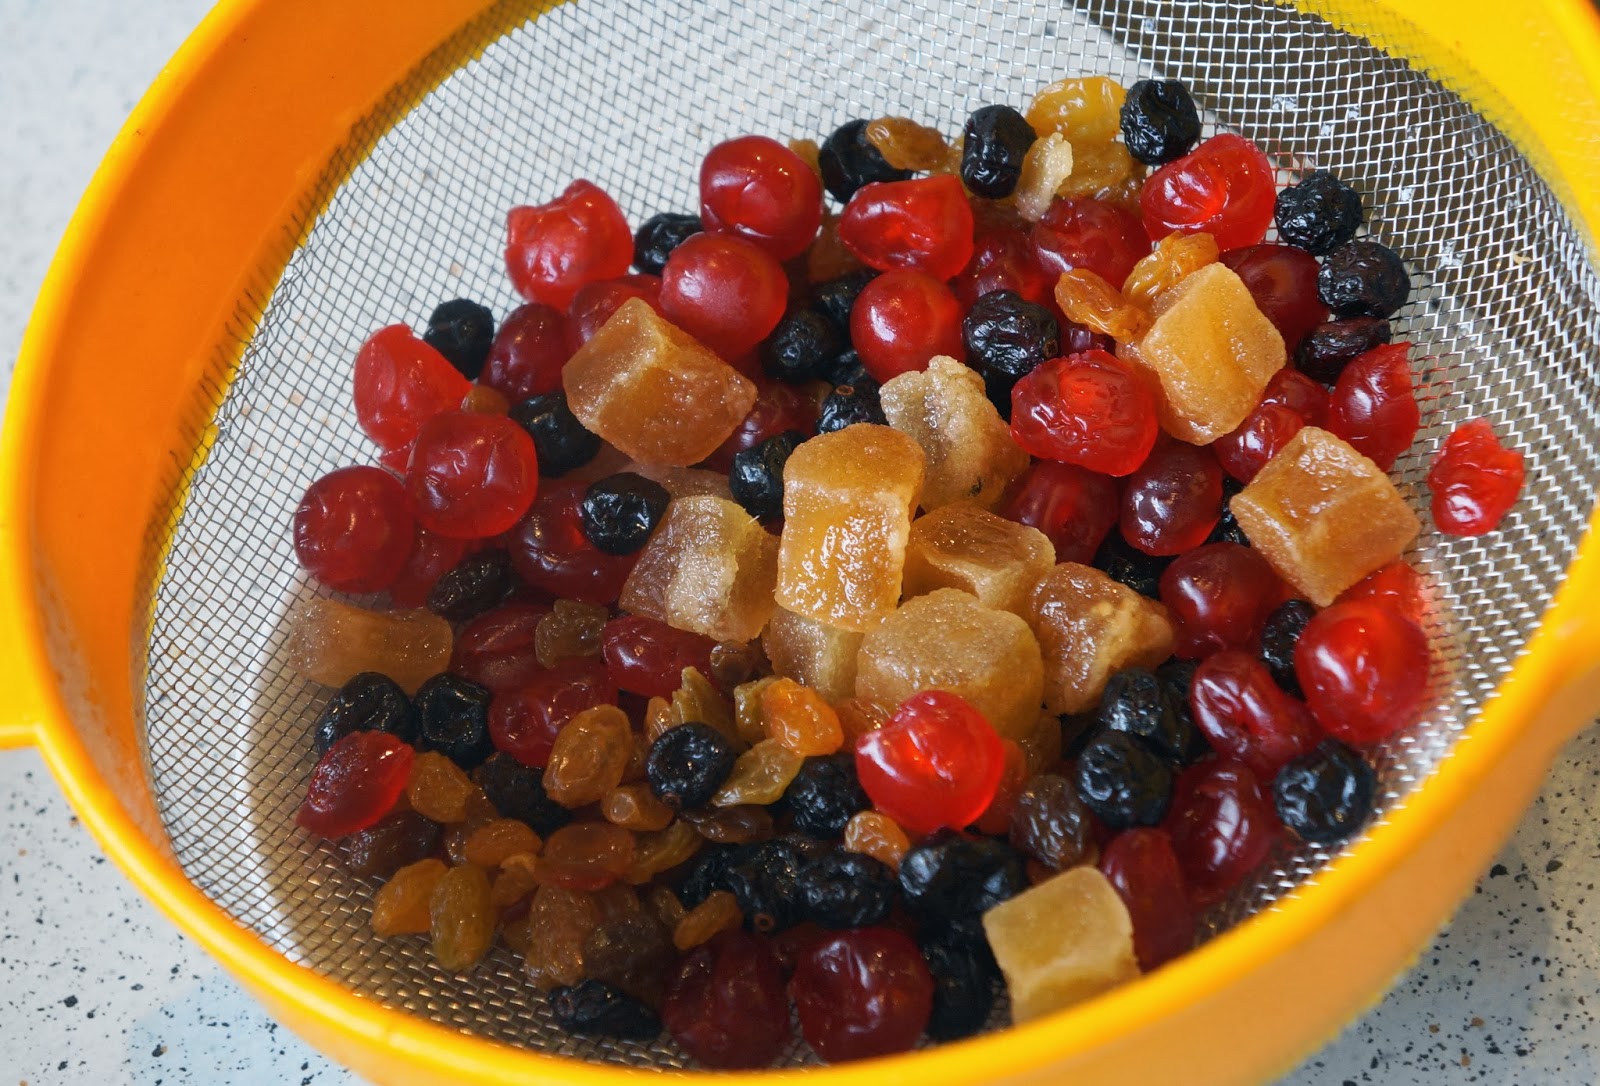
400g mixed dried fruits - I used glace cherries, whole cranberries, preserved ginger and golden sultanas
the zest of 1 lemon
the zest of 1 orange
90g flour
1 teaspoon vanilla essence

Preheat the oven to 180deg. C. Line a loaf tin with baking paper.


Wash the fruit to remove any syrup, sugar or grit. 

Allow it to drain. 

Cut up the ginger, cherries and whole cranberries. Zest the lemon and orange and add to the fruit.


In a scrupulously clean bowl whisk the egg whites and pinch of cream of tartar until soft peaks form. 

Gradually add the caster sugar to form a firm meringue. 


Using a spatula, gently fold the fruit into the meringue. 


Sift the flour and fold into the meringue with the vanilla. 


Place the mixture into the loaf tin and bake for 20 to 25 minutes. 


Allow to cool completely in the tin before turning out.


Slice thinly and lay the slices out on a lined oven tray. 

Bake at 120deg. C for a further 20 minutes until toasted and crispy.


These delicious little biscuits will keep in an airtight container for up to 2 weeks. 

Time to switch on the coffee machine and take a break before the real madness begins! 

I'll be keeping you updated on all the lovely party food we will be making for our little blossom's big day.