Showing posts with label knitting. Show all posts

Wednesday, 21 October 2015

Back from my digital holiday


As some of you might have noticed, I've been having a digital holiday. It all started with a couple of weeks of ill health - nothing serious - then I just put all my efforts towards creating things and away from the laptop. I think I developed a short term allergy to the WiFi. We all know how easy it is to waste time on-line. Being out of action for a while focuses the mind on what really matters, and the value of the precious time we all have with our families. 

I've been baking a few family favourites at the farm.

The spring holidays bought our Little Miss her annual pet lamb. This year we had Fawn the Romney ewe lamb. 


I finished making myself an oversized jersey - photos to come, and I started knitting this cute top-down cardigan on circular needles: typical pink, blue and purple hues for our Little Miss.

It didn't take long to make this simple elastic waisted skirt. She chose the fabric from The Fabric Store at The Tannery. Love that place. 

I'm looking forward to sharing more stories, recipes and crafty goodness soon xx 

Tuesday, 21 July 2015

Little Blue Girl

I'm not going to lie, it's taken me ages to finish this project. Now that it's done it looks so cute I wish I had just cracked on and finished it earlier. The colour combination was part inspired by the beautiful and colourful Swedish knitwear designers Millamia, and part stash busting some of my 'didn't quite get round to it' smaller projects. You know the ones: a few balls to make a cardigan for a four year old, but opps they've grown so big now!   

The two shades of blue are Naturally Alpaca DK - 90% alpaca and 10% merino wool - a New Zealand made yarn. The mottled pink is a Twilleys of Stanford yarn called Freedom Spirit that's made in England. I usually always buys New Zealand made yarn, but couldn't resist it sitting in the sale bin at Knit World.  

I used the cardigan pattern from this Patons book. I've made this pattern very successfully a number of times. Because our Little Miss is a long bean, I always increase the length of the body by 5cm and the length of the sleeve by about 3cm. 

The strip sequence I used is: 
5 rows sky blue, 
1 row pink, 
2 rows navy, 
1 row pink, 
5 rows sky blue, 
1 row navy, 
4 rows pink, 
1 row navy, 
and repeat!

The overall pattern really works well because the mottled pink yarn breaks up the stripe so it doesn't look so arbitrary or obvious. 

I let our Little Miss choose the cardigan colours from my stash. She has got so opinionated about her clothes these day that it's not worth the risk of having her tell me that she's 'not that keen on that one' once I've spend all that time knitting. I really hate to think what teenage years are going to be like! 

Happy knitting xx

Saturday, 24 May 2014

Adult size snood knitted in Crucci Terra Firma yarn

Here is the adult version of the Snuggly Snood I made for my daughter a few weeks ago. 


It's also made using the new Crucci Terra Firma bulky yarn. It's 100% New Zealand wool and super warm and cosy against the winter winds.


I have again used the recommended 20mm needles to get a more defined stitch result for this adult sized snood. 

You will need two 200g hanks to complete this project.


First wined the two hanks of yarn into two balls.


Adult's Snuggly Snood Pattern

Using 20mm knitting needles, cast on 16 stitches.

Work stocking stitch (1st row knit, 2nd row purl, then repeat) until both hanks have been knitted. Join the hanks at the end of a row. Finish with a purl row, leaving about 2 metres of yarn.


Now work the final row to join the ends and cast off at the same time: These are the pictures I took of the child's size snood, hence less stitches on the needles, but the process is the same.  

Fold the snood right sides together as shown, with the beginning end closest to you. 

Push the right hand needle through the first loop of the cast on end of the knitting. (the diagram shows completed stitches and a stitch in progress)


Then push the needle through the stitch on the left hand needle. Knit the stitch. This knits the two scarf ends together.


Once two stitches have been completed, cast the first stitch off by passing it over the second stitch. 


Repeat the stitches and cast offs until only the last one remains. Pass the loose thread through the loop and pull tight to fasten. 
Use a crochet hook to weave all the lose end in - most darning needles are not big enough to carry this yarn.


Happy knitting xx


Saturday, 26 April 2014

Little Person's Snuggly Snood Pattern

With winter weather nipping at our ears, the season for snuggling in front of the fire with a knitting project is here. Following the northern hemisphere trends for chunky yarns, its great to have some New Zealand made options appearing on the shelves. I particularly like Crucci's new super bulky Terra Firma yarn. It's 100% New Zealand grown and manufactured, and is a beautifully soft and lofty yarn. 


This is my first prototype using this yarn. There is a pattern for an adult snood on the wool band. It uses 25mm needles for a looser stitch and requires just the one hank to complete. 


I have opted to adapt and use the recommended 20mm needles to get a more defined stitch result for this child sized snuggly snood. 


As it is sold in 200g hanks, you first need to wined the yarn into a ball.


Child's Snuggly Snood Pattern

Using 20mm knitting needles, cast on 12 stitches.

I found these lovely short wooden needles at my local wool store.


Work stocking stitch (1st row knit, 2nd row purl, then repeat) until between 1 and 2 metres of yarn remain. Finish with a purl row.


Now work the final row to join the ends and cast off at the same time:

Fold the snood right sides together as shown, with the beginning end closest to you. 

Push the right hand needle through the first loop of the cast on end of the knitting. (the diagram shows completed stitches and a stitch in progress)


Then push the needle through the stitch on the left hand needle. Knit the stitch. This knits the two scarf ends together.


Once two stitches have been completed, cast the first stitch off by passing it over the second stitch. 


Repeat the stitches and cast offs until only the last one remains. Pass the loose thread through the loop and pull tight to fasten. 
Use a crochet hook to weave all the lose end in - most darning needles are not big enough to carry this yarn.


Our little Miss is very pleased with the new snood; it never drags on the ground like a normal scarf, and is much less likely to get lost in the playground. I'm off now to formulate an adult version.

Wednesday, 16 April 2014

Button Cable Scarf

In the last few weeks I've been experimenting with a range of different yarns and scarf patterns. Hand knits are very much on trend this season, and my sister Charmaine is interested in some for her new signature boutique in Dunedin. Northern hemisphere trends have been leaning towards chunkier yarns and lots of stitch detail. Scarves are super easy to design given the repetitive nature of the pattern and fact that the width measurement is not particularly critical to the finished design. So why not give your own winter masterpiece a try!

Here is my first scarf sample: 4 cables with a moss stitch boarder and button and hole fixing.

I used approximately 150g of a 200g hank of chunky 14ply Naturally yarn and 6.5mm (Metric sized) knitting needles. 


New Zealand made of course.


Cable Button Scarf

Using 6.5mm knitting needles and 14 ply wool, cast on 30 stitches.
1st Row: Knit 1, purl 1, repeat until the end of the row
2nd Row: Purl 1, knit 1, repeat until the end of the row
These two rows form the moss stitch pattern. Repeat once more to form the end boarder.

First row of cable pattern: work 3 stitches continuing the moss stitch pattern.  

Now slip the next 3 stitches onto a cable needle. Place the cable needle at the back of the work. 


Knit the next 3 stitches from the left hand needle. 


Now knit the 3 stitches from the cable needle. 


This forms the cable: repeat the sequence 3 more times, then work the last 3 stitches as moss stitch. 


This is the finished cable row. 

2nd row: Work 3 stitches in the moss stitch pattern, followed by 24 purl, then 3 stitches of the moss stitch. 
3rd row: Work 3 stitches in Moss stitch, 24 knit, then 3 moss stitch.
4th row : repeat the 2nd row sequence
5th row: repeat the 3rd row sequence
6th row: repeat the 2nd row sequence

These 6 rows form the cable pattern. 

Repeat them until the desired length is achieved. 
I completed 24 sequences for this scarf.

Final moss stitch boarder and button hole:
Work 2 rows of moss stitch as per the first band. 
3rd row: work 4 stitches moss stitch, yarn over needle, knit 2 stitches together, then resume the moss stitch pattern to complete the row. work one more row moss stitch. Working the yarn over needle will form the button hole.

Last row: cast off in moss stitch. 

Sew the stray yarn ends in and sew the button onto the opposite side and end of the scarf; position it 5 cable sequences up from the end. 

Winter here we come. 

Happy knitting xx

Wednesday, 12 February 2014

Finally Finished - My Little Girl's Striped Colour Block Cardigan

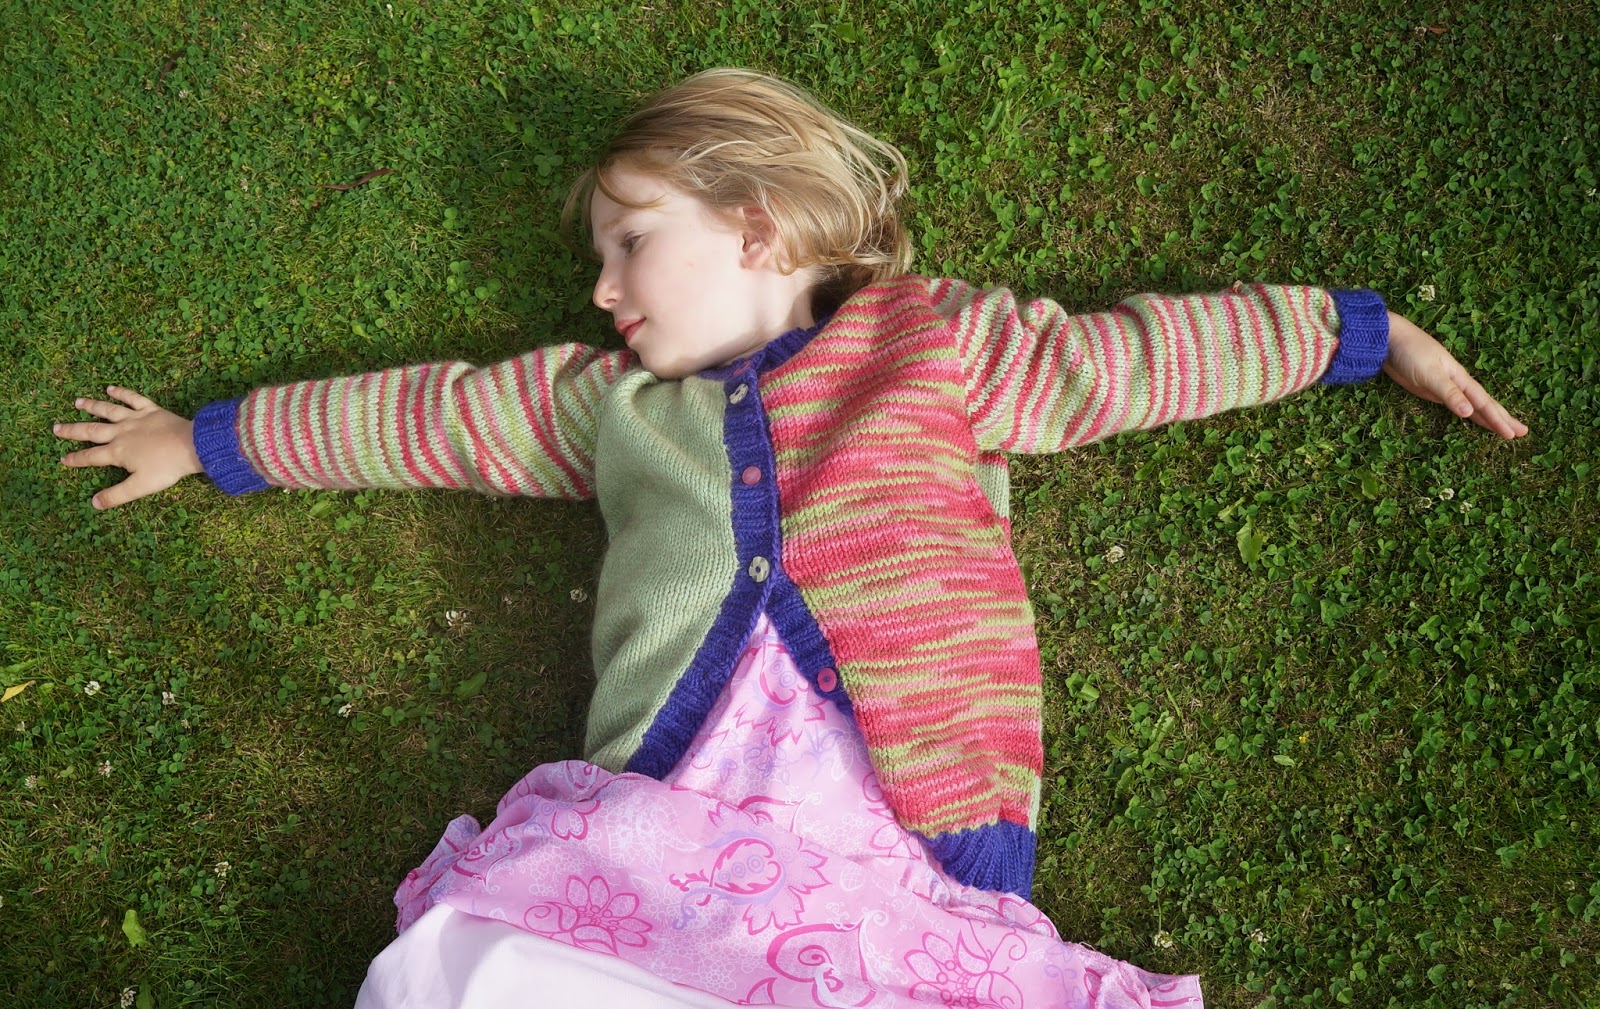
This one has been a long time in the making. Good thing I made a big size. Despite declaring she didn't like green, Little Miss almost 5 is now quite taken by her new cardigan. I think the proportion of pink was enough to win her over.


The pattern I used is a hybrid. The main pattern is  a Patons one from book 1253. But the colours and stripes are inspired by Sweden's Millamia designs. There combinations of colours, patterns and stripes is always striking: especially the Bright Young Things book (HCR Publishing, 2009). Unfortunately Millamia is all knitted on 3.25mm needles; all those extra stitches and rows take extra time that I don't ever seem to have.

I used this cardigan pattern in a size 6. It is knitted in double knit 8 ply on 4mm needles. The bands were knitted in a 2/2 rib on 3.25mm needles. As such, I changed the front band by casting the stitches directly onto the front and knitting 8 rows of 2/2 rib instead of knitting the band as a strip and sewing it on. 

I made the body of the garment about 2 cm longer to compensate for out long bean's extra height.

I used a combination of yarns: The variegated pink and green yarn are Utiku from The Wool Company. The Green yarn is a Shephard possum and wool blend, and the bands are Shephard lamb's wool. All are 8 ply and hand wash only.
The back of the cardigan is knitted as a repeated sequence of 10 rows green followed by 6 rows pink variegated. The sleeves are worked in 2 row stripes of the green and pink. The left front is all pink variegated and the right front is all green. Little Miss chose her own mixture of buttons from the stash she has been gradually whisking away from my craft draw. 

Our happy little girl wearing her new cardy. I wanted her to put a 'good dress' on to model it. She insisted on this vintage shopped number. She would wear everyday of the week if she could. 

Monday, 2 September 2013

Finishing the Farm Yard Cardigan

As a result of my computer misadventures I had a lot more time on my hands in the evening. This not unexpected side affect of computer withdrawal had been a rather lovely distraction. Knitting is such a great pass time, and any knitter will tell you, unlike writing deadlines, it is best not spent under time pressure for completion. This cardigan certainly did not suffer from that, as it has been about 20 years in the completion. 
I went through a stage in my early 20s of knitting all kinds of complex patterns and landscapes. Sadly the completed ones were worn and subsequently fell by the way side. This one survived because it was never completed. Stashed in an old and thankfully moth free wardrobe at my parents house, I had forgotten all about it until mother unearthed it a few months ago. 
With other projects on the go, it went back into storage until the other week, when looking at my little darling's current woefully short cardy sleeves, I thought I had better get cracking. I'd actually knitted the back, one side and most of the other side 20 years previous! I don't know why I abandoned it when I did, but better late than never, it is now complete. 
The pattern is by Burda; a dog eared photocopy from an old magazine. I'm sure I started it as a good way to use up oddments of wool on a small project. Unfortunately not quite enough oddments, as I ended up stalking around nearly every wool shop in town to try to match colours. Thankfully this degree of patterning is very forgiving when it comes to subtle differences in shade.
The wool is of course 20 years old too. Pre-machine wash processing, I can see it trying to mat together with just a little steam and heat from the iron!

Little Miss 4 just loves her new Farm Yard Cardigan. She couldn't wait to wear it to Pre-school. Cast on long before she was even thought of or imagined, its finally found its way down the years to a happy little girl.