Monday 29 October 2012

Crochet Nana Squares

Once the sole preserve of Nana's and Great Aunts, the crochet square is becoming the blanket material of choice for Mummy's around the globe. It has many positive attributes. Its warm and snugly, thanks to the air trapping properties of its textured finish; it comes in a variety of cheerful colours; its environmentally friendly, because it uses up all the odd bits of left over wool; and it reminds you of outings with your Nana and Poppa because they always carried one in the back seat of the car.

Overcome by a wave of nostalgia, I decided it was about time for a Nana craft revival:

I used a 3.5mm crochet hook and scraps of 8 and 12 ply yarn. If your using 12 ply, restrict it to the same number of rounds per square or the squares will end up different sizes.

Start by forming a loop and working 6 chain (ch). Join to the end to form a loop.
Now work in rounds:


Round 1: Work 3 ch, 2 triple crochet stitches (tc), 2 ch, 3 tc, 2 ch, 3 tc, 2 ch, 3 tc, 2 ch, join the chain to the first group of stitches to form a circle.


Round 2: Turn the work over and crochet the next row on the other side of the work. Change colours.
Work 3 ch, 2 tc passing the hook under the chain from the previous row, 2 ch, 3 tc through the same chain, 2 ch, 3 tc through the second corner of chain stitches, 2 ch, 3 tc, 2 ch, 3 tc through the third corner, 2 ch, 3 tc, 2 ch, 3 tc through last corner, 2 ch, 3 tc, 2 ch, join onto the first group of stitches.


Round 3: Turn the work over and crochet the next row on the other side of the work. Change colours.
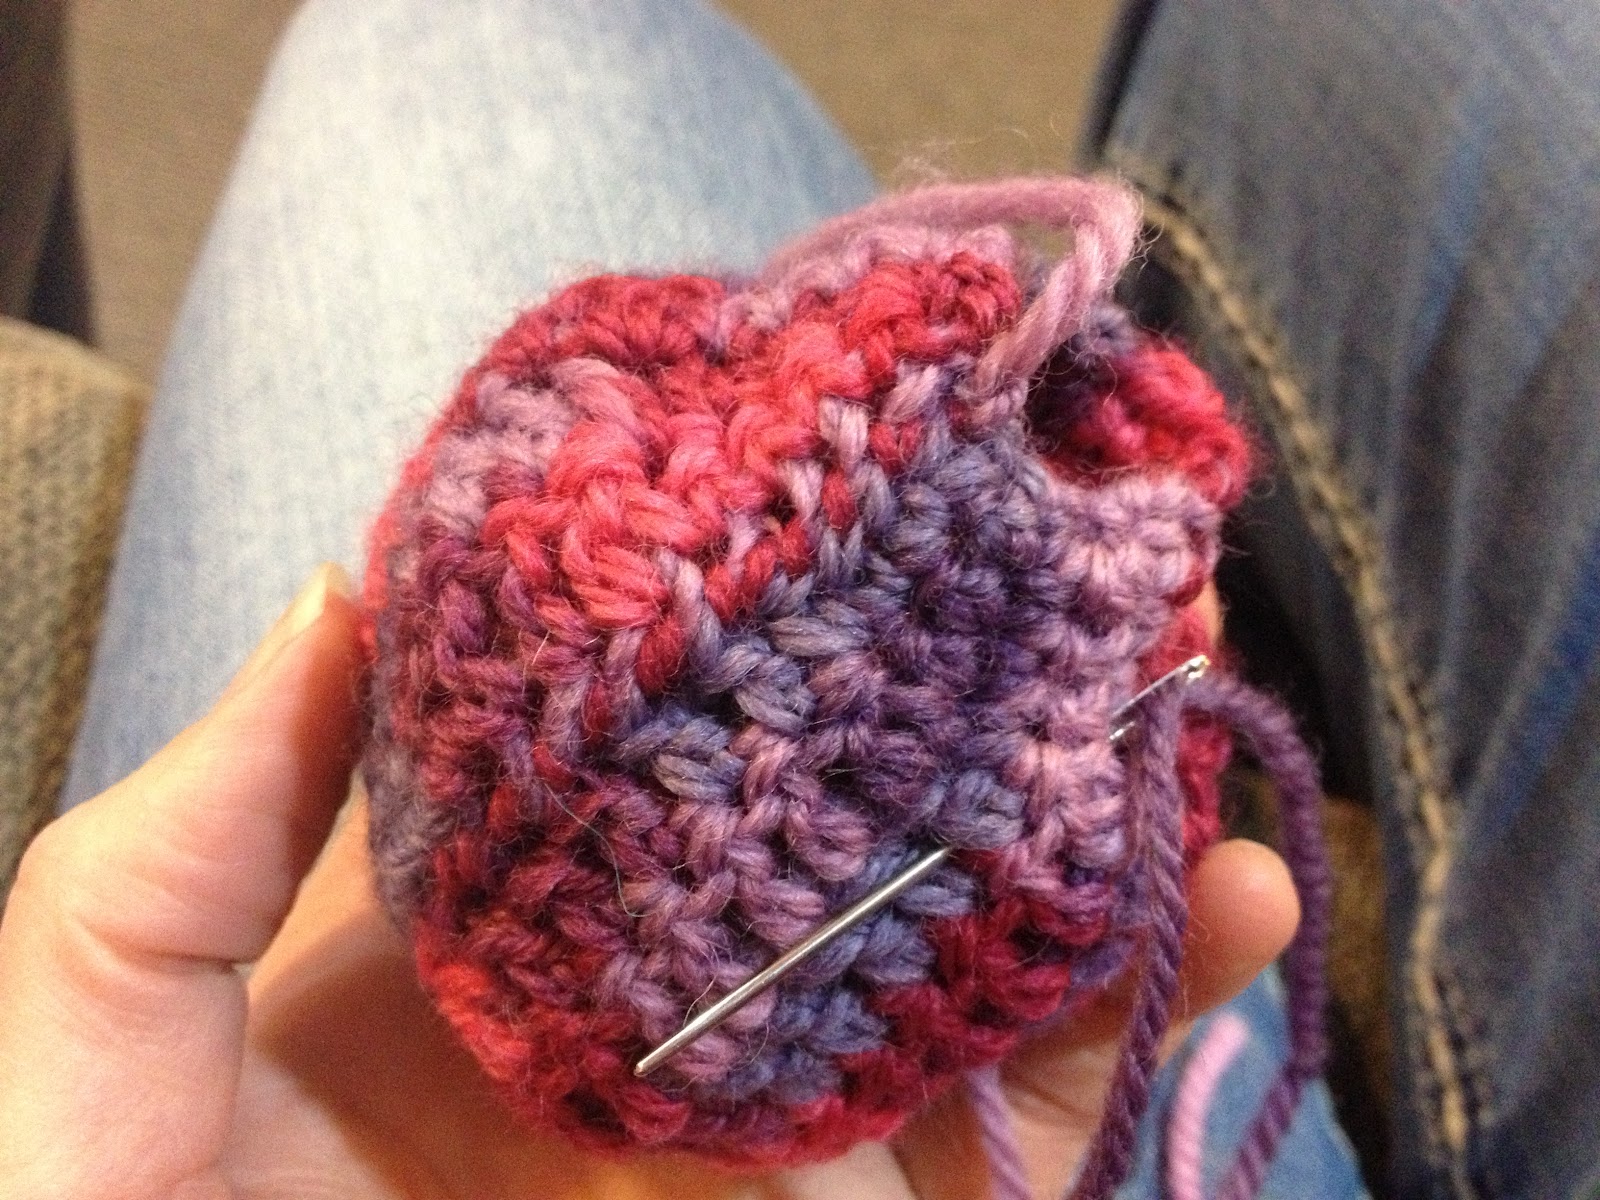
Work this round in the same way as the previous one. The only difference being that one extra set of 3 tc is worked in the middle of each side of the square as shown in the photo.


Round 4:  Turn the work over and change colours. Work using the same pattern as the previous rounds, but add another set of 3 tc into each side of the square, as pictured.

Use a blunt tipped darning needle to work the loose ends of the wool back into the square.

Pressing the square with a warm steamy iron will help to form an even shape and texture.


The Nana squares can be left this size and joined together using the darning needle and matching wool; or an extra row can be crocheted around all the squares, and then they can be sewed up using the darning needle and matching wool.

Mixing the colours with alternating dark, light, dark, light colours and combining different tones of the same colour will make the blanket more attractive.


They are quick to make, so its easy to accumulate enough for a snugly blanket. One of the main advantages is that they are easy to carry around and complete where and whenever the mood takes you. No large project to juggle with your Cafe coffee and cake. Accumulate enough and you will be making your own enviable Nana car rug.

Monday 22 October 2012

Chocolate Coconut Slice Lunch Box Filler

Oh I do love a long weekend. An extra day with the loved ones. Achieving something in the garden. A lazy morning watching the food channel on the box. Sunday night without the angst of doing the mental run-down on all next week's jobs. Unfortunately Sunday afternoon's mad dash of jobs to finish before the end of the weekend just ended up on Monday after all. Not the least of these is the baking of this week's lunchbox filler.

Today's creation is an old favourite:

Chocolate Coconut Slice
200g butter
200g caster sugar
2 eggs
2 cups flour
2 teaspoons baking powder
2 heaped tablespoons cocoa powder

Turn the oven on to 175deg. C and line a 20x25cm baking tin with baking paper.
Beat the butter and sugar until creamy, add the eggs and beat until well combined.
Fold in the sifted dry ingredients.
Spread half the mixture into the tin and spread on the filling.

Filling: Mix 2 tablespoons of icing sugar with 2 cups of coconut and 1 cup of milk.
Spread the remaining cake mixture over the top of the filling in teaspoon lots. Don't worry if it doesn't quite cover the filling, it will expand with cooking!


Bake for approximately 20 minutes until it springs back when pressed.
Be careful not to over bake and dry the cake out, as the mixture looks deceptively moist on top.


Once cold ice with the following:

Using an electric mixer, beat together 200g butter, 1 cup icing sugar, 1 tablespoon cocoa powder and 5 tablespoons boiling water. It should be light and pale in colour once whipped.
The recipe makes more than you will need, but the extra can be frozen and used later.


Another job done. Working week here we come.

Sunday 21 October 2012

On-Trend Floral Pants

Do you like my new pants?

The end of the school year is nearly upon us, and inspired by all the lovely things my Textile students have created, I thought it was about time to make time for some fashion of my own.

This is me loitering in one of my favourite local department stores, Ballantynes, making use of one of their large mirrors.

I wasn't sure how the floral fabric would look made into pants, given that busy patterns are not normally the friend of wider areas of my figure! But the fabric wasn't expensive, so I thought I'd give them a go.


Here's the pattern I used:


 I customised the pattern with a little current trend inspired ruffle and split on the leg.

Using an invisible zip instead of a normal lapped fly sped up the garment's construction by taking most of the more time consuming techniques out.


The ruffle is a simple strip of fabric sewn into a tube; then the seam is positioned through the middle of the strip and the top sew across. Turn the tube right-way-out, turn the raw edges of the open end to the inside and top stitch closed.

Run a gathering stitch through the centre, then top stitch to the garment.


I am wearing my new pants with a Charmaine Reveley silk sequined top and leather tie-up belt.

Wednesday 17 October 2012

Lovely Cushions


There's something irresistible about a table of remnants. They always sparkle with potential, and that potential always seems the greater for the cut price ticket. The urge to accumulate is enchanting. All crafters know the danger of the bulging stash. I am sure my family wonder at times if the house would seem bigger if Mummy had small hobbies. Maybe stamp collecting, that wouldn't take up much space, but stamps don't have such texture, and you  certainly can't join them together to create a natty little bag. Wool - well there's another story. It always seems like I get the fabric glut under control, and the wool starts to spill out of the wardrobe.

Anyway, I was casually perusing the selection at Fabric House, a really nice soft furnishing fabric store. They used to be in Madras street, but got quaked out and are now temporarily located in Wrights Road, Addington.
"Just a quick look around darling; I don't need anything" When up should pop a lovely 100% cotton English floral stripe fabric remnant. Hmm, 2 metres, what can I do with you. It was so pretty. It was a bargain. It positively screamed lovely, comfy cushions.


The fabric was 136cm wide, so I cut it into 46cm strips, and again into 46cm squares. This maximised the size and number if cushions, so I could neatly get six from my 2m remnant.


I purchased 30cm beige coloured zips and sewed 8 cm of 1.5cm seam on each end of the bottom of the cushion. Overlock the bottom edge of the fabric before you start. Pressing the seam open makes it easier to make a neat job of sewing the zip in.
Pin the zip in behind the fabric, taking care to place the zip in the centre of the seam.  Now use a zipper foot to sew around the zip. Its a good idea to move the zipper head out of the way of the needle. That way you wont get an uneven bulge of sewing at one end.
All stitched.                                                          
That's the hard part done. Now stitch around the remaining seams of the cushion. Don't forget to undo the zip before you sew, or it can be quite difficult to get the zip undone to turn the cushion in the right way. Now overlock the raw edges and your done. I tied the ends of the overlocking off, as I did not want them coming undone later.
 
 Now iron the cushion cover and your done. I purchased cushion inners from The Warehouse. They were only $8.99 each.
Where shall I put these... they match the couch really well; the curtains, not so much... but I do know a good place to find some more fabric... 

Monday 15 October 2012

Little Miss Fashion Designer


I have often said that fashion is a genetic predisposition in our family. Usually followed by some explanations as to its role in a newly acquired fashion item. Tailoring was my mothers profession before she married my father and became a farmer's wife; now she makes aprons in her spare time; my sister is a fashion designer and I teach Textile Technology. And so I suppose it could be regarded as unsurprising that my daughter - Little Miss 3 - has started to show an interest in the cloth. Unfortunately her first attempts at fashion designing happened to feature a designer top and a sharp pair of scissors. She had pulled one arm out and was wearing it off the shoulder style:
"It's too long Mummy" as she chops away at the offending sleeve.
I screeched so loud it gave the poor thing a fright. Oh well.
"She has been doing awfully well with her cutting out lately"


The top is reasonably new with plenty of room for growth. If it had been a Preschool top I would have overlocked around the sleeve and called it a day.

This never happens to the cheap ones.

I can fix this....

I started by unpicking the little cuffs. I took them to my hair appointment and picked away while my colour developed.


I trimmed off the chopped section and cut both sleeves to the same length.

Then I pinned the cuffs back onto the sleeves and overlocked them back on.

Luckily we happened to be at Nana's house so I used her commercial overlocker.


All fixed.

Now it's time to deal with the little holes.


I used a bit of the left over sleeve to put in behind the holes. A few randomly placed lines of stitching and its almost there.


A strategically placed plastic flowers from the front of the top sewed over the mend and its not so obvious now. One little top saved and ready to wear another day. We just have to stay away from the stains now.

Tuesday 9 October 2012

Catching up with our buddies


There are many advantages to holidays: time away from work, the occasional sleep-in, that relaxed feeling you get after a few days of down time, holiday food, the excuse to eat holiday food and deciding where to start on all those half finished projects. But by far the most excellent feature of holidays to the opportunity to catch up with friends.
Our Tuesday Plunket group catch-up was always a welcome patch of sanity among the very new world of stay-at-home motherdom. Time to share stories, grip gripes, and celebrate milestones. Now that work has intervened, holiday time is our opportunity to catch up with our buddies. Even after almost two years of Preschool, Little Miss 3 still regards her plunket buddies as her best friends. 

As is our tradition, we put on a lovely spread to host our friends: Fruity caramel crumble slice, Sticky lemon slice, jellies, sandwiches, Cheese and prosciutto scones and chips and dip. When asked Little Miss 3 regards chips and dip as her favourite party food; a preference she shares with many of her buddies. 

Here's two of the recipes I made:

Sticky Lemon Slice

This recipe came, via my mother, from the Dunsandal School fundraiser cook book Over the Fence and Under the Oak Tree. It's a lovely book full of the school community's favourite recipes. Mum loves to accumulate cookbooks; she picked this one up at the Cafe in Dunsandal for no better reason than the quality of the book.

225g butter
70g icing sugar
270g flour
400g caster sugar
4 eggs
4 tablespoons flour
1 teaspoon baking powder
zest of 3 lemons
100ml lemon juice
icing sugar for dusting

Cream the butter and sugar. Fold in the flour and press the mixture into a paper lined slice tin.  It's quite soft, so wet hands are useful for spreading the mixture. Bake at 170deg. C for 15 minutes.

While the base is cooking make the topping.
Beat the sugar and eggs together until thick and creamy. Beat in the flour and baking powder. Lastly, briefly beat in the zest and juice. Be sure to scrape the zest from the beater whisk attachment, as they tend to get stuck and you want them in the mixture not stuck to the beater.


Pour on top of the hot base and return to the oven for approximately 30 minutes at 160deg. C. The centre should be set, but not bubbly or overcooked.


I had some oven temperature issues - too hot - and ended up with slightly scorched edges and a huge crack on top. Its amazing what icing sugar can hide.


Fruity Caramel Crumble Slice

I adapted this from the Caramel Crumble recipe in Edna Low's Recipes from Edna's Kitchen. Its a great compendium of a life time of recipes from this amazing lady's kitchen, all compiled by the Mid Canterbury Federation of Women's Institutes. Mum bought my sister and I a copy each of this useful book. It's my go to when I want to make something new and need a reliable recipe. I added oats and fruits for some extra texture in the base, and used the whole tin of condensed milk, as a half tin always seems to end up wasted.


180g butter
125g sugar
3/4 cup flour
3/4 cup rolled oats
1 teaspoon baking powder
1 cup dried fruit - I used cranberry, glace cherries and currants

Cream the butter and sugar well. Fold in the sifted flour and baking powder and the rolled oats. Lastly fold in the dried fruit. 


Press 3/4 of the mixture into a lined slice tin. Bake at 180deg. C. for approximately 15 minutes.


While its cooking, prepare the topping.


120g butter
2 tablespoons golden syrup
1 tin condensed milk
1/4 cup sugar

Put all the ingredients in a pan and heat, stirring, until the mixture is melted.


Place on top of the hot cooked base. Crumble the remaining base mixture on top of the caramel. Bake at 160deg. C. for about 30 minutes until the topping is cooked and the caramel is bubbly at the sides.


Leave in the tin until cold, then cut into small squares. It's a very rich slice. 


Our afternoon tea spread. All ready for our buddies to tuck into.


Little Miss 3 having fun with her buddies.  There is nothing like the joy that comes with spending time with good friends. Thanks for coming over today. It's always a pleasure to see you all!

Saturday 6 October 2012

Crafty Crochet Balls


Continuing the theme of stash busting, these cute little projects are a perfect little doddle to occupy the few spare minutes of your day. All that's required is a few spare scraps of yarn, a 3.5omm crochet needle, a darning needle and a hand full or two of stuffing.

I adapted the pattern for these from a school library book. It suggested altering the colours, so the end result looks like a traditional beach ball pattern. I might try that next time; but for now, all that joining sounded like a hassle when I wanted to complete this quick smart.

The wool I have used is from The Wool Company in Taihape. All New Zealand wool, grown, spun and dyed in NZ. They have a fantastic mail order system via their web site: www.thewoolcompany.co.nz


Instructions:
  •  Make a foundation row of 16 chain
  • Row 1: 1 chain (ch), skip 1 chain, 4 double crochet (dc), 8 treble crochet (trc), 4 double crochet, turn.
  • Row 2: 1 ch, 4 dc into next 4 dc, 8 trc into next 8 trc, 4 dc into next 4 dc, turn.
  • These 2 rows form a pattern, and are repeated 9 times to form a ball shape.


Use a blunt pointed darning needle to sew a running stitch around the end of the ball; pull it tight to gather the end.
Sew the side of the ball together.


Leave the other end open and fill the ball with stuffing.
 
For the first one I used old scrapes of yarn collected from the ends of my weaving projects. It seemed like such a waste to throw them away. I am, however, not quite sure how this will hold up to washing, as the wool will need to be perfectly dried after washing to prevent it from later deterioration.
 
For the blue ball I resorted to using poly stuffing, as i know this can easily be washed after little fingers have spread their grimy message.
 
Stuff the ball as tightly as you can, as the stuffing will soften over time.
 
Now sew a running stitch around the open end and draw it up tightly. Sew a couple of times over the end and finish off by stitching over a couple of time in the same place. Stitch the end into the ball and cut off so it sinks in unseen.


Roll the ball around to form a nice even shape.
 
 
The multi coloured wool stuffing blends into the overall colour of the ball better than the poly stuffing.


And its done; all in no time at all.
 
I dare you not to become addicted to making these cute, quick little masterpieces.