The tie-up tassel beaded necklace is quite the trendy accessory at the moment. They are actually very easy and relatively speedy to make. Most of the ones I've seen around use clear crystal beads paired up with a coloured cotton of choice. I've gone for one of this season's on-trend colours - royal blue.
Start with a hank of thick DMC cotton thread. It comes in lots of colours.
Before you start make sure that you have a piece of thin wire that is small enough to fold over and use as a needle to thread the cotton through the beads.
You will need approximately 140 8mm smooth or faceted crystal beads. I used smooth.
Wrap the thread around your fingers about 20 times. More or less depending on how full you want the tassel.
Tie the thread off at the top of the bundle.
Now ravel off about 5 or 6 metres of thread from the hank.
You will need enough for the knotted beads and the tassel at the other end.
Tie a 20cm piece of thread around the buddle to form a tassel. Double knot it in place, then wind it around the bundle to form a tassel.
Tie off, then thread the end onto a darning needle and pass it through the tie from the top to the bottom of the tassel.
Cut the bottom of the bundle to release the tassel ends. Trim up any uneven ones to form a neat end.
Thread the bead end of the cotton thread around the doubled over wire to form a fine 'needle'.
Thread it through a bead.
Push the bead down to the tassel then tie a knot in the thread.
Use the darning needle to put through the knot and push it down hard against the bead while pulling the knot tight.
Knotting each bead will stop all the beads falling off if the thread should break at some stage in the future.
 Repeat the threading and knotting until all the beads are used and the necklace is the required length.
Wind the remaining thread around your hand 20 times to create the second tassel. Knot the cotton against the final bead, then thread it through the top of the tassel loops and tie it off as tightly as you can.
Tie an extra piece of cotton around the body of the tassel, wind it around the body of the tassel and tie in place. Thread the loose ends onto the darning needle and pass them through the tassel to hold them in place.
Not a bad outcome for an hour or two spent threading beads in front of the television. Now I'm wondering what colour I might make next. Happy creating my friends xx
It's getting to that time in the school term when lunchbox filling inspiration starts to wear thin. Sometimes the biscuit choices of 6 year old's can be a little fickle, so I was more than happy when our Little Miss settled on a shortbread making project.
This is a recipe I make often. Most people appreciate the fruit and nut variation, but this time I decided on adding a little chia. The chocolate is a concession to our Little Miss.
Fruit, Nut and Chocolate Shortbread Shapes
255g butter
115g icing sugar
115g flour
115g custard powder
115g cornflour
1/2 teaspoon salt
2 tablespoons chopped preserved ginger
2 tablespoons chopped walnuts
2 tablespoons chopped cranberries
2 tablespoons chia seeds
2 tablespoons white and dark chocolate buttons
a beaten egg white
Preheat the oven to 150deg. C and line a large baking sheet
 Cream the butter and icing sugar until pale and fluffy.
Sift the flour, custard powder, cornflour and salt.
Cream the butter and icing sugar until pale and fluffy.
Sift the flour, custard powder, cornflour and salt.
Fold the dry ingredients into the butter and sugar and turn out onto a sheet of plastic wrap.
Chill for half an hour.
Prepare the ginger and walnuts by slicing them into chunks.
Roll the shortbread out between two sheets of plastic food wrap.
Gather your selection of biscuit cutters and press out as many biscuits as will fit on the shortbread.

Place the biscuits onto a lined baking tray.
Gather up the off cuts and re-roll them between the plastic. Continue to cut the biscuits until all the mixture is used up.

Beat the egg white until fluffy.
Brush onto each biscuit and sprinkle with the toppings. I combined the cranberry and chia, and the walnut and ginger. Little Miss arranged hers with chocolate drops and mini teddies.
Bake for 20 - 25 minutes. They will brown a little where they have been glazed.
Little Miss was very happy to take a little parcel of biscuits to both her classroom and ballet teacher. Happy baking xx
Of late I've been cutting down on the sugar in my diet. I've given up all lollies, and I only have cake every now and then, and only if it's really good cake! Anyway, I've been finding that my two pieces of toast with peanut butter for breakfast have been wearing out by 10am. Finding all the store brought cereals either way too sweet, or textured like cardboard inspired me to try some homemade cereal for breakfast.
There are many great things about making your own muesli: you can control exactly what goes into it, and thus boost the proportion of tasty seeds, nuts and fruit; you can add less sugar; it costs way less than buying at the supermarket. This recipe is from my lovely friend and colleague Rebecca, and is published in the Lyttelton fundraising book: Harbour Kitchen. You can swap and change any of the nuts and seeds to suits your tastes - here is my version:
Muesli
3 cups rolled oats
2 tablespoons vegetable oil
1 cup raw almonds
1 cup sunflower seeds
half a cup pumpkin seeds
half a cup coconut threads
2 tablespoons black chia seeds
1 cup dried fruit - I used a mixture of apricots and cranberries
2 tablespoons honey
Preheat the oven to 160deg. C.
 Place all the ingredients except the fruit and honey into a large roasting dish and stir.

Place in the oven for approximately 30 minutes, checking and stirring every 10 or so minutes.
Keep a good eye on the muesli, as the nuts and coconut will easily burn.
Remove from the oven and add the warmed honey. Stir until well combined, then add the chopped dried fruit. Allow the muesli to cool before putting into an airtight container to store.
Happy breakfasting my friends xx
As the chill rolls around again, its time to take advantage of two good things of the season: decadent puddings and cheerful winter fruits. Here's a good idea for combining the two.
Decadent Chocolate Pudding with Roasted Winter Fruits
For the brownie:
250g good quality chocolate - I used Whittakers 72% Ghana
250g butter
1 and 3/4 cups brown sugar
4 eggs
1 cup plain flour
1 teaspoon baking powder
1/2 cup cocoa powder
Preheat the oven to 180deg. C. Line a 22 x 30cm or similar baking dish with baking paper.
Place the butter and chocolate into a large heavy based saucepan and melt over a low heat.
Take from the heat and allow to cool a little.
Add the sugar and mix well, followed by the eggs. Mix the eggs in well using a whisk.
The mixture will be thick, smooth and glossy.
Sift the dry ingredients together. Slowly stir into the chocolate mix until well blended.
Place in the lined baking tin and bake for 35 minutes until set, but still fudgy in the middle.
Allow to cool in the tin. The brownie can be reheated in the microwave - about 15 seconds per piece will do the trick.
For the roasted fruit:
3 or 4 granny smith apples
6 stalks of rhubarb
3 to 4 tablespoons brown sugar
Preheat the oven to 200deg. C and line a baking sheet with baking paper.
Peel the stringy skin from the rhubarb by starting from the cut end and pulling it away from the length of the stalk using a paring knife. Cut into 10cm lengths.
Peel, quarter and core the apples. Toss them, and the rhubarb in the brown sugar. Spread the fruit out on the lined baking sheet and bake for about 30 minutes until tender.
We served our brownie and winter fruit with whipped cream and ice cream.
Feijoa's can be a little divisive: people tend to either love or hate them in equal measure. It is no secret that Little Miss and I love them. In a world where you can buy any kind of imported fruit and vegetables at any time of year, there is a great joy in these completely seasonal, utterly New Zealand, green treats. I'm sure if they were available all year round they wouldn't have such an appeal. Anyway, as the season comes to an end, I'm doing my best to make the most of these fabulous fruit before they disappear again for another 10 months.
This recipe makes the most of another couple of seasonal treats, the walnut and the Granny Smith apple. I've put walnuts in the pastry to add texture and a nutty flavour, and the Granny Smiths make a great tart dessert apple.
Feijoa and Granny Smith Shortcake with Walnut Pastry.
for the pastry:
300g plain flour
200g butter
100g brown sugar
1/2 cup walnuts
4 tablespoons cold water
for the filling
3 Granny Smith apples
6 to 7 medium sized feijoas
the juice of half a lemon
3 tablepoons caster sugar
3 tablespoons raw sugar - for sprinkling on top of the shortcake
Using a kitchen whizz, blend the flour, butter and brown sugar until well mixed.
The mixture will resemble crumbs. Add the walnuts, and briefly blend - you don't want to cut the walnuts up too finely.
With the motor of the kitchen whizz running, add the water and blend until it starts to come away from the sides of the bowl - as shown.
This can be made by hand: mix the dry ingredients together, rub in the butter using your fingertips. Add the finely chopped walnuts, then blend together with the water.
Either method, don't overmix! Wrap the pastry in plastic food wrap and chill for at least half an hour. The pastry will keep quite happily in the fridge for a couple of days, so it is easily made in advance.
Preheat the oven to 190deg. C.
Line a medium sized baking dish with baking paper.
Roll the pastry out before preparing the fruit as both the feijoas and apples will brown once peeled.
Roll the pastry between two large sheets of plastic food wrap. You may need to use a couple of sheets overlapped. It should be about 5 to 6mm thick once rolled.
Take the plastic wrap from the top of the pastry and invert it into the lined tin. Ease it into the corners, then trim around the top of the tin. Cover and chill in the fridge while preparing the fruit.
Peel, quarter and slice the Granny Smiths.
Prepare them one at a time and immerse in a bowl of water with the lemon juice added. This stops them going brown.

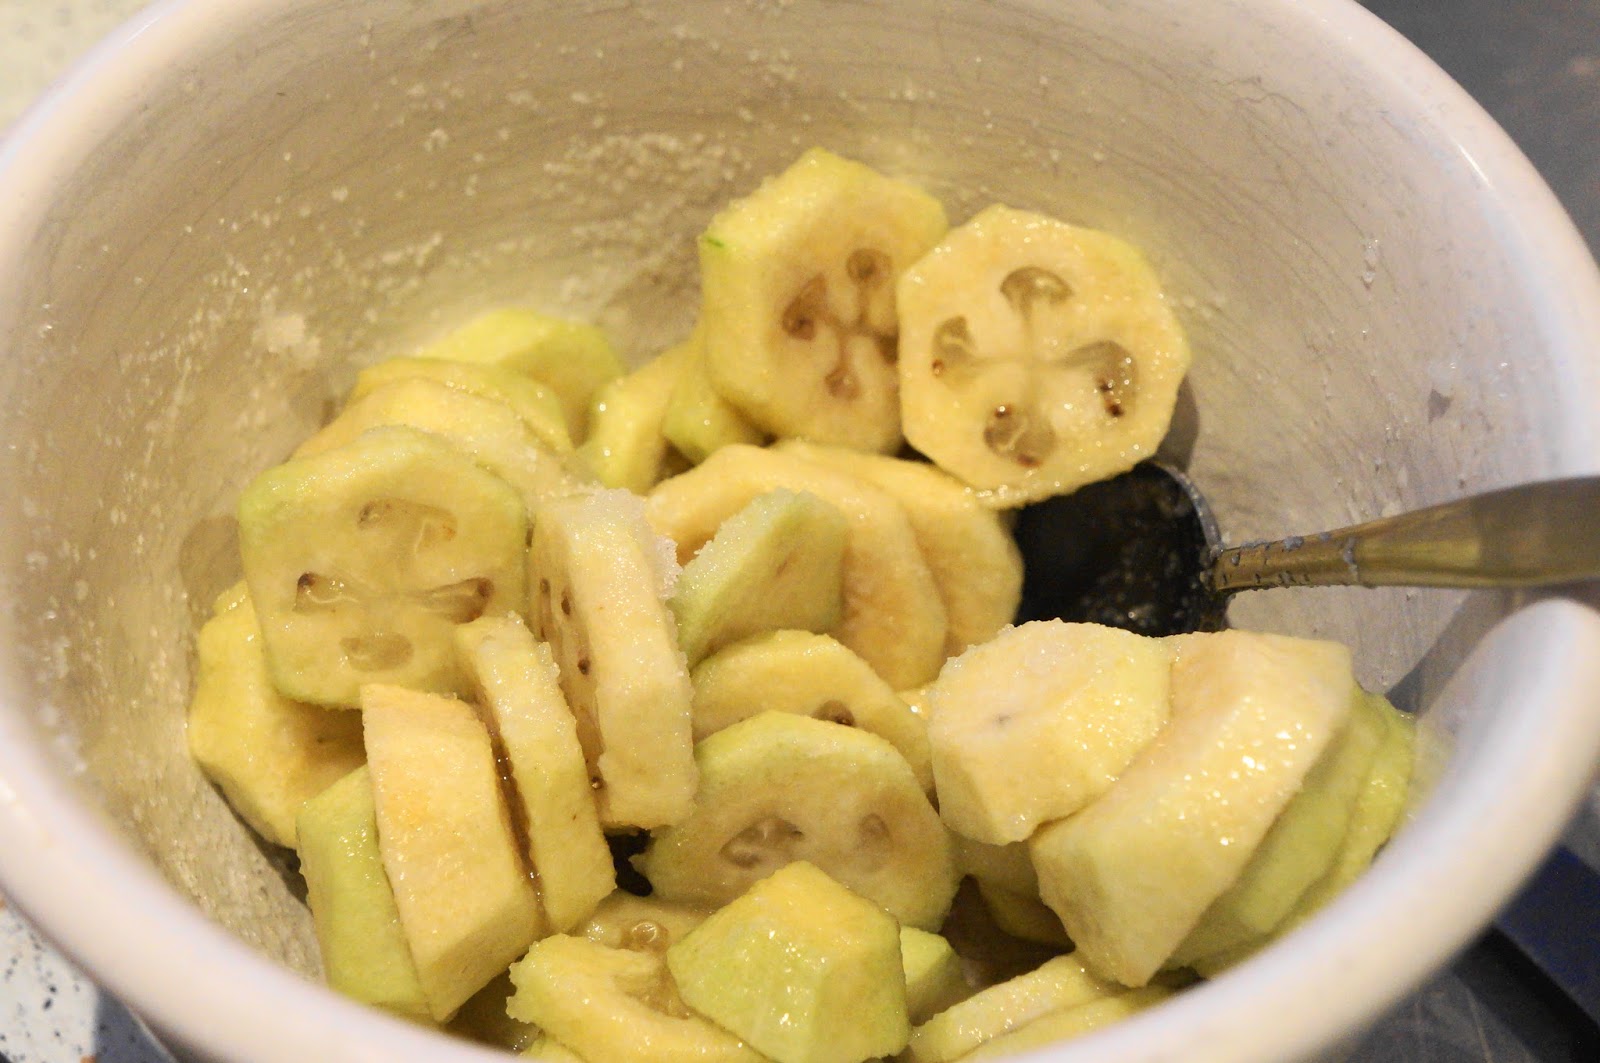
Prepare the feijoas by cutting the tops and tails off, then parring the skin off each one.
Slice into rounds, then place in a small bowl with the caster sugar to prevent browning.

Arrange the apple slices and feijoa rounds onto the chilled pastry. It doesn't have to be super neat, just squeeze them all in. Spoon the left over feijoa sugar and juice over the apple slices.

Cut the pastry that was trimmed from the tin into strips and arrange them on top.
Sprinkle with the raw sugar crystals and bake for 40 minutes until the pastry is golden brown. The pastry needs to be baked quite brown to ensure the bottom is cooked and not soggy!
We took half the pie over to share with our neighbours as a thank you for lending us their trailer. It was getting late, so our Little Miss put a dress on over her pyjamas!