Monday 30 December 2013

Our TranzAlpine Train Trip

We've had a great day on the TranzAlpine train to Greymouth. We took the return trip with an hour to spend in Greymouth before heading back to Christchurch. Little Miss 4 loved spending time with Uncle John. She loved going out onto the viewing car, and spending nine hours taking advantage of the being so close to the cafe.

 The weather was lovely on the eastern side of our lovely island. 


 This is one of the vistas of the Waimakariri River as seen from the viewing car. 


  These were taken just on the eastern side of the Otira rail tunnel.

The weather wasn't quite so kind on the west coast side of the main divide. Having left behind the first bit of sun we had seen in days, the rain was torrential once we passed through the Otira tunnel.

The Otira cottages. They were originally built for the railway workers and their family's. It must have been a cold, hard life.  

The edge of Lake Brunner. Wet but beautiful all the same. It was so wet when we got to Greymouth that we didn't get much further than the Speight's Ale House for lunch.


On our way back again. Another view of the Waimak river. Hope all your Holiday activities are going well!

Saturday 28 December 2013

Chocolate Mousse - a recipe for Emily

This recipe has been a family favourite for many years, and a particular favourite of one of my youngest cousins Emily. I usually make this for most of our major family get togethers, and it is always really well received by everyone. The special dishes that family contribute make up the fabric of my memories of our gatherings over the years. We still reminisce over all the things my paternal grandmother made for us. Joan was an absolute star in the kitchen and a culinary inspiration to all her 14 grandchildren. It would have been her birthday in a couple of days; I'm thinking of making some Afghans in her honour - she always made cracking ones.

I got this recipe from CPIT when I trained their over 15 years ago, and I have been making it ever since. It is super rich, so only a small portion will do most people.

Chocolate Mousse

250ml whole milk
300g good quality 70% cocoa chocolate - I used Whittaker's
4 eggs
50g caster sugar
8g gelatine
2 tablespoons Tia Maria liqueur
400ml cream

Separate the eggs and set the whites aside. 

Hydrate the gelatine with a few tablespoons of cold water and set aside to swell. 

Beat the yolks together with the caster sugar until the mixture is pale, light and fluffy. 

At the same time heat the milk in a heavy based saucepan until it reaches boiling point. 


Pour the milk into the yolks and whisk until combined. It is particularly important to add the milk to the yolks: done the other way around the eggs will cook and scramble. 

Clean the bottom of the pot and transfer the eggs and milk back into the pot. 


Using a spatula gently heat the mixture, stirring it constantly until it starts to thicken. 

If you think its getting to hot too quickly take it from the heat for a minute or two and continue to stir. Don't allow the mixture to boil or the custard will curdle. 

Once the custard coats the back of the spoon remove it from the heat and set aside. 

Heat the gelatine and water in the microwave in short bursts until it is melted. Stir it into the custard. 


Melt the chocolate. I usually do this in a Pyrex bowl in the microwave: put it on for 30 seconds, then stir and repeat once. Now stir until the last of the chocolate lumps have melted. Don't overheat or the chocolate will be ruined and don't have the chocolate too hot or it will spoil the custard.

Stir the melted chocolate and the Tia Maria into the custard and set aside to cool. 
The mixture needs to cool until it is at room temperature. 

Beat the eggs whites until soft peaks form and transfer them to another bowl. 

The whites must be beaten in a spotlessly clean bowl or they will not reach their full volume. That's why I beat then first: otherwise I would need to thoroughly clean the bowl after beating the cream.


Now beat the cream to soft peaks and fold in the chocolate mixture.


Now fold the egg whites into the chocolate mixture a third at a time. They need to be thoroughly mixed without losing too much of the air the egg whites bring to the mixture.  


Pour the mousse into a serving bowl, cover with food wrap and refrigerate for at least a few hours before serving. 

I put ours into one big bowl, but it looks equally good in individual serving dishes. 


Though it's quite an involved recipe, it is definitely worth the effort. Happy cooking Emily. I'm sure your flat mates will love you for making this one.

Wednesday 25 December 2013

Another old school family recipe - 1970s Carrot and pineapple salad

Recipes and family dishes are such a great reminder of family times and dear ones long departed. This is another of our old family recipes. Gran would always make this whenever we had a family get together. As children we looked forward to eating this with our ham on Christmas day because it always tasted a little like having your pudding at the same time as the main course. It took me a few years to realise this dish is a product of the 70s obsession with gelatinisation. These days we make it in Gran's honour and sit round reminiscing about our childhood memories as cousins together on the farm.

Having such a great time catching up with everyone, I forgot to photograph this salad on the plate. We ate it for Christmas supper with ham, cold turkey, new potatoes, new seasons carrots and a green salad.

Pineapple and Carrot Salad

1 x 420g can of crushed pineapple
2 cups orange juice
1 cut prepared and cut orange flesh
1 cup grated carrot
2 tablespoons white wine vinegar
1/2 cup sugar
1 teaspoon salt
2 heaped dessert spoons powdered gelatine

Soften the gelatine in 1/2 cup cold water and set aside.
Add the sugar and the salt to the orange juice and bring to the boil. Remove from the heat and add the vinegar. Heat the gelatine in the microwave in short bursts until it has dissolved. Stir the gelatine into the orange juice mixture and set aside to cool. 
Prepare the oranges by cutting off the top and bottom down to the flesh, then cutting down the sides of the orange a strip at a time to remove all the pith and skin. Now cut the orange flesh segments out one at a time. Cut each segment into two. Wash, peel and grate the carrots and drain the pineapple. The pineapple juice is not required for this recipe.

Stir the orange segments, carrot and pineapple into the cooled orange jelly. Pour the mixture into a suitable glass or crystal serving bowl and refrigerate for a couple of hours at least to set before serving with your choice of summer cold meats and salads.

This dish will always be the taste of our summer family childhood. 


Christmas Day with the Family


We've had a great Christmas Day. Wishing you all the very best wishes for a fabulous family Christmas.

Tuesday 24 December 2013

Auntie Lois' Pineapple Cheesecake

This recipe has been a feature of our family gatherings for many years. No one really knows where it came from, but is was usually made by Auntie Lois and so has become known as Lois' cheesecake. There is quite a long and involved story around the acquisition of the recipe; lets just say that some people are more willing to share than others, and its taken a good 10 years for me to get my hands on this one. The original was written in ounces, so I have modified it into metric measures.

Auntie Lois' Pineapple Cheesecake

250g wine biscuits
125g butter 

a 425g can of crushed pineapple divided into 1 cup of drained crushed pineapple and 1/2 cup of pineapple juice
1 x 85g packet of lemon jelly crystals
1 1/4 cups boiling water
250g cream cheese
rind of 1 lemon
1/2 teaspoon vanilla essence
1 cup cream

Crush the biscuits in a food processor and combine with the melted butter. 


Press the crumb mixture into the bottom of a couple of loose bottomed dishes.


Dissolve the jelly in the boiling water, add the pineapple juice and leave to cool.


Once the jelly is nearly set, beat together the cream cheese, rind and vanilla until it is light and fluffy. 


Combine half a cup of the jelly with the drained crushed pineapple and set aside. 


Blend the remainder of the jelly mixture with the beaten cream cheese until well mixed. 

Beat the cream then fold it into the cheesecake mixture. 


Pour the mixture over the chilled biscuit base and refrigerate until firm. 


Now gently spoon the reserved crushed pineapple and jelly mixture over the set cheesecake filling and return it to the fridge. 

The cheesecake is best left to set overnight before serving. 


When your ready to serve it, release the cheesecake from the mould by placing the base on an inverted mug and pulling the dish sides down. Place the whole thing base and all onto your serving plate and your ready to serve.

The recipe makes enough for a couple of shallow cheesecakes or one deeper version. This is a lovely light cheesecake that is perfect for serving as part of a more substantial meal. 

Dessert is a big deal for our family at Christmas time. We all contribute to the spread.
Merry Christmas !

Monday 23 December 2013

DIY Christmas Wreath

 My grandmother always went to a lot of trouble to decorate the house for Christmas. They always had a huge tree and we would collect holly branches and other flowers to create huge flower arrangements for the hallways. It was with this in mind that I gathered up some holly branches and pine and conifer fronds from around the family farm and set about making a Christmas wreath. After about 40 minutes of fighting the spiky branches I came up with this great looking Holly and foliage wreath for our gate. 

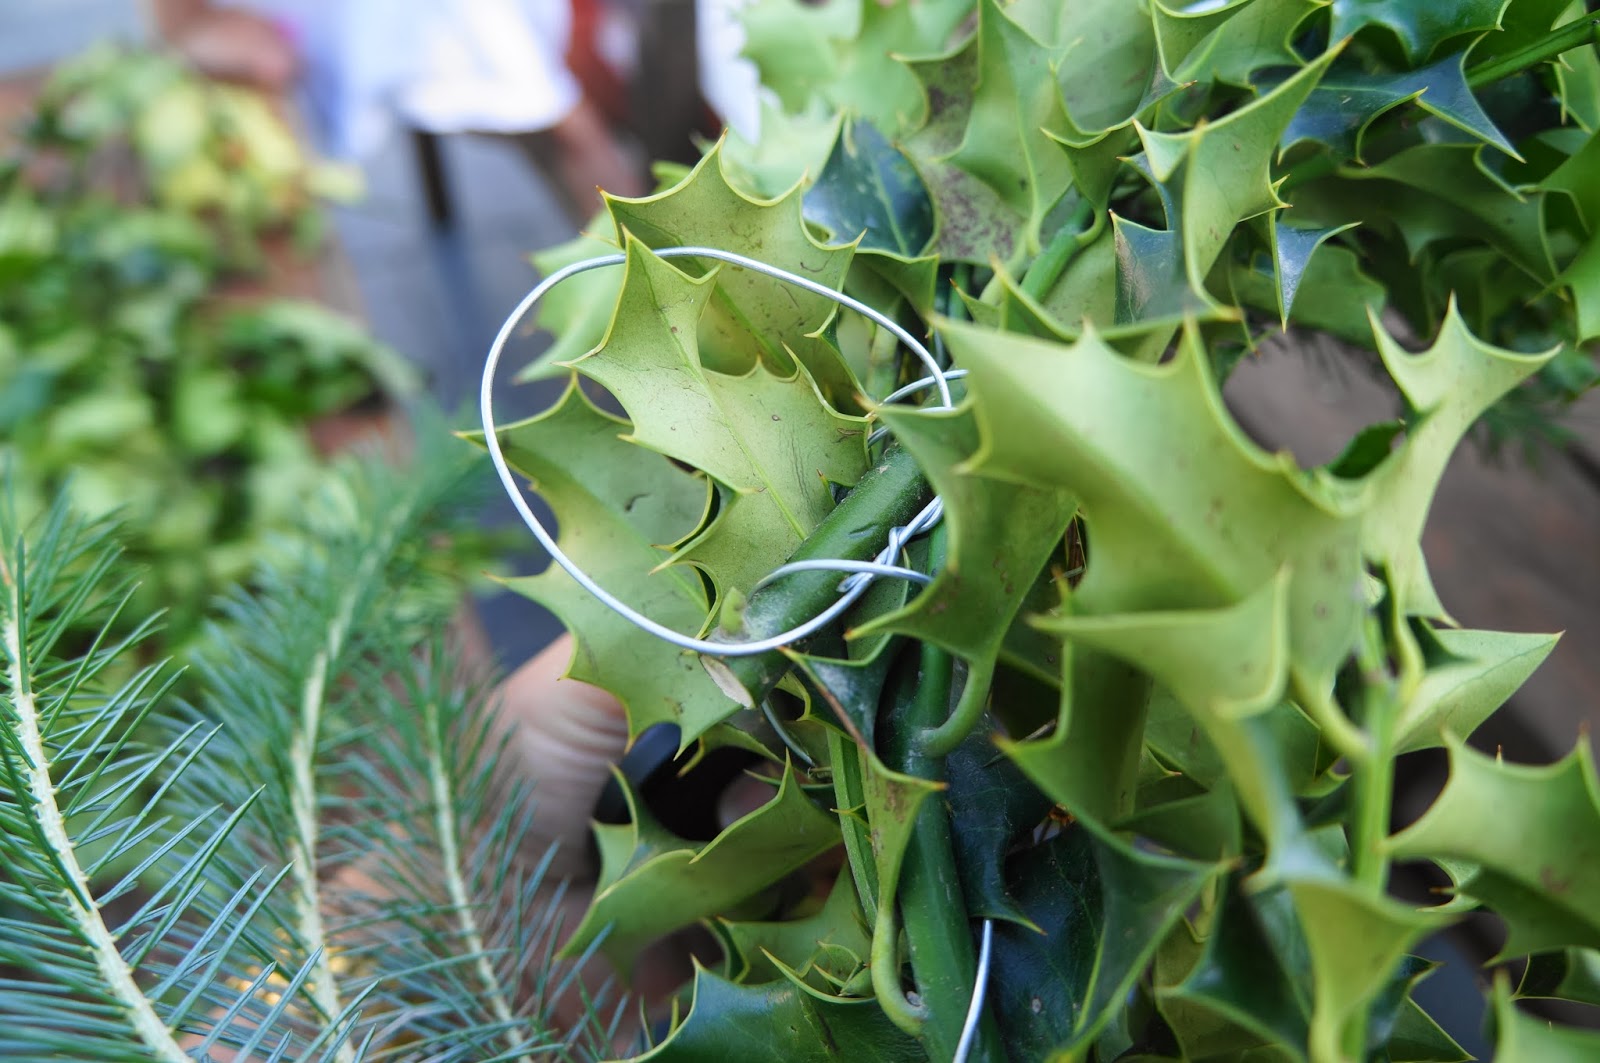
Being summer in the southern hemisphere we don't have berries on the holly shrubs at the moment and the tips of the tree are young, soft and prone to droop, so I trimmed most of the soft foliage away and set about wiring the whole lot together.


These are the tools I used: thick plastic dipped gardening gloves to keep the prickles at bay, thin lacing wire, pruning shears, wire cutters and a pair of pliers.


I started with two Holly branches and twisted a metre length piece of wire around the branches, trying not to catch too many leaves. Half way along the branch I overlapped another branch and continues twisting the wire around. Lace the wire quite closely to keep the structure stable.

Keep adding overlapping branches and wrapping the wire as tightly as possible until the whole thing is lust over a mitre long. 


Now bend the length around into a circle being sure to overlap the ends. All the sections of the wreath should be about the same thickness. 

Once your happy with the initial overall look. Create a hanging loop and thread it through the laced wire. Looking at the overall placement of the branches, place the loop wherever you want the wreath to hang from. 

Now select your additional pine branches and push them into the wreath wherever you see fit. I used about 4 extra pine branches in total. 


For the base of the wreath I wired together a little posy of conifer fronds and cabbage tree flowers, leaving extra wire to use to wire it onto the wreath. 


To keep the wreath fresh I have been sprinkling it with water from the watering can every couple of days.


With the left over holly and branches I created this dinner party centre piece. 


Merry Christmas and best wishes to you all!