Saturday, 11 May 2013

A Baked Fruit Pudding with Friends

We had a lovely dinner with friends last night. With the working week at an end we are always in danger of a quick take out, so it was lovely to be invited out. Our contribution to dinner was the pudding. With a cold breeze blowing and bursts of rain, a lovely homely baked pudding was the perfect dinner choice. I mixed it at home and popped it into the oven at our friend's house. It's a great quick mix and the choice of fruit can be varied depending on what's in the pantry.

Baked Fruit Pudding


1 small cup plain flour
3/4 cup brown sugar
2 - 3 cups dried fruit - I used golden sultanas, cranberries, standard sultanas and crystallised ginger
3 tablespoons butter
1 small cup milk
1 teaspoon baking soda

Pre-heat the oven to 175deg. C.
Mix the dry ingredients and fruit. Warm the milk and melt the butter. If you do this together ensure the mixture is not too hat as you don't want to cook the flour before it goes in the oven. Add the soda to the milk and butter and stir. It will froth up a bit. Mix the milky mixture into the dry ingredients and fruit and pour into a shallow, greased oven dish.

The dish needs to be quite shallow as the pudding is quite dense and will take too long to cook in a deep dish. 

Bake for 30 to 40 minutes until the centre bounces back when pressed and the pudding is golden brown.


We served it with whipped cream and custard. Ice cream is also a good accompaniment.

It was great to catch up with friends and watch our daughters playing. Two little blue ballerina's having a ball! They couldn't have been happier!

Wednesday, 8 May 2013

At last, a great Feijoa Cake!


I'm the first to admit that sometimes a recipe just doesn't turn out the way I intended. My first attempt at formulating a feijoa cake wasn't much to write home. Despite the kind and forgiving assurances of my friends, I just knew I wasn't going to be making that one again. And so, after a little digging in the recipe archive - an old folder I've had since I was a teenager, I found an old apple cake recipe I could convert. I added crystallised ginger for a little zing and walnuts for texture.

Feijoa, Ginger and Walnut Cake
1 cup peeled and sliced feijoa
1 cup caster sugar
120g butter
1 egg
1 1/2 cups plain flour
1 teaspoon baking powder
1/2 teaspoon salt
1 teaspoon ground cinnamon
1/2 teaspoon mixed spice
1/2 cup walnuts - sliced
1/2 cup sultanas
1/4 cup crystallised ginger - finely sliced

Preheat the oven to 180deg. C and line a 20cm round, loose bottom tin with baking paper. 


Place the freshly peeled and sliced feijoas into a bowl and mix in the caster sugar. Leave for a few minutes, then add the melted butter and beaten egg into the feijoa mixture.

Sift in the flour, baking powder, salt and spices. Stir until just mixed. Add the fruit and nuts and gently combine. 


Place into the lined tin and bake for 30 to 40 minutes until a skewer inserted into the middle of the cake comes out clean and the cake is beginning to brown.The cake takes some cooking as the feijoas make it quite a wet mixture.Cool in the tin, then turn out.
No icing is required, but a dusting of icing sugar looks really good.
This cake makes a really good dessert served warm or an afternoon tea cake served cold.
Happy baking!

Sunday, 5 May 2013

Crafty Fox Cushion Tutorial

Mum and I have spent the last week or so racking our collective brains over what inspired ideas we could design and make for the British themed encraftment market. I had been thinking corgis, care of the Queen, as one of the all time British symbols, but it was Mum who suggested the fox as an interesting alternative. Now foxes are quite a trendy motif in the crafty world currently, so combining them with a useful and serviceable cushion seemed like a good idea.
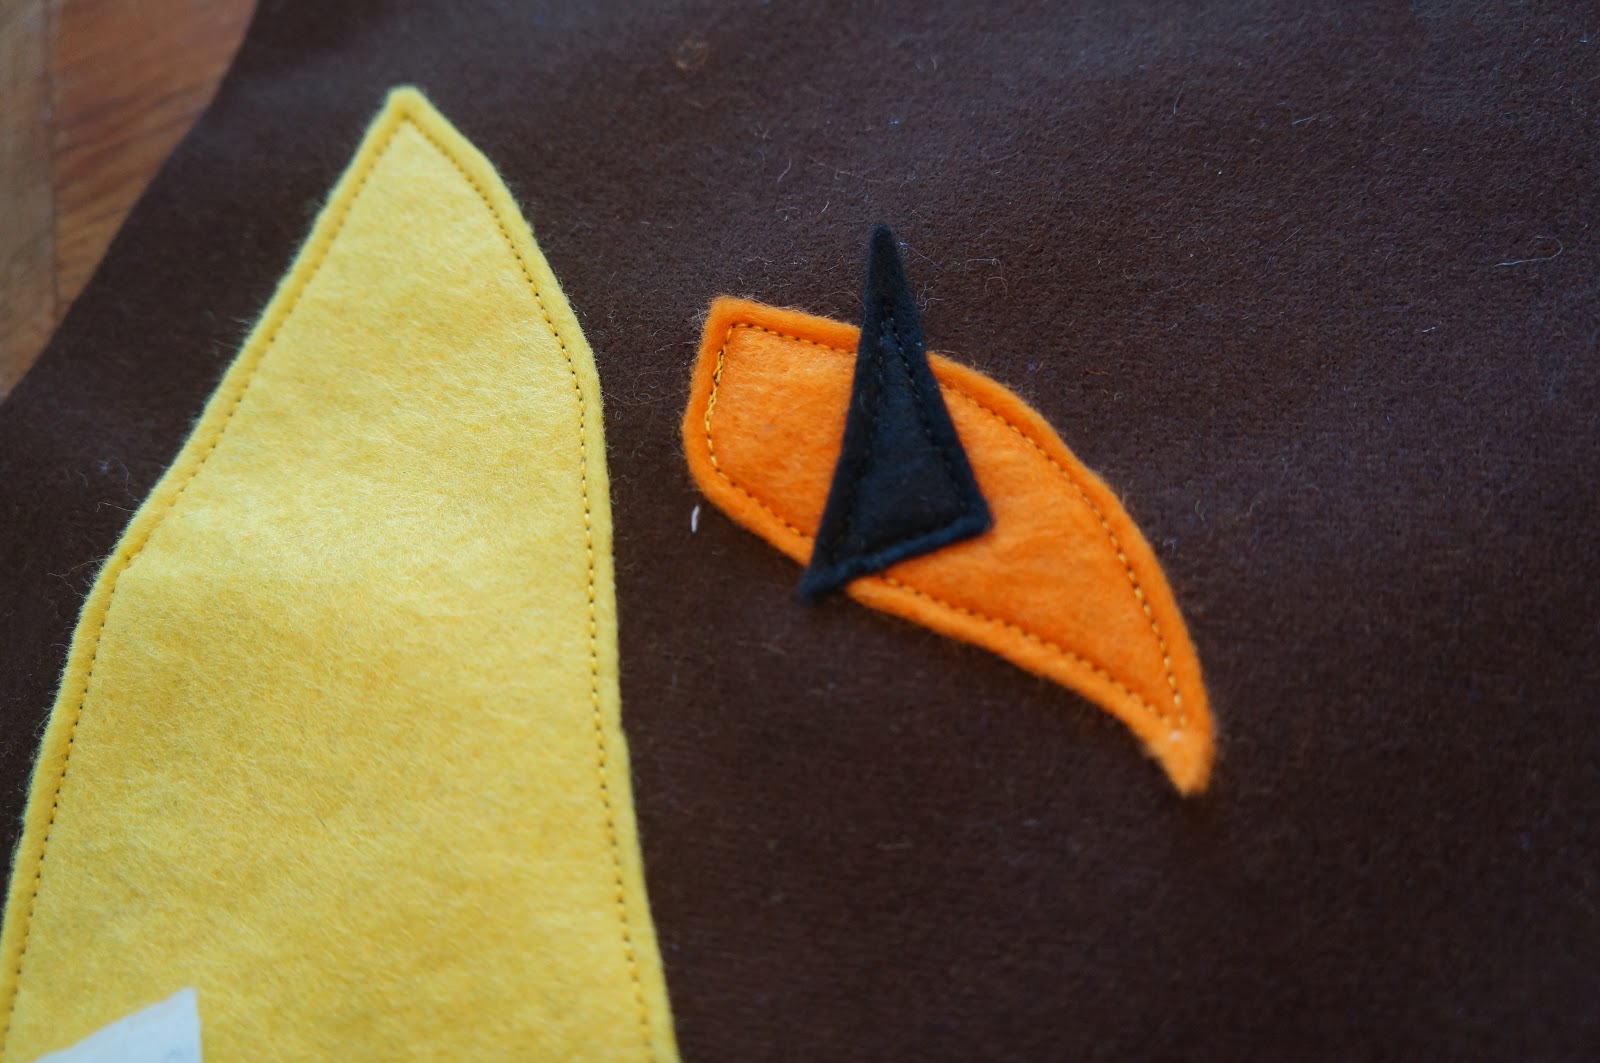
The reverse side of a Fabric Vision bag provided the perfect host in producing the fox template. I Googled up some fox images as inspiration for the design and colours, drafted out the shape then added the features. I then traced the features onto separate paper to form the templates. Since I was using felt, which does not fray, I did not need to add any seam allowance to the  fox's features.


I cut out a pair of head shapes from the wool fabric, followed by a strip of cotton fabric for the sides. The features were cut from wool felt.


Transfer the positioning for the features from the pattern to one side of the fox head using tailors chalk. Then position and pin your felt pieces. Carefully top stitch them onto the pattern. Its a good idea not to sew over the pins when top stitching or they will leave an irregularity in the stitching. Be very careful that the felt remains in place or else it will form a pleat of bubble once you get around to the beginning of your stitching.
Now start from somewhere on the foxes cheek and pin the strip of cotton fabric only the fox face. I cut a strip that was 7cm wide, including 1cm each side for the seams. Because the fox head is quite large I needed two widths of fabric to get all the way around. I joined one of these before I started.


Put plenty of pins in and allow for the seam to be 1cm from the edge of the fabric. The join should not have any pleats or puckers.


When you get right around to the other side, match up the fabric strips and sew them together before beginning to sew around the outside of the cushion. I deliberately chose to start by sewing the strip onto the front of the cushion as the first side is easier to get neat.


Once the first side is done, repeat the process with the back of the cushion. Leave a 10cm gap along a straight edge of the cushion in order that it can be turned in the other way.
Overlock or zig-zag the edges to stop them from fraying. 


Turn the cushion in the right way an stuff with polyester fibrefill. Although synthetic, it is the most practical filling as it doesn't absorb water and is easy to wash and dry.
 
Pin and then hand stitch the opening closed using a mattress stitch.
 
And your fox is complete and ready to roam your living room!
 
Since I used wool fabric, Mr Fox is best hand washed and dried flat in the shade. He can, however be made in whatever fabric takes your fancy. I am thinking of trialing a Cotton floral fox. 


Thursday, 2 May 2013

Great British Encraftment Market Application

This is a story about a crafty mother and daughter who love to create beautiful things and spread their crafty goodness far and wide.
Craftiness runs in our family: but our crafty partnership started when my mother Vivienne made an apron for my sister, Charmaine Reveley, to wear while she was working in her fashion design workroom. One of Char's customers really loved the apron, and mum started making them to sell. At the same time, I started writing this blog to share craft techniques and recipes with the world and making crafty items to sell with my mother.

I took these pictures of our stand at the Riccarton Rotary Market just prior to Christmas last year. We really enjoyed the market vibe: meeting people and talking about their craft interests. 

 Vivienne makes aprons from lovely 100% cotton fabrics. They are beautiful and practical, and designed to be easily worn and washed. The patterns and  fabrics used change all the time as new and interesting ones come along. 


 Prudence makes 100% NZ wool crocheted blankets, homespun and dyed wool, NZ wool knitted hats, 100% cotton floral rats, bunting, assorted 100% cotton cushions, crocheted balls and cute little floral and ribbon clutch bags, pencil and knitting bags.
Crafty Little Rats

Crochet Balls

We are passionate about using natural fibres and New Zealand wool. The resurgence in craft related pursuits is wonderful and reflects a cultural shift towards choosing handmade over mass produced.  

 Here are our British inspired craft items: we have really enjoyed designing and creating them, and we hope you love them as much as we do!
 This is a crafty Fox cushion. Its made of 100% wool fabric, felt and 100% cotton fabric around the outside.

 This is a 100% New Zealand wool hand knitted crown hat. It will be made in a variety of colours for girls and boys.

 This is a multi purpose Union Jack clutch bag. It's made of 100% cotton craft fabric and ribbons. The inside is lined and the seams bound. The bags will be made in a variety of colour ways and variations.

 These cushions are awesome! They are made from 100% cotton fabric, with a zip closure for easy laundering. The back is a plain matching blue/beige colour.

This is just one of the apron ideas Vivienne has developed for the British theme. It is made from 100% cotton and binding, and has a pocket for all those important things like hankies, safety pins and clothes pegs, and the strap at the top is adjustable for people of different heights.

Thanks so much for considering our application for the Great British Encraftment Market. We are super keen to be part of the craft market family!

Friday, 26 April 2013

Delicious Feijoa Crumble

Feijoas are a much anticipated seasonal treat in our house. So much so, that having eaten all the ripe ones, we have had to hide the harder ones from Little Miss 4 else she gobble them up as well.
Last night I made Feijoa Crumble for pudding at Nana and Poppa's house. Although often mixed with other fruits, this time I opted for the straight feijoa fix. This topping can be used on any fruit. The fruit doesn't have to be cooked first, just put in the dish, top with the crumble mix and put it in the oven.

Crumble Topping

1 cup flour
1 cup rolled oats
3/4 cup brown sugar
1 teaspoon mixed spice
1/4 teaspoon salt
100g butter - melted

Combine the flour, oats, brown sugar, spice and salt in a bowl. Mix in the melted butter. The mixture should look like sandy crumbs.


Prepare the feijoas by peeling and slicing into bite sized pieces - I used about 8 good sized feijoas. Sprinkle the fruit with 2 tablespoons of white sugar and 1 teaspoon of mixed spice. The sugar will sweeten the fruit and stop it from discolouring. 

Place the fruit into an oven proof dish and top with enough crumble mixture to form a generous coating. Any left over crumble mix can be frozen for later use. It doesn't require thawing so can be used as a quick and tasty dessert solution. 

Bake in a hot oven - about 190deg. C - until it starts to turn golden and the fruit is bubbling at the sides of the dish.

We served ours with Deep South ice cream.

If feijoas are not your thing than any combination of apples, pears and a sprinkling of frozen berry fruit is equally delicious. Any left over fruit crumble can be stored in the fridge and reheated later. I ate the left over Feijoa Crumble for breakfast this morning. It was delicious!
Happy cooking!

Thursday, 25 April 2013

Lovely Quince Cake

 Today we had a lovely morning tea catch-up with some friends on their lifestyle block. They have an amazing and lovely array of fruit trees, and a fabulous outlook on the country side. Weighed down with feijoas and quinces, and a huge and impressive pumpkin, we headed back to the city dreaming of all the possible recipes to make.


While the man of the house can take or leave them, Little Miss 4 and I love feijoas. We have already eaten several, raw of course, so I turned my attention to the quinces. This humble and, some might say, old fashioned fruit is traditionally made into jelly. It's a very firm fruit that requires long slow cooking. Straight from the tree they are covered in a fine furry coating. If your planning to eat the flesh of the fruit, then its a good idea to peel off the tough skin and roast the fruit with sugar and a little water. 

Given the quinces really firm density, I thought it might try baking them in a cake. I considered using the feijoas, but given their high moisture content I decided that more thought needed to be given to their cake formulation. With friends coming for tea, and the need for speed, I pulled out my trusty Carrot Cake recipe and simply substituted the quince for the carrot.

Quince Cake

2 cups caster sugar
4 eggs
1 1/2 cups oil - I used rice bran oil

Beat the eggs and sugar until light, fluffy and doubled in volume. Fold in the oil.


Add 3 cups of washed, peeled and grated quince flesh and 3/4 cup of sultanas.
Sift together: 2 heaped cups of plain flour, 2 teaspoons baking soda, 2 teaspoons cinnamon, 1 teaspoon mixed spice and 1 teaspoon salt.


Gently fold the flour mixture into the wet mixture and place into a lined cake tin. The cake will rise a bit so make sure their is enough room for expansion.
Bake for 40 minutes at 180deg. C until a cake tester comes out clean.


I was worried the quince would be too fibrous, but it turned out really well. The quince added tartness to the cake, which mixed with the spices and sultanas was delicious. 

I served the cake with Deep South Rum and Raisin ice cream and raspberry puree made from heating frozen raspberries and a little icing sugar.

Wednesday, 24 April 2013

Matching knitted Striped Beanie

 It's hard to stay grumpy for too long when your this cute.

 And when you have just got a pretty new hat to wear to Preschool.

I have made a cute little striped hat to match the Debbie Bliss Cardigan I just finished knitting for Little Miss Four. Made with 12 ply 100% wool it's a quick easy knit you can customise with your own unique combination of colours. Little Miss Four is a little string bean, so if your hat wearer is more bonny, then assume that this size will fit a 2 to 4 year old. There is plenty of stretching room in this design. However, if you want to increase the size just add extra stitches in multiples of 10, and increase the length of the sides of the hat before starting the decrease rows.

Start off by casting 80 stitches onto size 4mm knitting needles. Rib Knit 1 (K1) Purl 1 (P1) for 8 rows, ending with a right side row.
Change to 5mm needles and work 6 rows of stocking stitch (stst) (that's 1 row knit, then 1 row purl repeated) ending with the right side facing.

Join on your first colour - in this case pale blue - work 2 rows stst. Pick up the main colour again, break off the pale blue, and work 2 rows of the main colour in stst.

Join on the 2nd colour - in this case purple - work 2 rows stst. Pick the main colour and work 2 rows stst. Leave the purple yarn attached as this colour is repeated.

Join on the 3rd colour - in this case dark pink - work 2 rows stst. Pick up the pain colour again. Break off the dark pink. Work 2 rows stst in the main colour.

Pick up the 2nd colour - purple - and work another 2 rows stst. Break off the purple yarn, pick up the main colour again. The right side should be facing and the hat should measure 11.5cm from the beginning.

Begin the decrease rows:
First decrease row: K8, K2 together (K2tog). Repeat this sequence of 10 stitches until the end of the row.
2nd and every alternative row: purl until end.
3rd dec. row: K7, K2tog. Repeat sequence until end.
5th dec. row: K6, K2tog. Repeat.
7th dec. row: K5, K2tog. Repeat.
9th dec. row: K4, K2tog. Repeat.
11th dec. row: K3, K2tog. Repeat.
13th dec. row: K2, K2tog. Repeat.
15th dec. row: K1, K2tog. Repeat.
17th dec. row: K2 tog. Repeat.
18th row: purl.
Next row: K2tog. Repeat.
Continue to K2tog on knit rows until 3 stitches remain. Knit a cord by passing the knit stitches onto the left needle and knitting through them again. Continue to do this until the cord is the required length.

Use a wool darning needle to sew the hat together, starting from the top. Sew the ends of the contrast strips into the seam and trim off any extra wool.
Ready to wear as a matching set. Enjoy your knitting not that the cold weather is creeping in!