So excited.... Mum and I have been accepted for the Great British Craft Market! Tonight was the stall holders' meeting at The Make Cafe. The place was buzzing with enthusiastic crafty types chatting about their projects, drinking coffee and nibbling the sweet treats - thank you Kirsty, we so love the chocolate brownie!
It was lovely to meet the organising committee and all the other enthusiastic crafters. This is Hazel from Hazel Loves Design. When she is not helping to organise the craft market, Hazel is the visual design and graphic arts expert behind the Hazel Loves Design blog and it's associated publication Hazed.
It's shaping up to be a rippingly good market with over 60 top quality stands, a great venue and, best of all, no admission fee. They have also organised a 'Crafty Cash' eftpos facility to help with those spare of the moment must haves.
Hopefully the rain stops tomorrow, because I'll be out with my hammer to put the sign up!
Sunday, 19 May 2013
Wednesday, 15 May 2013
Winter Wardrobe Update - Waist band tutorial
Winter has closed in and my wardrobe selection is looking a little tired and in need of a freshen-up. We all have our favourite classic wardrobe pieces to get out again, but their comes a time to move the peripheral items on. I don't want to become one of those teachers that get stuck in the style habits of the decade that was their hay day; especially with a major zero related birthday on my horizon this year.
Every season I vow to spend more time making my own clothes; plying the trade that runs through our family tree. With just a day or two of our recent holidays left, I finally broke out the stash and sewed myself up a couple of skirts. Long days of working and generally mangy weather has meant it's taken a couple of weeks for me to photograph the finished products.
I used a very simple Butterick pattern and tartan wool fabric remnant I picked up at a stash-rehash event for the paltry sum of $12. I had envisaged cutting the front and back panels in single pieces, but the fabric was only 90cm wide, so I had to have a seam in the
centre front and centre back. Which of course meant matching the stripes in the tartan.
I fitted a 25cm invisible zip in the centre back seam and joined the side seams and centre front matching the pattern; then I over-locked all the vertical seams and one side of the waist band. Ensure the skirt fits before sewing on the waist band!
To fit the tailored waistband:
1) Pin the raw (not over-locked) edge of the waist band to the waist of the skirt. Put the pins in as shown and you will be able to sew over the top of them to ensure a neat finish.
Make sure the sewing meets at the same point on the zip, or the ends of the waistband wont meet up when the zip is closed.
Leave enough overlap at each end of the band to accommodate the seam allowance and enough band to overlap for the button - about 2cm plus 1.5cm for seam.
Remember that the overlap on a women's garment is right over left.
2) Iron the seam, then fold the band over against itself, matching the end and the edges. Sew across the end of the band as shown in the photo.
3) Sew the tab end of the band by folding over the band and matching the edges in the same way as before. Pin and sew across the end, turning 1.5cm from the edge of the band, and sewing in towards the zip. Stop sewing once you get to the band seam as shown. This forms the tab that the button hole will be sewn into.
4) Turn band in the right way making sure the corners a well turned out. Use a pin to pick out the point if required. Iron the band, turning the seam into the band and leaving the overlocked edge outside and overlapping the seam. (I didn't need to over-lock the outside edge because I cut the waistband from the selvage edge of the fabric - that's the bit that wont fray)
5) Measure and pin the waist band into place. In this case the waist band is 3cm wide. From the outside of the garment stitch along the seam of the band (where the pins are in the photo) to secure the inside edge of the band to the garment. This is called a stitch-in-the-ditch. Alternatively, the seam could be top stitched if you prefer more obvious stitching effect.
6) All sewn up. The bands should match exactly once the zip is closed. Now find a matching button from your stash and sew the button hole into one overlapping side of the band. Sew on your button.
Every season I vow to spend more time making my own clothes; plying the trade that runs through our family tree. With just a day or two of our recent holidays left, I finally broke out the stash and sewed myself up a couple of skirts. Long days of working and generally mangy weather has meant it's taken a couple of weeks for me to photograph the finished products.
I used a very simple Butterick pattern and tartan wool fabric remnant I picked up at a stash-rehash event for the paltry sum of $12. I had envisaged cutting the front and back panels in single pieces, but the fabric was only 90cm wide, so I had to have a seam in the
centre front and centre back. Which of course meant matching the stripes in the tartan.
I fitted a 25cm invisible zip in the centre back seam and joined the side seams and centre front matching the pattern; then I over-locked all the vertical seams and one side of the waist band. Ensure the skirt fits before sewing on the waist band!
1) Pin the raw (not over-locked) edge of the waist band to the waist of the skirt. Put the pins in as shown and you will be able to sew over the top of them to ensure a neat finish.
Make sure the sewing meets at the same point on the zip, or the ends of the waistband wont meet up when the zip is closed.
Leave enough overlap at each end of the band to accommodate the seam allowance and enough band to overlap for the button - about 2cm plus 1.5cm for seam.
Remember that the overlap on a women's garment is right over left.
Because this skirt is cut from the bias of the fabric - across the diagonal of the fabric - it is prone to dropping: where the fabric stretches and drops making the hem uneven. Because of this I hung it up for a couple of days before sewing the hem. I could have hand sewed it; however the quite busy pattern meant I could machine sew it 2cm from the edge of the fabric without compromising the look of the garment. Time is precious after all!
Thanks to my sister Charmaine for taking the photos
Autumn leaves, stocking, woollen layers, hearty meals and sensible shoes.
The winter season is definitely here.
Sunday, 12 May 2013
Baked Apples for Pudding on Mother's Day
What a wonderful Mother's Day! Slept in, had breakfast in bed, then headed off to visit my family for lunch. Then onto afternoon tea with four generations of our family: Little Miss 4, myself, my mother and Auntie and my Grandmother had a lovely afternoon tea catch-up. Never better than spending time with the family.
For lunch the Man-of-the-House cooked fresh tomato soup, followed by lamb chops served with glazed pumpkin, potato with butter and parsley, and honey-ginger swede. Pudding was my responsibility, so inspired by the Granny Smith apples on Mum's tree I decided to make baked stuffed apples.
Baked Stuffed Apples - based on my vague recollection of a Peter Gordon Recipe
9 cooking apples
1 cup rolled oats
3 tablespoons honey
75g butter + 2 tablespoons extra
1 teaspoon ground cinnamon
a couple of handfuls of raisins
Gather your apples and wash and dry them. Preheat the oven to 175deg. C.
Melt the first measure of butter in a frying pan and add the oats. Gently fry until they start to crisp. Add the honey and cinnamon and stir until the honey melts and is blended with the oats. Lastly stir in the raisins.
Take from the heat and set aside to cool a bit.
Core the apples using a standard coring devise and peel the top half of the skin from each apple.
As each apple is cored and peeled, stuff it with the oat mixture and brush the extra measure of melted butter - by doing this immediately it prevents the apples from oxidising and turning brown.
Place the stuffed apples into a large shallow baking dish and bake for about 40 minutes until they have become soft and pulpy inside. If the raisins in the filling start to burn, then cover each apple's filling with a small cooking foil 'hat'.

Serve your baked apples with ice cream or custard.
Happy Mother's Day!
For lunch the Man-of-the-House cooked fresh tomato soup, followed by lamb chops served with glazed pumpkin, potato with butter and parsley, and honey-ginger swede. Pudding was my responsibility, so inspired by the Granny Smith apples on Mum's tree I decided to make baked stuffed apples.
Baked Stuffed Apples - based on my vague recollection of a Peter Gordon Recipe
1 cup rolled oats
3 tablespoons honey
75g butter + 2 tablespoons extra
1 teaspoon ground cinnamon
a couple of handfuls of raisins
Gather your apples and wash and dry them. Preheat the oven to 175deg. C.
Melt the first measure of butter in a frying pan and add the oats. Gently fry until they start to crisp. Add the honey and cinnamon and stir until the honey melts and is blended with the oats. Lastly stir in the raisins.
Take from the heat and set aside to cool a bit.
Core the apples using a standard coring devise and peel the top half of the skin from each apple.
As each apple is cored and peeled, stuff it with the oat mixture and brush the extra measure of melted butter - by doing this immediately it prevents the apples from oxidising and turning brown.
Place the stuffed apples into a large shallow baking dish and bake for about 40 minutes until they have become soft and pulpy inside. If the raisins in the filling start to burn, then cover each apple's filling with a small cooking foil 'hat'.
Serve your baked apples with ice cream or custard.
Happy Mother's Day!
Saturday, 11 May 2013
A Baked Fruit Pudding with Friends
Baked Fruit Pudding
1 small cup plain flour
3/4 cup brown sugar
2 - 3 cups dried fruit - I used golden sultanas, cranberries, standard sultanas and crystallised ginger
3 tablespoons butter
1 small cup milk
1 teaspoon baking soda
Pre-heat the oven to 175deg. C.
Mix the dry ingredients and fruit. Warm the milk and melt the butter. If you do this together ensure the mixture is not too hat as you don't want to cook the flour before it goes in the oven. Add the soda to the milk and butter and stir. It will froth up a bit. Mix the milky mixture into the dry ingredients and fruit and pour into a shallow, greased oven dish.
Bake for 30 to 40 minutes until the centre bounces back when pressed and the pudding is golden brown.
We served it with whipped cream and custard. Ice cream is also a good accompaniment.
It was great to catch up with friends and watch our daughters playing. Two little blue ballerina's having a ball! They couldn't have been happier!
Wednesday, 8 May 2013
At last, a great Feijoa Cake!
I'm the first to admit that sometimes a recipe just doesn't turn out the way I intended. My first attempt at formulating a feijoa cake wasn't much to write home. Despite the kind and forgiving assurances of my friends, I just knew I wasn't going to be making that one again. And so, after a little digging in the recipe archive - an old folder I've had since I was a teenager, I found an old apple cake recipe I could convert. I added crystallised ginger for a little zing and walnuts for texture.
1 cup peeled and sliced feijoa
1 cup caster sugar
120g butter
1 egg
1 1/2 cups plain flour
1 teaspoon baking powder
1/2 teaspoon salt
1 teaspoon ground cinnamon
1/2 teaspoon mixed spice
1/2 cup walnuts - sliced
1/2 cup sultanas
1/4 cup crystallised ginger - finely sliced
Preheat the oven to 180deg. C and line a 20cm round, loose bottom tin with baking paper. Place the freshly peeled and sliced feijoas into a bowl and mix in the caster sugar. Leave for a few minutes, then add the melted butter and beaten egg into the feijoa mixture.
Place into the lined tin and bake for 30 to 40 minutes until a skewer inserted into the middle of the cake comes out clean and the cake is beginning to brown.The cake takes some cooking as the feijoas make it quite a wet mixture.Cool in the tin, then turn out.
This cake makes a really good dessert served warm or an afternoon tea cake served cold.
Happy baking!
Sunday, 5 May 2013
Crafty Fox Cushion Tutorial
Mum and I have spent the last week or so racking our collective brains over what inspired ideas we could design and make for the British themed encraftment market. I had been thinking corgis, care of the Queen, as one of the all time British symbols, but it was Mum who suggested the fox as an interesting alternative. Now foxes are quite a trendy motif in the crafty world currently, so combining them with a useful and serviceable cushion seemed like a good idea.
The reverse side of a Fabric Vision bag provided the perfect host in producing the fox template. I Googled up some fox images as inspiration for the design and colours, drafted out the shape then added the features. I then traced the features onto separate paper to form the templates. Since I was using felt, which does not fray, I did not need to add any seam allowance to the fox's features.
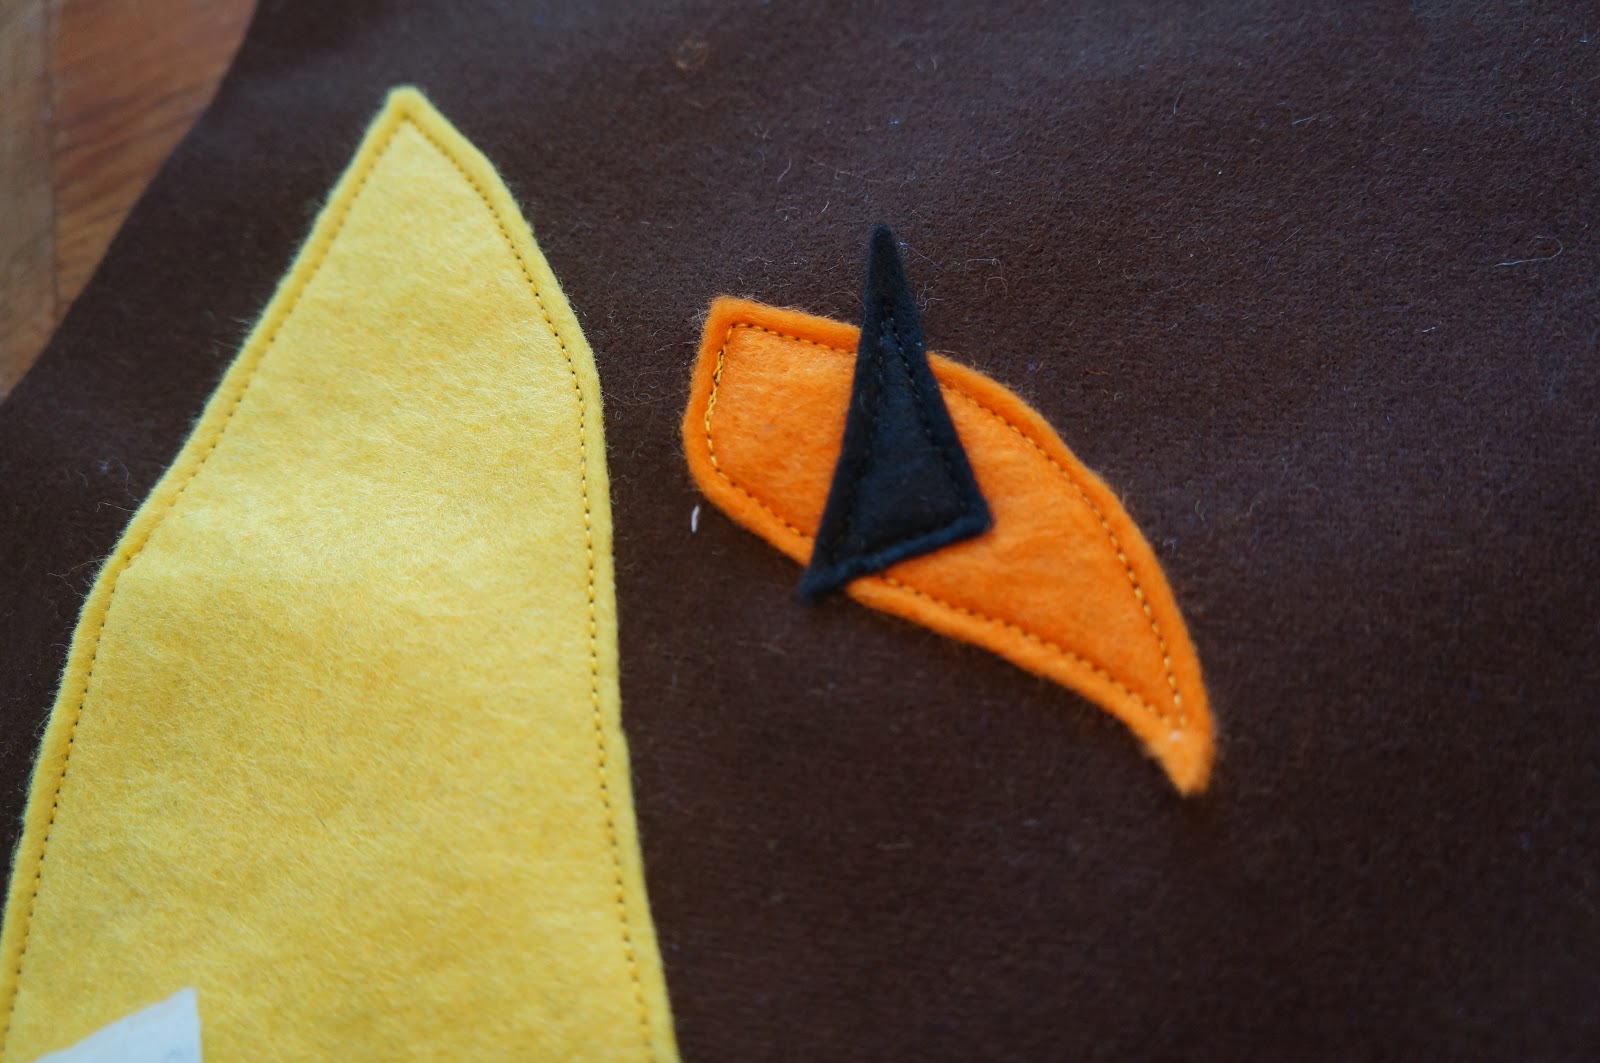
Transfer the positioning for the features from the pattern to one side of the fox head using tailors chalk. Then position and pin your felt pieces. Carefully top stitch them onto the pattern. Its a good idea not to sew over the pins when top stitching or they will leave an irregularity in the stitching. Be very careful that the felt remains in place or else it will form a pleat of bubble once you get around to the beginning of your stitching.
Put plenty of pins in and allow for the seam to be 1cm from the edge of the fabric. The join should not have any pleats or puckers.
I cut out a pair of head shapes from the wool fabric, followed by a strip of cotton fabric for the sides. The features were cut from wool felt.
Now start from somewhere on the foxes cheek and pin the strip of cotton fabric only the fox face. I cut a strip that was 7cm wide, including 1cm each side for the seams. Because the fox head is quite large I needed two widths of fabric to get all the way around. I joined one of these before I started.
When you get right around to the other side, match up the fabric strips and sew them together before beginning to sew around the outside of the cushion. I deliberately chose to start by sewing the strip onto the front of the cushion as the first side is easier to get neat.
Once the first side is done, repeat the process with the back of the cushion. Leave a 10cm gap along a straight edge of the cushion in order that it can be turned in the other way.
Overlock or zig-zag the edges to stop them from fraying.
Turn the cushion in the right way an stuff with polyester fibrefill. Although synthetic, it is the most practical filling as it doesn't absorb water and is easy to wash and dry.
Pin and then hand stitch the opening closed using a mattress stitch.
And your fox is complete and ready to roam your living room!
Since I used wool fabric, Mr Fox is best hand washed and dried flat in the shade. He can, however be made in whatever fabric takes your fancy. I am thinking of trialing a Cotton floral fox.
Thursday, 2 May 2013
Great British Encraftment Market Application
This is a story about a crafty mother and daughter who love to create beautiful things and spread their crafty goodness far and wide.
Craftiness runs in our family: but our crafty partnership started when my mother Vivienne made an apron for my sister, Charmaine Reveley, to wear while she was working in her fashion design workroom. One of Char's customers really loved the apron, and mum started making them to sell. At the same time, I started writing this blog to share craft techniques and recipes with the world and making crafty items to sell with my mother.
I took these pictures of our stand at the Riccarton Rotary Market just prior to Christmas last year. We really enjoyed the market vibe: meeting people and talking about their craft interests.
Vivienne makes aprons from lovely 100% cotton fabrics. They are beautiful and practical, and designed to be easily worn and washed. The patterns and fabrics used change all the time as new and interesting ones come along.
Prudence makes 100% NZ wool crocheted blankets, homespun and dyed wool, NZ wool knitted hats, 100% cotton floral rats, bunting, assorted 100% cotton cushions, crocheted balls and cute little floral and ribbon clutch bags, pencil and knitting bags.
Here are our British inspired craft items: we have really enjoyed designing and creating them, and we hope you love them as much as we do!
This is a crafty Fox cushion. Its made of 100% wool fabric, felt and 100% cotton fabric around the outside.
This is a 100% New Zealand wool hand knitted crown hat. It will be made in a variety of colours for girls and boys.
This is a multi purpose Union Jack clutch bag. It's made of 100% cotton craft fabric and ribbons. The inside is lined and the seams bound. The bags will be made in a variety of colour ways and variations.
These cushions are awesome! They are made from 100% cotton fabric, with a zip closure for easy laundering. The back is a plain matching blue/beige colour.
This is just one of the apron ideas Vivienne has developed for the British theme. It is made from 100% cotton and binding, and has a pocket for all those important things like hankies, safety pins and clothes pegs, and the strap at the top is adjustable for people of different heights.
Thanks so much for considering our application for the Great British Encraftment Market. We are super keen to be part of the craft market family!
Craftiness runs in our family: but our crafty partnership started when my mother Vivienne made an apron for my sister, Charmaine Reveley, to wear while she was working in her fashion design workroom. One of Char's customers really loved the apron, and mum started making them to sell. At the same time, I started writing this blog to share craft techniques and recipes with the world and making crafty items to sell with my mother.
I took these pictures of our stand at the Riccarton Rotary Market just prior to Christmas last year. We really enjoyed the market vibe: meeting people and talking about their craft interests.
Vivienne makes aprons from lovely 100% cotton fabrics. They are beautiful and practical, and designed to be easily worn and washed. The patterns and fabrics used change all the time as new and interesting ones come along.
| Crafty Little Rats |
| Crochet Balls |
We are passionate about using natural fibres and New Zealand wool. The resurgence in craft related pursuits is wonderful and reflects a cultural shift towards choosing handmade over mass produced.
Here are our British inspired craft items: we have really enjoyed designing and creating them, and we hope you love them as much as we do!
This is a crafty Fox cushion. Its made of 100% wool fabric, felt and 100% cotton fabric around the outside.
This is a 100% New Zealand wool hand knitted crown hat. It will be made in a variety of colours for girls and boys.
This is a multi purpose Union Jack clutch bag. It's made of 100% cotton craft fabric and ribbons. The inside is lined and the seams bound. The bags will be made in a variety of colour ways and variations.
These cushions are awesome! They are made from 100% cotton fabric, with a zip closure for easy laundering. The back is a plain matching blue/beige colour.
This is just one of the apron ideas Vivienne has developed for the British theme. It is made from 100% cotton and binding, and has a pocket for all those important things like hankies, safety pins and clothes pegs, and the strap at the top is adjustable for people of different heights.
Thanks so much for considering our application for the Great British Encraftment Market. We are super keen to be part of the craft market family!
Subscribe to:
Posts (Atom)