Thursday, 13 June 2013

My Mother's Recipe for Date Chocolate Slice

This is my mother's recipe for Date Chocolate slice. It's actually the first time I have ever made it because we usually eat it when we visit our family on the farm. A market goer that Mum knows liked it so much he requested the recipe. 

One of the great advantages of blogging recipes is their availability - they are always there to be looked up whenever and wherever required, and sharing them with friends is as easy as giving out a web address or looking up a facebook page. 

I am not sure of the origin of the recipe, as Mum has been making it for years.


Little Miss 4 helped me with baking the square. The picture doesn't do justice to the actual amount of flour spread around the kitchen! 

Date Chocolate Square

Filling:
3/4 cup dates
1/2 cup water
1 tablespoon cocoa
1 tablespoon butter

Put into a pot and cook until thick. Stir occasionally so the dates break up and a thick paste is formed.


Cake:
4 oz butter
4 oz caster sugar
1 egg
1 1/2 cups flour
2 tablespoons custard powder
1 teaspoon baking powder
pinch salt
1 teaspoon vanilla essence

Preheat the oven to 175deg. C


Cream the butter and sugar. Add the egg and beat until light and fluffy.
Sift the dry ingredients together and fold them into the butter and sugar mixture.


Roll the mixture out between two pieces of baking paper - it is too delicate to roll directly onto the bench and the baking paper makes it easier to get onto the baking tray.


Spread the date mixture onto half of the rolled cake mixture and fold the remaining half over by lifting the paper to enclose the filling.


Bake for 20 to 25 minutes until the top starts to turn a golden colour.


Ice with the following once cold:

1 tablespoon butter melted
the juice of a lemon
approximately 1 to 1 1/2 cups icing sugar
Blend the icing together. Add a little water if it is too dry.


Slice the square up as required to prevent the cake from drying out before it is served.

Happy caking!


Monday, 10 June 2013

Baked New York Style Cheesecake

While I should have been baking sensible lunch box related treats, winter weather just kept  bringing the idea of baked cheese cake into view. As you can tell, I love cheese cake. It's probably my favourite sweet treat. 

Having not made a baked cheese cake in years, I didn't even know where to start looking for a recipe. So, after a quick book shelf scout around I adapted this one from a recipe in a little book simply entitled Sweet Food. 

The original recipe had a sour cream topping, but preferring the classic New York style, I left it off and also substituted the plain biscuit base for a spicy Gingernut option.
It's super easy to make. The hardest part is getting the baking time correct.

New York Style Baked Cheesecake

250g gingernut biscuits - crushed
1 teaspoon ground mixed spice
100g butter - melted

500g cream cheese, at room temperature - don't use the low fat version, it wont work for you.
3/4 cup caster sugar
4 eggs
1 teaspoon vanilla essence
the juice of one lemon
the zest of two lemons

Line the sides of a 20 to 25cm loose bottom baking tin with baking paper. Pre-heat the oven to 175deg. C.


Finely crush the biscuits and blend with the spice and melted butter. Press the biscuit mixture into the base and sides of the lined tin. Cover and chill while you make the filling.


Beat the cream cheese and sugar until smooth and glossy. Add the eggs, one at a time, beating after each addition. Mix in the vanilla, zest and juice. 


Pour the mixture into the crumb base and bake for 50 minutes until the mixture has risen a little, is firm, but still has a wobble in the middle. Turn the oven off, open the door and leave the cheesecake in the oven to cool for about an hour. 

Take from the oven and allow to cool completely before covering with food wrap and refrigerating overnight. 


Once chilled, unveil by standing the baking tin on a large glass or mug and pulling the sides of the tin down to release the cake. Carefully peel off the paper and loose the bottom using a spatula. Slide the cake onto a serving platter. 


Cut using a large knife - cleaning the knife in between each cut in order to keep the slices neat. Serve with a little whipped cream and whatever fruit you have handy. 

Surprisingly easy to make, this cheesecake is always a crowd pleaser. 

Child's Travelling Art Set

Little Miss 4 just loves a birthday party - her buddies, the cake, dressing up in a pretty dress to 'look flash', playing games, singing happy birthday, and giving her precious little friends a birthday gift. She just loves choosing the present. This time around we decided to make something clever and useful for the birthday boy. 

I borrowed the basics of this idea from a design I saw at the craft market. LM4 was given a similar type of thing with a folded black board sheet and chalk; she loves it and we have used it many times as a travelling source of amusement when we go on plane trips or out to restaurants.

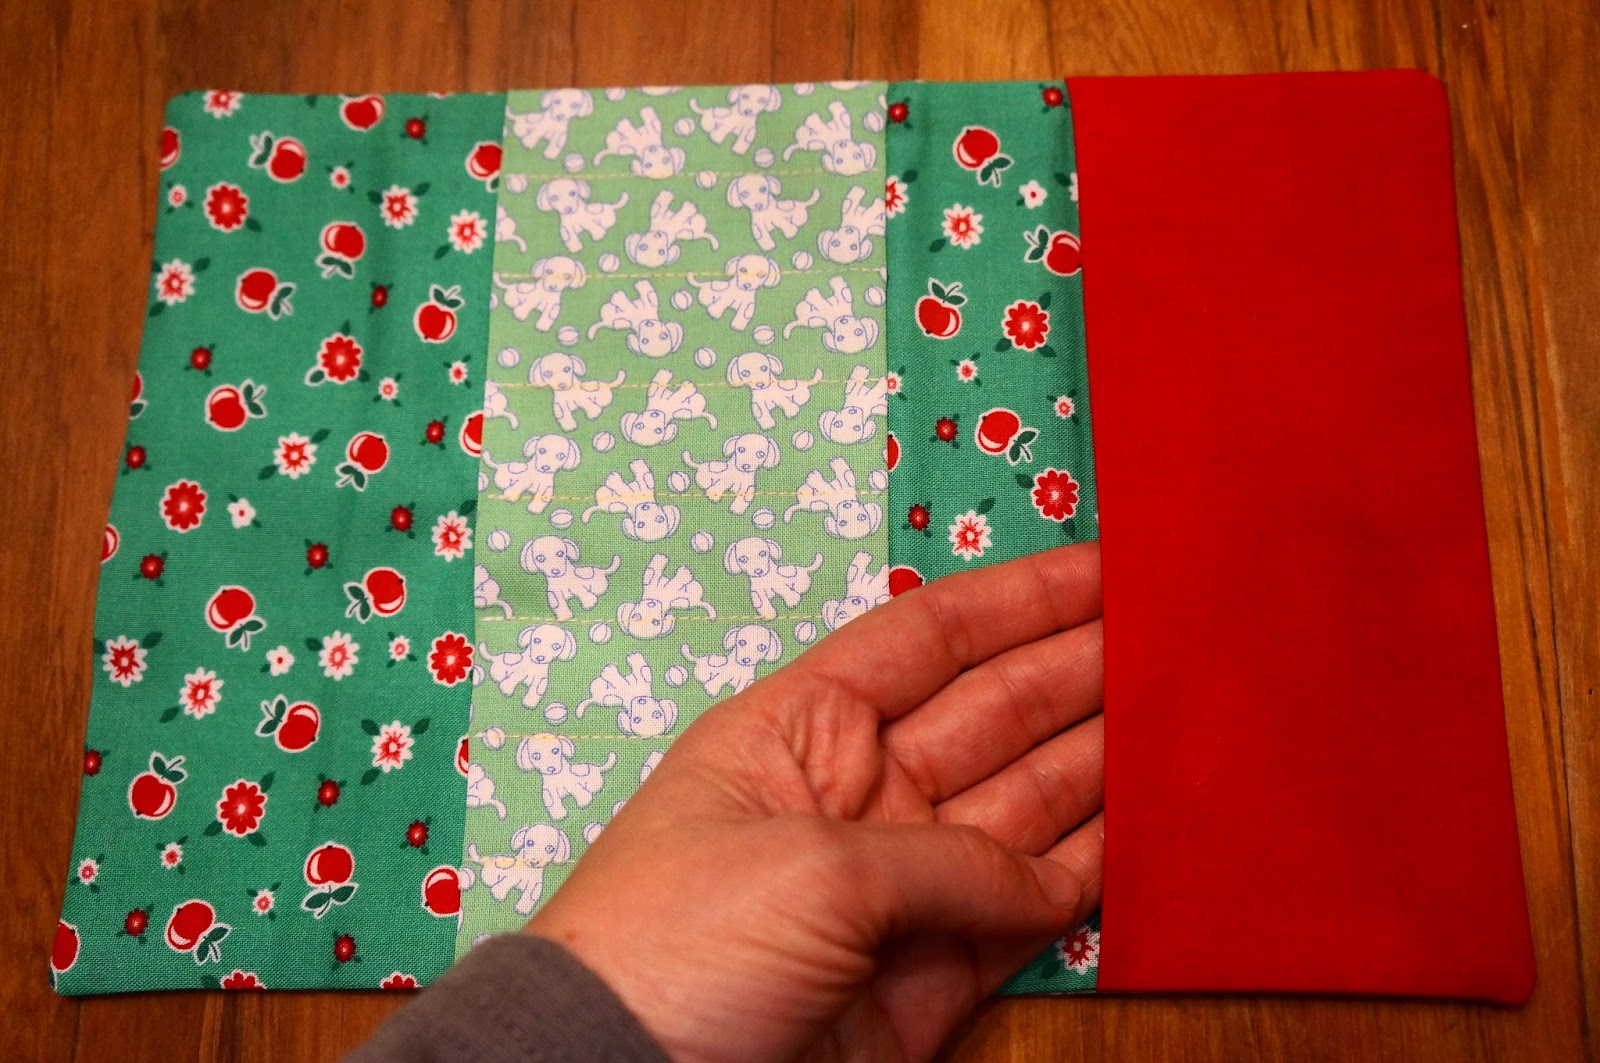
I wanted the art set to be cute, portable and practical. I started by raiding the stash for some boy fabric. Having realised just how much pink flavoured fabric I have in reserve, I found some cute little puppy's, nice red apples and plain red fabric for one of the inside pockets.

 I started by drafting out a simple pattern for the outside shell, and two identical inside pockets big enough to hold a simple paper pad and some little pencils.
Decide on where the folds are going to be and mark with a pencil line. I allowed 1 cm for seams.


Cut out two body panels, two pockets and one body panel from thin fusible quilters batting. Mark the fold lines with a notch so you know where to position the pockets.


Fold the pocket panels in half and iron flat. For the middle pocket - line the pocket seam line up with the notch marks in the inside body panel. 


Sew the pocket on using a straight stitch. I zig zagged the raw edge first to stop it from fraying when the pencils are put in their little pockets.
Fold the pocket up to enclose the seam. Iron in place.


Position the second folded pocket at the bottom of the case and line it up with the edge of the body panel. Sew around the outside using an 8mm seam.


I divided the first pocket into 8 little pencil pockets. I divided the width, less 2 cm for seams into 8 and measured and marked the pockets with tailor's chalk. Sew each line, and back stitch at each end so they don't come undone.


Layer the outside body panel on top of the batting. Lay the inside body panel over the top of the outside panel with the right side together. Pin around the outside and sew using a 1 cm seam. Leave an opening in the centre of one end in order to turn the case in the right way. 


Clip some of the seam allowance from the corners and turn the case in the right way. Push the corners out so they make a nice neat edge. Iron the case.


Using a needle and thread sew the opening closed using a mattress stitch so it cannot be seen.


At this stage I put the pencils, pad and sharpener into the case to test where to put the button holes and buttons. 


I trialed the button hole on a bit of spare fabric and batting before measuring and sewing the button holes into the bag.
After extensive consultation with LM4 about which button would be the best choice: 
"Boys don't usually pink flowers on their art sets"
We decided on the bells instead of buttons. 

All done and ready for a new home.


Our favourite little Huggle-monster trying out his new art set on his third birthday! 
Happy Birthday Little Mister 3!

Monday, 3 June 2013

Absolutely Delicious Ginger Cake Recipe

I feel I've been cheated out of this lovely long weekend. While I should have been caking and crafting my weekend away, instead I've been coughing and sniffing, and residing on the couch for most of the time. 
While most people will tell you to lie back and relax through the germ invasion, I've got things to do, cakes to make, garments to sew and knitting to stitch. 

Little Miss 4 was all ready to do some baking this morning. She had all the basics out of the pantry, the old Edmond's Cook Book out of the drawer, her 'proper stool' all set up, apron on and hands washed. Trouble was I felt so rubbish that finding the caster sugar on the bottom shelf sent me back to the couch. Anyway, after a day of rest and telling myself I was well again, we started our baking project after tea. Nothing like baking in your PJ's.  


We randomly chose this recipe and it is absolutely delicious. Typically I recombined and tweaked a couple of things, and the result was excellent.

Ginger Cake with Ginger Whisky Icing
120g butter
120g sugar
3 tablespoons golden syrup
2 eggs
240g flour
1 teaspoon baking powder
1 teaspoon ground ginger
1 teaspoon all spice
1/2 cup crystallised ginger - chopped
1/2 cup walnuts - chopped
1/2 cup raisins

1 teaspoon baking soda
1/2 cup milk- warmed

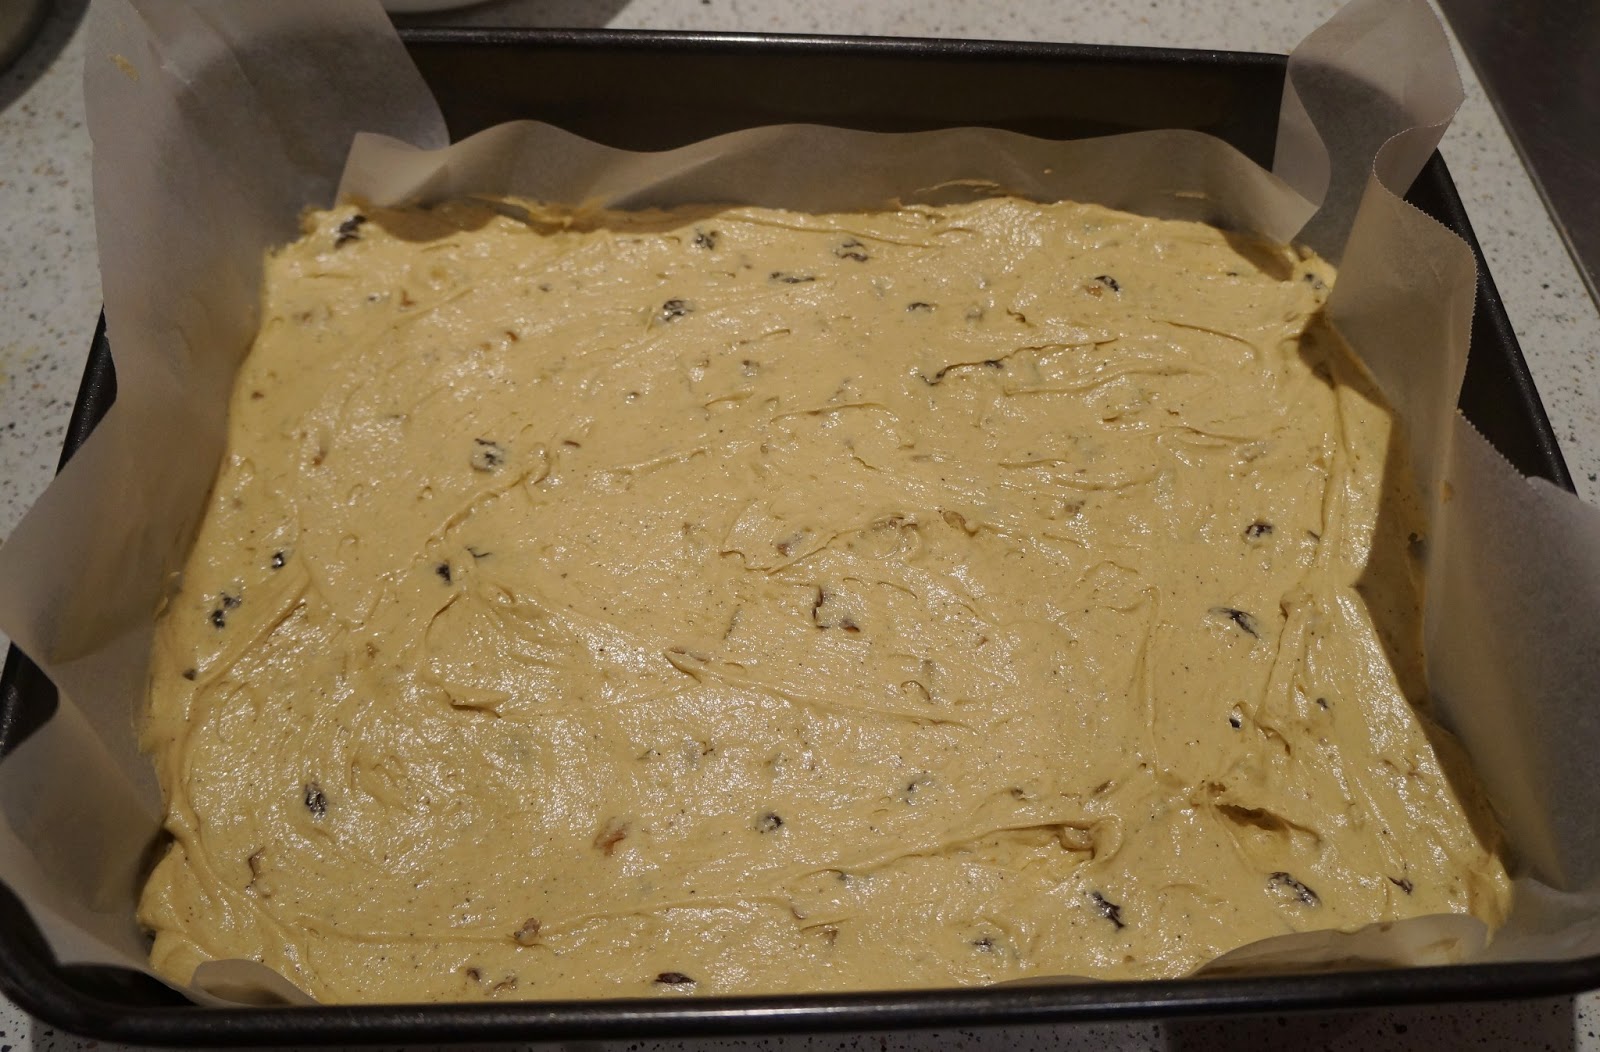
Preheat the oven to 175deg. C. Line a 22 x 30 cm baking tin with baking paper.


Cream the butter, sugar and golden syrup together until pale, light and fluffy. Beat the eggs into the butter mix, half at a time.


Fold in the sifted flour, baking powder and spices until partly combined.


Mix the milk with the soda and fold into the mixture a third at a time. Lastly, fold in the fruit and nuts.


Pour into the baking tin and spread into the corners. Bake for 20 to 25 minutes until golden and well risen. A cake tester inserted into the centre should come out clean. 


Whisky Spiked Ginger Icing

While the cake is cooking, mix up the icing:
Combine 2 tablespoons butter, 4 tablespoons icing sugar, 2 teaspoons golden syrup and 1 teaspoon ground ginger in a small saucepan. 


Melt the icing then take from the heat and whisk until it forms a smooth paste. 


While the icing is hot add about a tablespoon of whisky. I used a single malt Glenmorangie; nothing smoky or it will ruin the taste. 

The heat of the icing evaporates the alcohol content, making it fine for everyone to eat.


Spread the icing over the hot cake and leave to cool.


This was a delicious supper treat enjoyed with a cup of rose hip tea, and it will be a great lunch box filler for the working week.

Sunday, 2 June 2013

What a great day at the Craft Market!


What a great day at the Great British Craft Market! Loads of Christchurch craft lovers enjoying all the creative stalls, food, coffee, music and happy atmosphere on offer.  Thanks so much to the Encraftment team: Kirsten from The Make Cafe, Bronwyn from Baby Bird and Hazel from Hazel Loves Design, for organising such a successful market.


Thanks to all out friends who came along. It was lovely to see you all, and I hope you enjoyed the market as much as we did.

The Great British theme was everywhere. All the small children loved the woollen Fox Cushions!
I still have a couple left if you would like to give a crafty fox a home.


Vintage was the favoured style of apron on Market Day. I'm sure you will all be cooking up a storm in your new pinnys.

As you can see by my depleted tree, little sprout hats were definitely a hot favourite. There is nothing better than seeing a happy little face in their new cosy hand-knitted wool hat. I love making these, so it's always a pleasure to see them go to new homes and know they are keeping little people warm.
So many thanks again. Mum and I had a great day meeting all you craft loving people.