I borrowed the basics of this idea from a design I saw at the craft market. LM4 was given a similar type of thing with a folded black board sheet and chalk; she loves it and we have used it many times as a travelling source of amusement when we go on plane trips or out to restaurants.
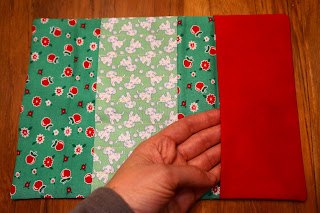
I wanted the art set to be cute, portable and practical. I started by raiding the stash for some boy fabric. Having realised just how much pink flavoured fabric I have in reserve, I found some cute little puppy's, nice red apples and plain red fabric for one of the inside pockets.
I started by drafting out a simple pattern for the outside shell, and two identical inside pockets big enough to hold a simple paper pad and some little pencils.
Decide on where the folds are going to be and mark with a pencil line. I allowed 1 cm for seams.
 Cut out two body panels, two pockets and one body panel from thin fusible quilters batting. Mark the fold lines with a notch so you know where to position the pockets.
 Fold the pocket panels in half and iron flat. For the middle pocket - line the pocket seam line up with the notch marks in the inside body panel.
  Sew the pocket on using a straight stitch. I zig zagged the raw edge first to stop it from fraying when the pencils are put in their little pockets.
Fold the pocket up to enclose the seam. Iron in place.
 Position the second folded pocket at the bottom of the case and line it up with the edge of the body panel. Sew around the outside using an 8mm seam.
I divided the first pocket into 8 little pencil pockets. I divided the width, less 2 cm for seams into 8 and measured and marked the pockets with tailor's chalk. Sew each line, and back stitch at each end so they don't come undone.
 Layer the outside body panel on top of the batting. Lay the inside body panel over the top of the outside panel with the right side together. Pin around the outside and sew using a 1 cm seam. Leave an opening in the centre of one end in order to turn the case in the right way.
 Clip some of the seam allowance from the corners and turn the case in the right way. Push the corners out so they make a nice neat edge. Iron the case.
 Using a needle and thread sew the opening closed using a mattress stitch so it cannot be seen.
 At this stage I put the pencils, pad and sharpener into the case to test where to put the button holes and buttons.
 I trialed the button hole on a bit of spare fabric and batting before measuring and sewing the button holes into the bag.
After extensive consultation with LM4 about which button would be the best choice:
"Boys don't usually pink flowers on their art sets"
We decided on the bells instead of buttons.
All done and ready for a new home.
Our favourite little Huggle-monster trying out his new art set on his third birthday!
Happy Birthday Little Mister 3!


No comments:
Post a Comment