With the first day of December tomorrow, I've been feeling a little festive. Not so much that I might get carried away and go shopping; just enough to make some spicy, indulgent little cookies for tomorrow's work meeting.
This recipe is based on a coffee biscuit my mother often makes. I've just added some Christmas spice in the form of a little cinnamon. Nothing like a little treat to sweeten up a Monday morning.
Coffee, Walnut and Cinnamon Creams
140g butter
1/2 cup caster sugar
1 egg
3 tablespoons very strong espresso
1 teaspoon vanilla essence
2 cups plain flour
2 teaspoons baking powder
1 teaspoon ground cinnamon
about 1/2 cup chopped walnuts
1 extra beaten egg for glazing
Cream the butter and sugar until pale and fluffy. Add the egg, at room temperature, and beat until well combined.
Next add the coffee and vanilla essence.
Fold in the sifted flour, cinnamon and baking powder.
Wrap the mixture in plastic baking film and chill for about 20 minutes.
Once chilled, preheat the oven to 180deg. C.
Take from the fridge and place between two sheets of plastic wrap.
Roll out until the mixture is about half a centimetre thick.
Remove the top layer of plastic wrap, then using a cookie cutter, stamp out a row of biscuits.
Transfer them to a lined tray by removing the surrounding mixture, then lifting the bottom layer of plastic and peeling off the biscuit shapes before placing them onto the waiting tray.
Gather up all the scraps and re-roll and repeat the biscuit cutting until all the mixture is used.
Using a pastry brush, glaze the top of the uncooked biscuits with the extra beaten egg.

Sprinkle on the chopped walnuts and bake for 10 minutes.
 While the biscuits are baking prepare the filling:
Beat together 120g butter, 1 cup icing sugar, 3 tablespoons very strong espresso, and 1 teaspoon vanilla essence until light and fluffy.
Set aside until the biscuits are completely cooled.
Place a teaspoon of filling onto half the biscuits and sandwich them together into pairs.
The recipe makes about 24 depending on the size of the cutter.
Time to start humming those Christmas Carols....
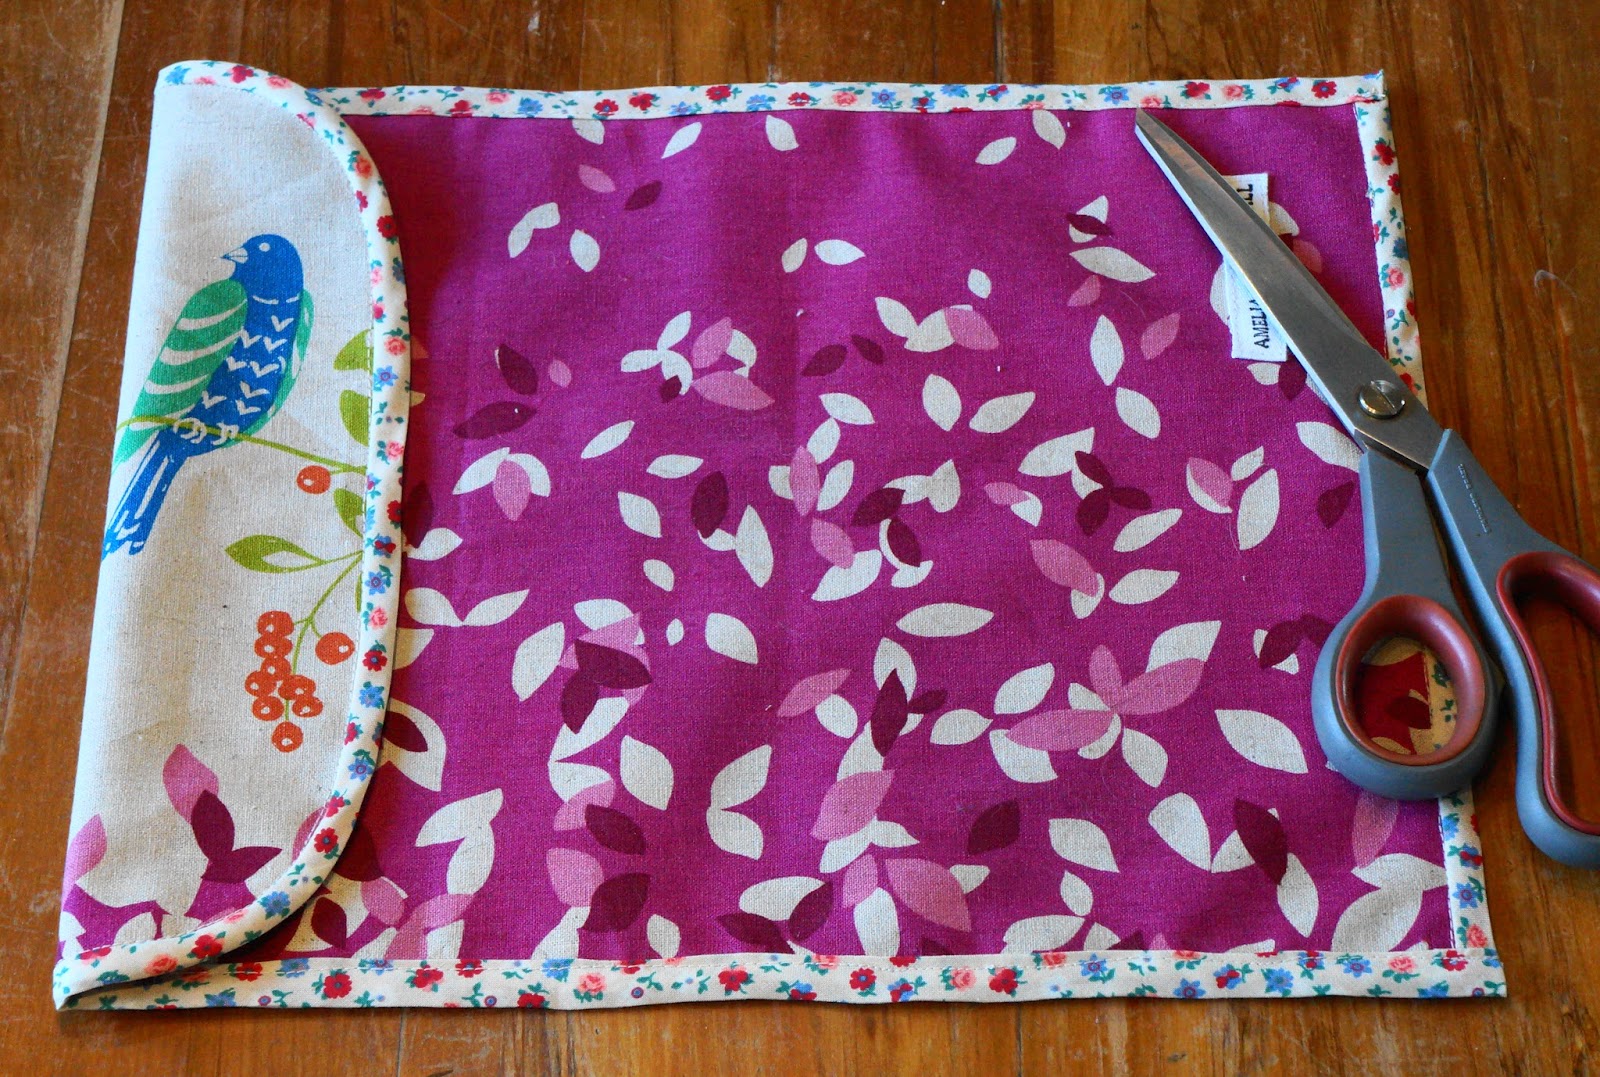
The crafty side of this blog has been rather silent for quite some time. An unfortunate side affect of being way too busy at work. This is a project I've had in the back ground for a while. Little Miss chose the main fabric from the bargain bin at Bolt of Cloth and the lining came from a competition I won from Debs at Works in Progress.
Her old reading bag was getting really tatty with the lining all cracked and breaking off in pieces. I got the cute bias binding from Fabric Vision. The mix of colours in the floral binding goes with almost everything, so I find myself using it as a trim on all sorts of projects.
To make this bag all you need is 2 fat quarters of fabric, some paper to draw out your rectangles for the pattern, about 1.7m of bias binding, a couple of centimetres of Velcro, and some matching thread.
Here is the pattern I drew out. The dimensions are not crucial.
This one is 32.5cm x 27.5cm for the smaller inside of the bag, and 41cm x 27.5cm for the larger side with the flap.
Just draw out your rectangles, then round off the corners of the fold over flap. The flap measures 8.5cm from the fold line.
The pieces fit neatly onto a standard fat quarter. I positioned these in order to make the most of the birds.
Fat quarters are available at almost all fabric stores, but they are the speciality of the patchwork and quilting set. They are usually 50 x 56cm square.
Cut one set of the pattern from the main fabric and one from the lining.
Start by sewing the matching fabric panels to each other using a half cm seam.
This will stop them from moving around later.
Next pin and sew the bias binding onto the opening of the smaller inside panel.
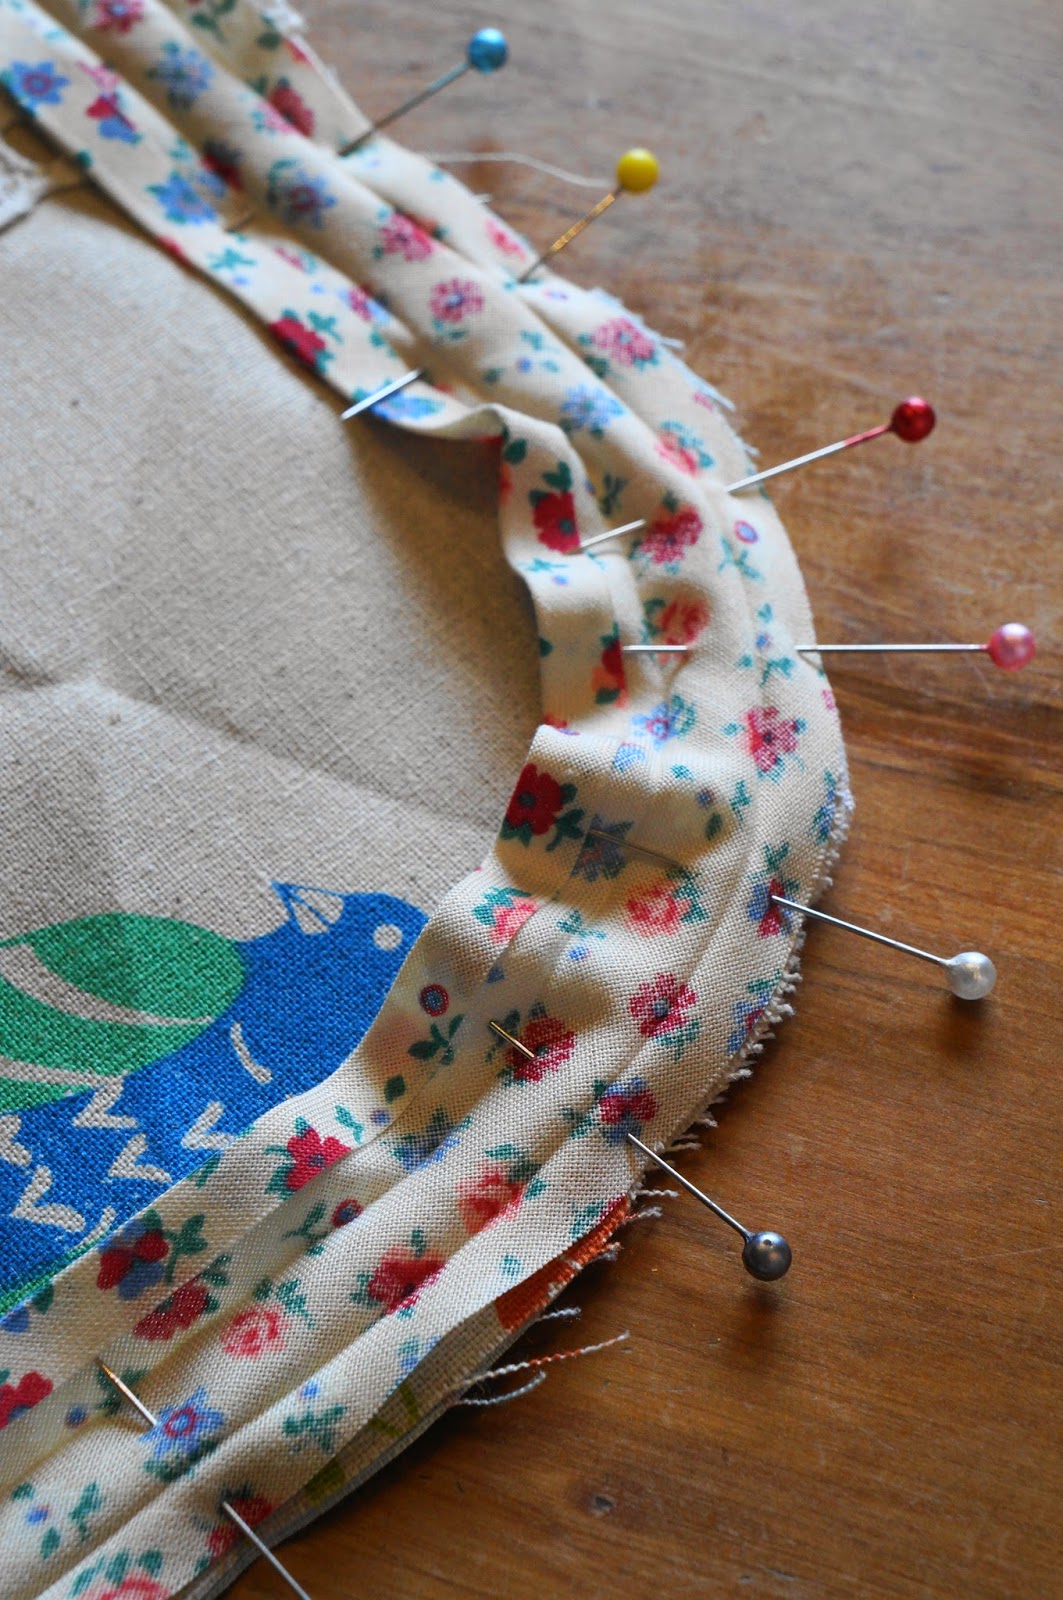
Open out the bias binding and making sure the longest edge will end up at the back of the seam, sew along the fold of the binding.
Trim the fabric a little, then fold the bias over the edge of the seam.
The un-sewn edge of the bias should overlap the first row of stitching so that it will be caught by the final row of stitching.
With the top side of the fabric facing upwards, 'stitch in the ditch' beside the binding. This will sew the fabric onto the overlap from the binding: thus leaving the outside of the binding perfectly neat.
Now sew on any extra trim you might want to add. Little Miss wanted an extra row of lace on the outside of her bag. I just sewed a row of straight stitch along each side of the lace to attach it.
Now pin both panels of the bag together and pin another row of bias binding along the bottom edge of the bag.
Sew as before. The bias will cover the raw edges and attach the front and back together.
I sewed a cloth name label onto the panel before pinning them together.
With the bottom edge sewn, pin the bias binding around the remainder of the bag.
Leave extra bias on the ends.

Sew the bias as before, taking care to ease it neatly around the corners.
Neaten the ends by folding and tucking in the extra overlap of bias binding before making the final row of stitching.
 Check the seam to see that all the overlapping bias has been caught by the 'stitch in a ditch'. If you have missed any, then just unpick the affected section and stitch again.
Nearly all done.
Now position the Velcro and top stitch into place.
Sew the teeth to the flap, and the fluff to the bag panel.
I sew the teeth in first, then fold over the flap in order to correctly position the fluffy section.
Despite being tired and as grumpy as a bear, she was quite happy to try out her new school reading bag with a bit of poetry reading at bed time.
For me it's always a privilege to work with the students in my classes over the course of the school year. The highs, the lows, the dramas, the laughs, the groans, and everything else in between. Of all the many things about our school that I value, and there are many, it's the ability and freedom each girls has to just be who they are that I value most of all. This recipe come from one of these fabulous young things. While the other girls were cooking Chicken Cordon Bleu and Chocolate Mousse, Sabrina would be doing her own thing, making all these interesting and delicious vegetarian and vegan recipes.
I was particularly taken by these Chickpea and Chocolate Chip Cookies. They are full of healthy goodness with just enough Chocolate to keep even the most conservative eater happy. They are also gluten and refined sugar free and the ingredients can be varied according to what's available and what you might feel like on the day. I didn't have any almond butter, so I substituted Coconut oil instead, but peanut butter or any other nut butter is just as good.
Sabrina's Chickpea and Chocolate Chip Cookies.
1 390g can of chickpeas, drained and rinsed
4 tablespoons almond milk
1/2 teaspoon vanilla extract
1 tablespoon coconut oil
1 tablespoon coconut sugar
1/4 cup honey
1 egg white
1/2 cup almond flour, I used the one that contains the skins
1/2 teaspoon salt
1/2 teaspoon baking soda
1/4 to 1/2 cup chocolate chips, I only had the little ones, but Sabrina used chucks.

Preheat the oven to 180deg. C and line a baking tray with baking paper.
 In a food processor blend the chickpeas, almond milk, vanilla, coconut oil, coconut sugar and honey until smooth.
In a separate bowl beat the egg whites until they start to fluff up.
 Transfer the chickpea mixture to a large mixing bowl and fold in the egg whites, followed by the almond flour, salt and chocolate chips.
Place dessert spoon lots onto the lined baking tray leaving plenty of room in between for the cookies to spread.
Don't spread the mixture out; leave it in little spoon lots as it will settle in the oven.
Bake for 15 minutes until they start to brown around the edges. Leave them on the tray for about 15 minutes to firm up before transferring to an air-tight container for storage. The cookies have a soft texture that will appeal to young and old alike. This recipe makes around 18 large cookies. You can make them smaller, just change the cooking time down to 10 minutes.
Every year at about this time our school has a Fashion Show to showcase all the work of the Technology students. It's a great celebrate of our Faculty and school with garments made by our students, our guest retailer Where the Fox Lives, supper made by the Food students, music by the Jazz band, songs by our Pacifica group and even the staff modelling outfits. This year our Little Miss got to model a dress in the Vintage section of the show. So much excitement in our house: getting to hang out with the girls, getting hair done, all eating pizza together for tea, and dressing up and going on the stage made for some of our little girls favourite things to do. Here's what happens when you leave the camera with a 5 year old and her Villa buddies.
Someone is super excited to be waiting to go back on stage for the finale.
Its always a pleasure and an honour to work with all these great girls.
Oh what to do about Halloween? It's a bit of a dilemma in NZ. As a country we don't have a tradition of Halloween; yet our children, possibly with the aid of advertising, just can't help themselves but want to engage with it. Where else does dress ups, theatre and candy combine so beautifully?
Anyway, Little Miss really wanted to go trick or treating this year, but I just wasn't happy with going around our neighbours effectively demanding candy when no one in our street really pays any attention to Halloween. Having heard about reverse trick or treating last year, we thought we'd give it a go. Reverse trick or treating is when you go around giving the treats to your neighbours, rather than expecting to be the recipient. We're always looking for opportunities to encourage our only child's generosity, so this was the perfect scheme.
With a ghosty theme in mind, I made these Raspberry Ghost Meringues and some delicious Chocolate truffles to share with our neighbours. They are super easy to make and gluten free.
 Raspberry Ghost Meringues
4 egg whites
a pinch of cream of tartar
1 cup caster sugar
1 tablespoon cornflour
1 teaspoon raspberry extract
2 tablespoons berry jelly crystals
Preheat the oven to 120deg. C. and line a baking sheet with baking paper.
Carefully separate the eggs to avoid contaminating the whites with any egg yolk, as this would prevent the whites from foaming up as they should. Add the pinch of cream of tartar to the whites and with the whisk attachment to the beater, beat until soft peaks form. Add the caster sugar a couple of tablespoons at a time. Beat well in between each addition. The mixture will become smooth and glossy. Beat until firm peaks hold when the whisk attachment is raised from the mixture.
Add the cornflour, beating briefly and slowly until it is combined.
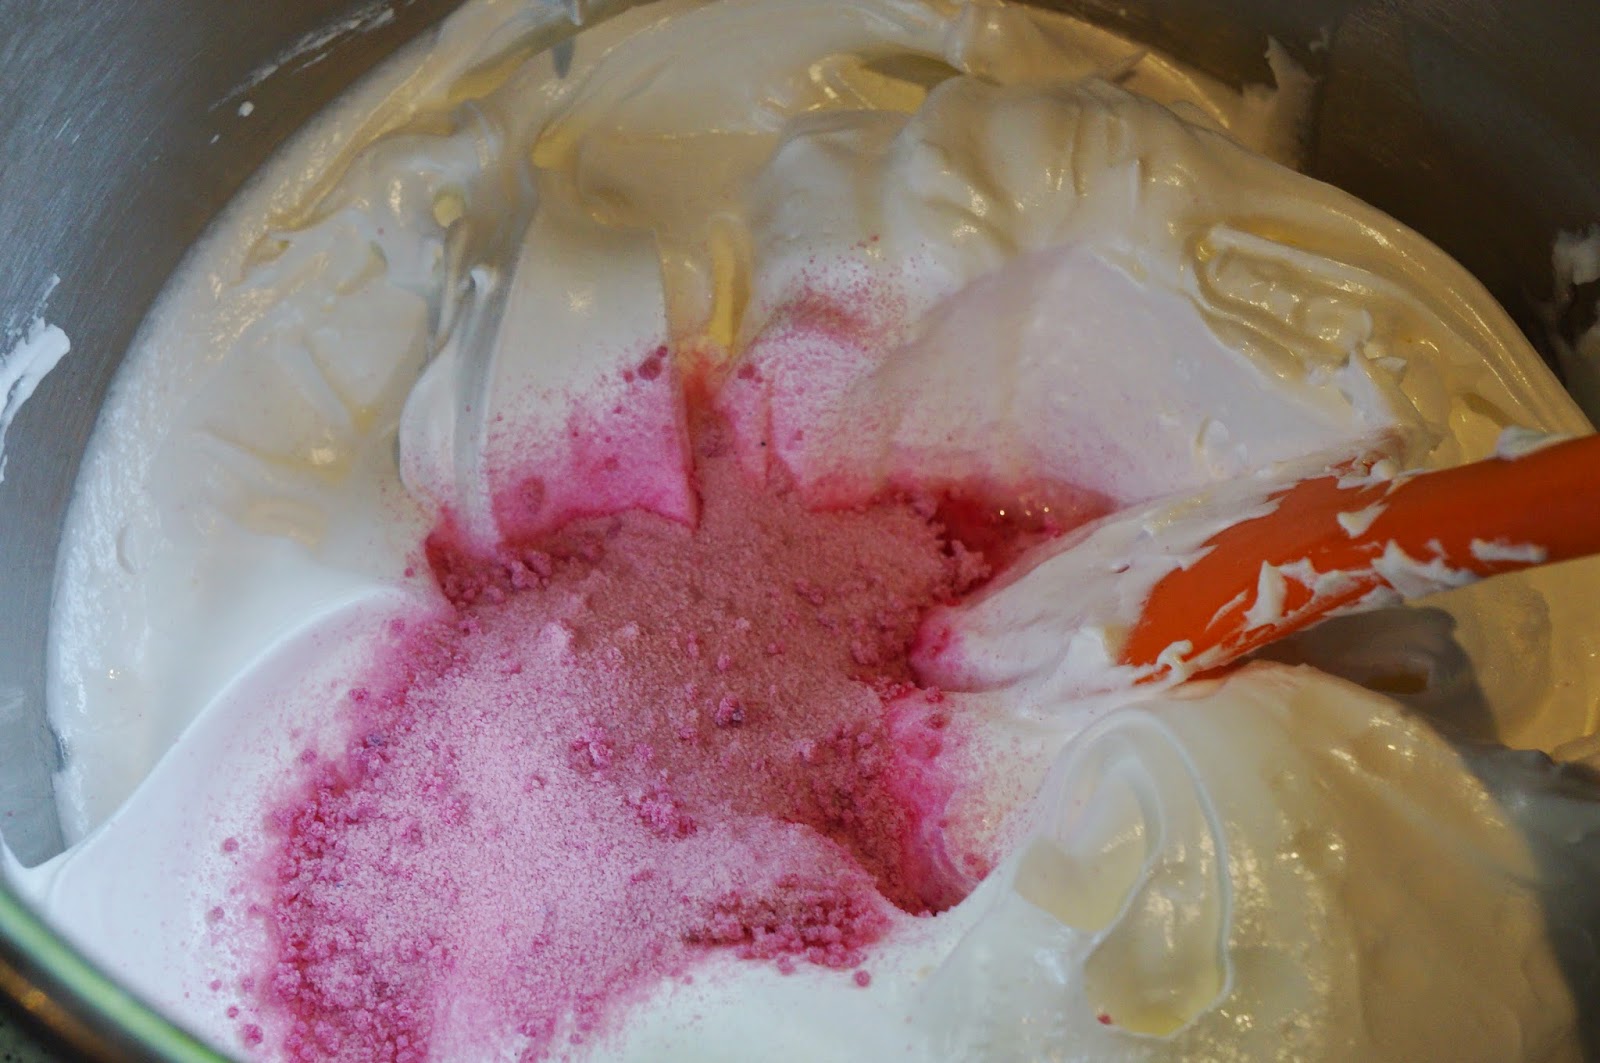
Take the bowl from the mixer. Add the raspberry extract and jelly crystals to the mix.
Using a spatula, fold the mixture just once.
That way the raspberry is marbled through the mixture.
Gently spoon the meringue into a piping bag fitted with a large round nozzle.
Pipe the meringues straight down onto the tray, squeezing the bag in 'jolts' so they form little round rolls in the sides.
Leave a gap between each meringue on the tray as they will spread a little.
Bake the meringues for 2 hours until they are crisp on the outside and chewy in the middle. At this stage turn the oven off and open the oven door. Leave them in the cooling oven for another half hour.
 Once they are cold, melt some chocolate, and using a skewer or toothpick, dab two eyes onto each ghost meringue.
We packaged our treats up in cellophane bags, wrote out some little cards, then off to visit our neighbours.
Everyone was thrilled to receive our little gift. It was a lovely way for us to catchup with our neighbours, no-one felt pressured because they didn't have sweets in the house, and our little blossom was so happy spreading a little joy around our street. Definitely a tradition we'll be doing again next year.

 While the biscuits are baking prepare the filling:


.JPG)


