Tuesday, 30 July 2013

What's not to like about Pavlova? - Recipe tutorial


Pavlova is such a great kiwi favourite. It reminds me of hot summers, happy family times and Christmas' at the farm. As you all will be aware they are quite a tricky thing to get right, but there is usually no fault that can't be disguised with a generous slather of cream and a sprinkling of fruit. I made this one for a dinner party with friends. I have to confess that the previous one I made was rather last minute, and when the man-of-the-house needed the oven at a higher temperature it succumb to the heat and ended up rather flat! The great thing about pavlova is that, though the look may not be perfect, the taste is very forgiving.

Pavlova

6 eggs - separated and at room temperature
a pinch of salt 
1 1/2 cups caster sugar
1 1/2 tablespoons cornflour
1 teaspoon cider vinegar
1 teaspoon vanilla extract

Preheat the oven to 150 deg. C. normal bake setting. Line a baking sheet with baking paper.

Carefully separate the eggs. A single speck of egg yolk in the white will stop them from fluffing up. Make sure the mixer bowl and whisk are spotlessly clean.

Beat the egg whites with the pinch of salt until soft peaks form. If they are over beaten at this stage they will appear dry looking and wont whip to full volume with the sugar.


Combine the caster sugar and cornflour. Add this to the egg whites in 3 tablespoon lots, beating well in between each addition to incorporate the sugar.

Once all the sugar has been added beat for another 5 minutes. The sugar should be all but dissolved. Add the vinegar and vanilla and beat for a few seconds to mix.


Pile the pavlova mixture onto the lined tray and smooth into a round disk. It important to build in plenty of height, as the pavlova will settle out in the oven.

Place the pavlova on the centre rack in the oven and leave for 45 minutes before turning the oven temperature down to 100deg. C for a further 1 hour. Then turn the oven off and leave the pavlova in to cool.

It's a good idea to leave it overnight, just don't forget it's in there and turn the oven on again!
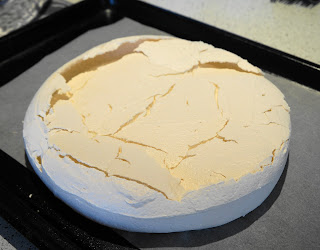
If you can remove the Pavlova from the paper onto the serving plate then that's great, but if it looks like it will break up, then just put the whole thing on the plate and trim the paper accordingly. If you have pinking shears, they make a pretty zig-zag edge.
Don't worry if the sides crack, just stick them back on and pile it with whipped sweetened cream and your choice of fruit. Raspberries are lovely in season, and kiwi fruit are a NZ classic. 


The best part of the baking is of course, licking the mixer whisk afterwards.  

I served the pavlova with a delicious raspberry puree. Little Miss 4 and her buddy loved the crunchy bits from around the outside the best!


Saturday, 27 July 2013

Green Herb, Cream Cheese and Beetroot Canapes


Writing blog posts has taken a bit of a back seat this school holidays while I concentrate on a variety of crafting and cooking projects. There is always a tension between time spent writing posts and time spent generating all the foodie and crafty projects expected of these pages. Cooking and baking has hogged the centre stage lately, but stay tuned as I have many crafty projects waiting to be posted.

This post is the second item to feature in my up-coming advertisement in Hazed Magazine. It's a delicious little canape perfect for entertaining guests or just treating yourselves to as a weekend treat. It's really easy to make and assemble. The little savoury pikelets, cream cheese spread and beetroot pickle can all be made in advance and the canapes assembled before guests arrive.

Green Herb, Cream Cheese and Beetroot Canapes

Green Herb Pikelets

1 cup flour
a good handful parsley and mint leaves
1 1/2 teaspoons baking powder
1 egg - separated
3/4 cup milk
2 tablespoons butter - melted
1 teaspoon salt
2 T finely grated Parmesan cheese
Combine the flour, baking powder, salt and Parmesan in a medium sized bowl.

Combine the milk and egg yolk in a separate bowl. 

Wash and finely chop the herbs.

Whip the egg whites until soft peaks form.
Make a well in the centre of the dry ingredients. Pour in the milk mix and chopped herbs. Gently stir with a whisk to gradually combine.
When nearly combined add the melted butter and stir until all ingredients are incorporated. 
Using a spatula fold in the whisked egg whites. Start with a third of the whites, then fold in the remainder. 

This lightens the mixture making the pikelets softer and more aerated.
Cook in teaspoon lots on a hot buttered griddle or non-stick frying pan.
Beetroot Pickle
3 fresh beetroot
1/2 cup brown sugar
1 teaspoon ground cumin
2 whole star anise
1/4 cup wine vinegar
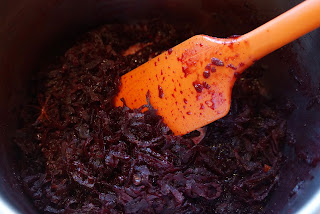
Peel and grate the raw beetroot. 
Put it and the remaining ingredients into a medium sized saucepan and cook, stirring occasionally until the beetroot has softened and the liquid all but evaporated.
Allow to cool before assembling the canapes. 

The pickle can be stored in an airtight container in the refrigerator for up to 2 weeks.
Cream Cheese Spread
1 250g tub of cream cheese
I teaspoon salt
2 teaspoons grainy mustard
1 heaped tablespoon mayonnaise
the juice of 1 lemon


Soften the cream cheese and beat with the remainder of ingredients until smooth. This mixture needs to be at room temperature in order to neatly assemble the canapes. If you make it ahead of time, store in the fridge but allow time to soften and whip again before using.

Make the canapes mass-production style by laying out all the pikelets, topping them all with a modest teaspoon of cream cheese filling, then garnishing with the beetroot pickle. A sprinkle of chopped parsley also looks nice.                                                                                                                                                                                    Assemble the canapes on a chopping board before transferring to a pretty serving plate. A serviette, either paper or linen, used to line the serving dish will stop the canapes from sliding on the serving plate as they are being handed around. Your guests will love these bright, cheerful and tasty nibbles. 
Thanks to Jen from Utterly in Love for this very cute photo.

Thursday, 25 July 2013

The next big thing - Chocolate Eclairs

I love choux paste. It's versatile, delicious and actually quite easy to make.
 
UK paper, The Independent, has tipped them as the next big thing; bigger than cupcakes, or even macaroons. They are being dressed up in all sorts of incarnations; something which suits them indeed, as the relatively plain bun can be filled with any number of fillings and adorned with whatever topping you like. I really like the pastry cream fillings, but my family always wants just good old Chantilly cream.

Thanks to Jen from Utterly in Love for shooting this cover photo as part of an up and coming advert for this blog in Hazed Magazine.


Choux Paste Buns for making Chocolate Eclairs

200ml water
85g butter
1 dessertspoon sugar
1/2 teaspoon salt
145g plain flour
4 to 5 eggs depending on the size - 245g weight once shelled

Preheat the oven to 200deg. C. Line a large baking tray with baking paper and grease or spray with butter or a non-stick spray.

Bring the butter, water, sugar and salt to the boil in a large saucepan.


Take from the heat and add the flour at once and beat until the mixture leaves the sides of the saucepan. Return to a low heat and stir the mixture for a few minutes in order to evaporate more water from the dough.


Transfer the mixture to the bowl of the beater and spread out to cool until just warm.

I usually give the flour dough a good mix with the whisk attachment in order to speed the cooling and develop the gluten in the flour. 


Lightly beat the eggs with a fork and slowly add to the dough in five parts, thoroughly beating between each addition. the mixture should be smooth and glossy.

Check the consistency of the dough before adding the final addition of egg, as the mixture should be of 'dropping consistency'. That means that it only just drops from the wooden spoon dropped back into the bowl.


Pipe the mixture into the baking tray.

Try to add height to the piped eclairs. I use a star nozzle in order to form a rougher textured bun.


Leave plenty of space between the buns to allow for rising.

Push any little peaks in the piped mixture down with wet hands.


Bake for 20 minutes at 200deg. C, then turn the oven down to 175deg and bake a further 20 minutes.

The buns should be golden brown and a nice crispy texture.


Allow to cool before piercing a hole in the base and using a piping bag to fill with Chantilly Cream - whip about 250ml cream with a couple of tablespoons of icing sugar and a teaspoon of vanilla extract. 


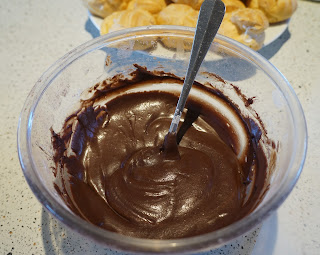
Make the chocolate icing by combining 2 tablespoons of melted butter with 2 tablespoons of sifted cocoa powder, 2 cups of icing sugar and enough warm water to make a nice smooth paste. The icing should easily spread on the eclairs, but be firm enough to not run off.


Eclairs are such a great treat for any occasion. The unfilled buns can be kept in an air tight container in the fridge for a few days or frozen for up to month.


Move over macaroon, here comes the eclair. 


Thursday, 18 July 2013

Shearing Pictures and Mum's Great Afternoon Tea

It's blade sharing time at the farm. That's where the sheep are shorn using hand blades so a thicker layer of wool is left on to keep them warm.

Afternoon tea in the shearing shed on the last day of work at Fighting Hill: Mum made sandwiches, cinnamon oysters with cream and pavlova to celebrate the completion of shearing. To help out I made the carrot cake. All served up on a wool bale.

As it is usually only isolated High Country farms that blade shear, the farmers provide breakfast, morning tea, lunch, afternoon tea and dinner to the shearing gang. That's a lot of catering and this is hungry work. These days, my sister in law helps Mum out, but I remember being on the farm helping my mother and grandmother.    

People often ask why shear them now, in the middle of winter? Left with a full fleece on the wool can get soaked with rain that takes ages to dry. Would you want to wear a thick wet woollen blanket all day?

The wool is sorted into types depending on its condition and where it was located on the sheep.

Then it's bailed to be sold later. As medium micron Romney wool it will be made into carpet, upholstery and furnishing fabric. It's also really good for felting and home spinning.

A beautiful clear winter's day at the farm.

Shearing the black sheep. Without the buzzing of machine shears, the shed is really quiet and the sheep don't get as stressed.

Dad at his wool bail desk, ready to write out the checks to pay the gang for their work.

Little Miss 4 loved watching the shearing, especially when it was her first pet sheep Lola's turn. The recipe for the Carrot Cake batter is on the blog here. Just bake it in a cake pan instead of cup cakes. 

Cheese Scones on the last day of term


Having just had a few days away with the family, this post comes to you a little delayed...

Anyway, the last day of term is clean up day in the school Food Room. Every class does their share and is rewarded with a fresh baked (frozen pre-made) chocolate chip cookie and a Milo. My Level 3 class, having already sampled a few cookies in the past few weeks were not interested in any more. On a whim I offered to make them cheese scones. They were stoked with the idea.

Cheese Scones

4 cups plain flour
8 teaspoons baking powder (yes, really eight)
1 teaspoon salt
2 teaspoons dried mustard powder
ground black pepper
about 150g butter
2 to 3 cups grated cheese
2 eggs
enough milk to top the eggs up to 2 cups liquid

Preheat the oven to 200deg. C and line a large tray with baking paper.

Sift the flour, baking powder, salt and mustard powder into a large bowl. Grind in the pepper. Grate the butter into the flour mixture. No need to measure the exact quantity, just use the increments on the butter paper to estimate how much to add. Toss the flour through the butter, then use our fingertips to rub the butter into the flour until the mixture resembles crumbs.
Stir the grated cheese through the mixture. Into a measuring jug or two cup measures crack the eggs and top up to a total of two cups of liquid. Use a fork to blend the eggs and milk.
Make a well in the centre of the dry ingredients and pour in the milk and egg mix. Use a table knife to gently stir the mixture to combine. Do not over mix or the scones will be hard and will not rise properly.
When the mixture is only just combined turn it out onto some lightly floured baking paper and gently flatten and shape into a rectangle. The mixture should be quite wet. Sprinkle a little flour on top if required. Do not knead!

Use a sharp knife to cut the scone dough into squares and place onto the lined baking tray.
Bake for 10 to 12 minutes until nicely browned. Test the scones for doneness by tapping on the bottom - it will sound hollow if properly cooked.
Allow to cool a little before breaking open as required. Don't try to cut open a hot scone with a knife or it will appear doughy inside.

Add lashings of butter and everyone is happy. I've been making this recipe for years and it never disappoints. Add fresh chopped herbs  to the mixture if you have them. Finely sliced bacon is also a favourite. Happy baking!


Thursday, 11 July 2013

Lamb Tagine a la Slow Cooker with Cous Cous


I have been neglecting the joy of the winter slow cooker meal. What's not to like about the added time, subtracted effort model of family meal cooking? So out of the back of the cupboard it comes. Today, sick child and class work to set, was a classic case of more time less effort. I just love Moroccan food, and using the slow cooker allows me to make a tagine with all the effortless ease of the slow cooker meal.

Lamb Tagine a la Slow Cooker

Cooking time 3 hours in the slow cooker. Serves 4.

200g lamb - shoulder is better
1 tablespoon sweet smoked paprika
1 tablespoon ground cumin
1 teaspoon ground cinnamon
2 teaspoons whole coriander seeds
1 teaspoon salt
1 onion
2 cloves of garlic
a preserved lemon - if you don't have one use fresh lemon rind and juice
3 tablespoons olive oil
a collection of vegetables from the fridge - I used half a leek, a small kumara, a handful of yams, a carrot, a stick of celery

Trim and slice the lamb. Place the lamb, salt and spices into the slow cooker and mix until coated. 


Slice up the vegetables into roughly even sized pieces. This is a rustic dish, so don't get too worried about how neat they are. Add the vegetables into the slow cooker and stir around to combine with the spices. 

Throw in the garlic, lemon peel and juice. If you have preserved lemon, don't add it until later in the cooking process.


Add the olive oil and enough boiling water to just cover the lamb and vegetables. Turn the slow cooker up to high, put the lid on walk away for 2 hours. 

Now add the olives and preserved lemon and leave for another hour. Check the seasoning and add more salt if required.


Cous Cous with Raisins

1 onion - finely sliced
2 tablespoons olive oil
2 tablespoons raisins
1 teaspoon salt
1 cup boiling water
1 cup instant cous cous
2 tablespoons butter

In a small pot with a tight fitting lid, fry the onion in the oil until soft. Add the raisins, followed by the salt and boiling water. 

Bring back to the boil then take from the heat and add the cous cous. Stir and leave with the lid on for 4 to 5 minutes. 


The water should be completely absorbed. 

Add the butter and stir over the heat with a fork until the butter is melted and the cous cous fluffy.

Serve the tagine over the cous cous in bowls. Spoon the liquid over so it soaks into the cous cous.

Dinner done!