On Friday night it was my very great pleasure to cook a birthday dinner for my man-of-the-house. With both of us busy at work at the moment and our Little Miss not needing any more late nights this week, we decided to celebrate this birthday at home. Since my darling man does most of our cooking, it's somewhat of a novelty for me to be cooking a dinner party.
In the interest of variety I decided to spurn the traditional roast or braise in favour of a little ethnic Moroccan inspired dish served with some seasonal vegetables. I didn't take many photos as coming straight from work, time was short!
Moroccan Inspired Chicken and Cous Cous
serves 6-8
For the Marinade:
2 tablespoons ground cumin
1 tablespoon ground sweet smoked paprika
1 teaspoon ground cinnamon
1 tablespoon salt
3 cloves garlic - crushed
juice of 1 lemon
12 skin on boneless chicken thighs
Combine the marinade ingredients and place in a bag with the chicken. Return to the fridge and marinate for a few hours.
For the Cous Cous:
1 red onion
1/2 preserved lemon
4 tablespoons olive oil
3 cups boiling water or chicken stock
1 tablespoon salt
2 tablespoons liquid chicken stock concentrate - check the salt level before adding the additional salt to the liquid, as stock concentrate can contain a lot of salt.
3 cups instant cous cous
100g butter
20 large green olives
1 cup sun dried tomatoes in olive oil - drained
1/2 cup pumpkin seeds
To Serve:
1 cup walnuts
1 cup Greek yoghurt
Preheat the oven to 200deg. C and line a large roasting dish with cooking foil.
Once the oven reaches temperature, place the marinated chicken into the tray, making sure to leave a gap between each piece. Bake for about 20 to 25 minutes until golden brown and the internal temperature has reached 75deg. C.
While the chicken is cooking, make the cous cous and prepare the walnuts and yoghurt:
In separate dishes, toast the walnuts and pumpkin seeds until golden. Be careful as they easily burn. Set these aside until needed.
Line a sieve with a clean, fine kitchen cloth. Place over a bowl and add the yoghurt. This will drain the extra liquid from the yoghurt and make it much thicker. Place a large serving platter into the warming draw.
To make the cous cous: In a large saucepan, fry the finely diced onion in the olive oil until soft. Slice the preserved lemon into small pieces and add with the water or stock, and the stock concentrate. Bring back to the boil and check the seasoning before adding the additional salt. Take from the heat, tip in the dry cous cous and stir. Place a tightly fitting lid on the pot and leave for 10 minutes to swell.
Prepare the olives by pitting and slicing into chunks. Chop the sun dried tomatoes into thin slices. Once the cous cous is ready, fluff it with a fork and stir in the olives, tomatoes, pumpkin seeds and butter.
To assemble the dish:
The chicken and cous cous should be ready at about the same time. Spread the thick Greek yoghurt onto the warmed, large serving platter. Pile the cous cous onto the platter. Arrange the cooked chicken thighs around the top of the cous cous. Then top with a sprinkling of the toasted walnuts.
I served this with butternut pumpkin wedges, whole carrots and beetroot halves roasted in olive oil.
We had Apple Crumble with Icecream for pudding.
Happy birthday my darling! Nothing better than a good time spent with family and friends.
Monday, 2 June 2014
Saturday, 24 May 2014
Adult size snood knitted in Crucci Terra Firma yarn
Here is the adult version of the Snuggly Snood I made for my daughter a few weeks ago.
It's also made using the new Crucci Terra Firma bulky yarn. It's 100% New Zealand wool and super warm and cosy against the winter winds.
I have again used the recommended 20mm needles to get a more defined stitch result for this adult sized snood.
You will need two 200g hanks to complete this project.
First wined the two hanks of yarn into two balls.
Adult's Snuggly Snood Pattern
Using 20mm knitting needles, cast on 16 stitches.
Work stocking stitch (1st row knit, 2nd row purl, then repeat) until both hanks have been knitted. Join the hanks at the end of a row. Finish with a purl row, leaving about 2 metres of yarn.
Now work the final row to join the ends and cast off at the same time: These are the pictures I took of the child's size snood, hence less stitches on the needles, but the process is the same.
Fold the snood right sides together as shown, with the beginning end closest to you.
Push the right hand needle through the first loop of the cast on end of the knitting. (the diagram shows completed stitches and a stitch in progress)

Then push the needle through the stitch on the left hand needle. Knit the stitch. This knits the two scarf ends together.
Once two stitches have been completed, cast the first stitch off by passing it over the second stitch.
Repeat the stitches and cast offs until only the last one remains. Pass the loose thread through the loop and pull tight to fasten.
Use a crochet hook to weave all the lose end in - most darning needles are not big enough to carry this yarn.
Happy knitting xx
I have again used the recommended 20mm needles to get a more defined stitch result for this adult sized snood.
You will need two 200g hanks to complete this project.
Using 20mm knitting needles, cast on 16 stitches.
Work stocking stitch (1st row knit, 2nd row purl, then repeat) until both hanks have been knitted. Join the hanks at the end of a row. Finish with a purl row, leaving about 2 metres of yarn.
Now work the final row to join the ends and cast off at the same time: These are the pictures I took of the child's size snood, hence less stitches on the needles, but the process is the same.
Fold the snood right sides together as shown, with the beginning end closest to you.
Push the right hand needle through the first loop of the cast on end of the knitting. (the diagram shows completed stitches and a stitch in progress)
Then push the needle through the stitch on the left hand needle. Knit the stitch. This knits the two scarf ends together.
Once two stitches have been completed, cast the first stitch off by passing it over the second stitch.
Repeat the stitches and cast offs until only the last one remains. Pass the loose thread through the loop and pull tight to fasten.
Use a crochet hook to weave all the lose end in - most darning needles are not big enough to carry this yarn.
Happy knitting xx
Monday, 19 May 2014
Canada's Rowing Snack Recipe
Last week one of my students made this fantastic slice for a trial practical. It's the recipe her mother makes her for snacking on during rowing training. Every day we send a 'brain food' snack as part of Little Miss 5s morning snack; she gets sick of the standard fruit and nut mix, so this recipe is an excellent and interesting substitute. Canada used sunflower and sesame seeds, but since we have a sesame allergy in our house I substituted linseed and chia instead. Interestingly it has Milo in it, thus a good supply of Vitamin B and Iron to add to the protein from the nuts and seeds. One of my friends suggested using Cadbury Hot chocolate powder instead of Milo for a gluten free option.
Canada's Rowing Snack Slice
1 cup coconut
1 cup oats
1 cup raw nuts - I used walnuts
1/2 cup linseed
1/2 cup chia seeds
1/2 cup pumpkin seeds
2/3 cup Milo
1/2 cup honey
1/4 cup dark cane sugar
125g butter
Preheat the oven to 180deg. C and line a 20 x 25cm baking tin with baking paper.
Measure the nuts and seeds into a large bowl. Add the Milo, and set aside.
Place the butter, sugar and honey into a small pot and melt together.
Boil for 5 minutes.
Stir the toffee into the seed and nut mixture and spread into a lined tin.

Bake for 25 minutes until golden brown and bubbly.
Take from the oven and set aside to cool. Once cold slice up and store in an airtight container.
This is a delicious and nutritious mid-morning snack that will keep you going right through the day.
Canada's Rowing Snack Slice
1 cup coconut
1 cup oats
1 cup raw nuts - I used walnuts
1/2 cup linseed
1/2 cup chia seeds
1/2 cup pumpkin seeds
2/3 cup Milo
1/2 cup honey
1/4 cup dark cane sugar
125g butter
Preheat the oven to 180deg. C and line a 20 x 25cm baking tin with baking paper.
Measure the nuts and seeds into a large bowl. Add the Milo, and set aside.
Boil for 5 minutes.
Stir the toffee into the seed and nut mixture and spread into a lined tin.
Bake for 25 minutes until golden brown and bubbly.
Take from the oven and set aside to cool. Once cold slice up and store in an airtight container.
This is a delicious and nutritious mid-morning snack that will keep you going right through the day.
Thursday, 15 May 2014
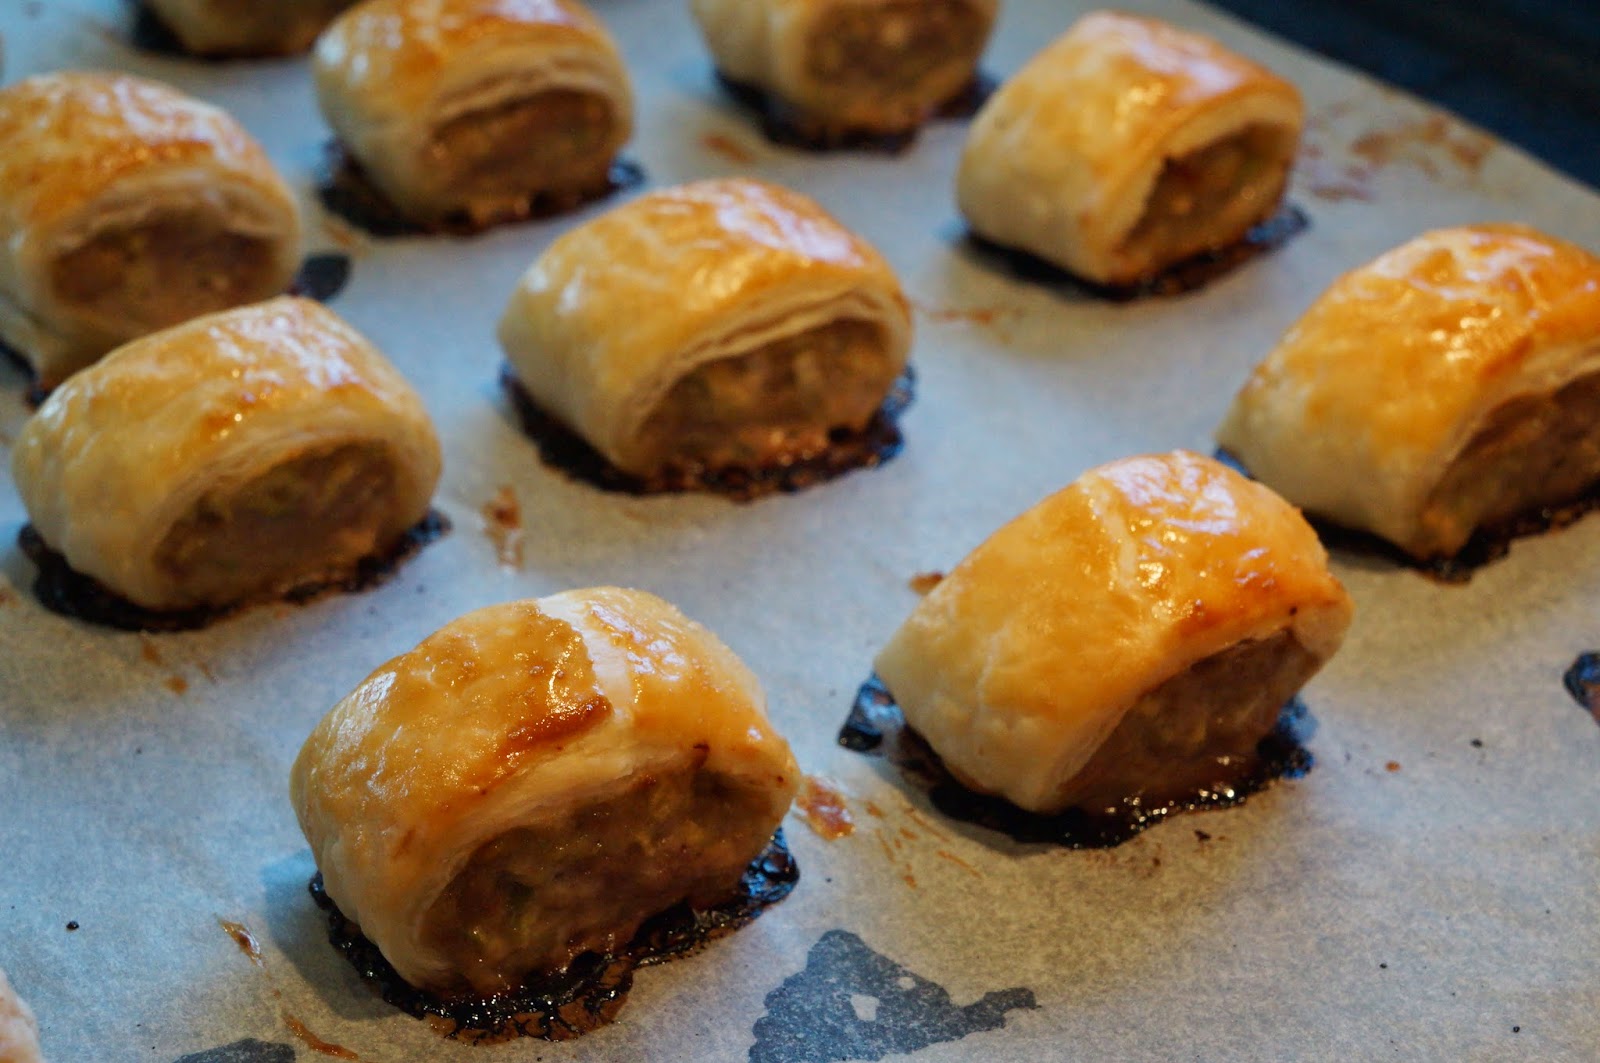
Tasty Pork and Apple Sausage Roll Recipe mmmmmm....
Wanting a change from our usual sausage roll recipe, I've opted for a pork and apple variation to serve our visiting buddies. You really can't go wrong with sausage roll making; anything baked in pastry can usually be relied upon to be tasty. These ones are nice and light with a fruity, spicy flavour.
Pork and Apple Sausage Rolls
500g pork mince
1 apple
1 egg
2 tablespoons sweet chilli sauce
1 teaspoon ground cumin
1 teaspoon salt
ground pepper
5 or 6 sheets of pre-rolled flaky pastry
another egg for glazing the pastry
Preheat the oven to 180deg. C and line a baking tray with baking paper.
Grate the unpeeled apple into the bowl and stir to combine.
Cut the pastry sheets into two and spread a row of pork filling onto each strip.
Roll pastry over the filling and seal by brushing a little water on the overlapping pastry to stick it together.
With the seam on the bottom, cut the rolls into individual sausage rolls.
Place the individual rolls onto the baking sheet.
Beat the second egg and glaze the rolls.
Bake for 20 to 25 minutes until golden brown and cooked through.
Happy days xx
Tuesday, 13 May 2014
At my brother's Wedding
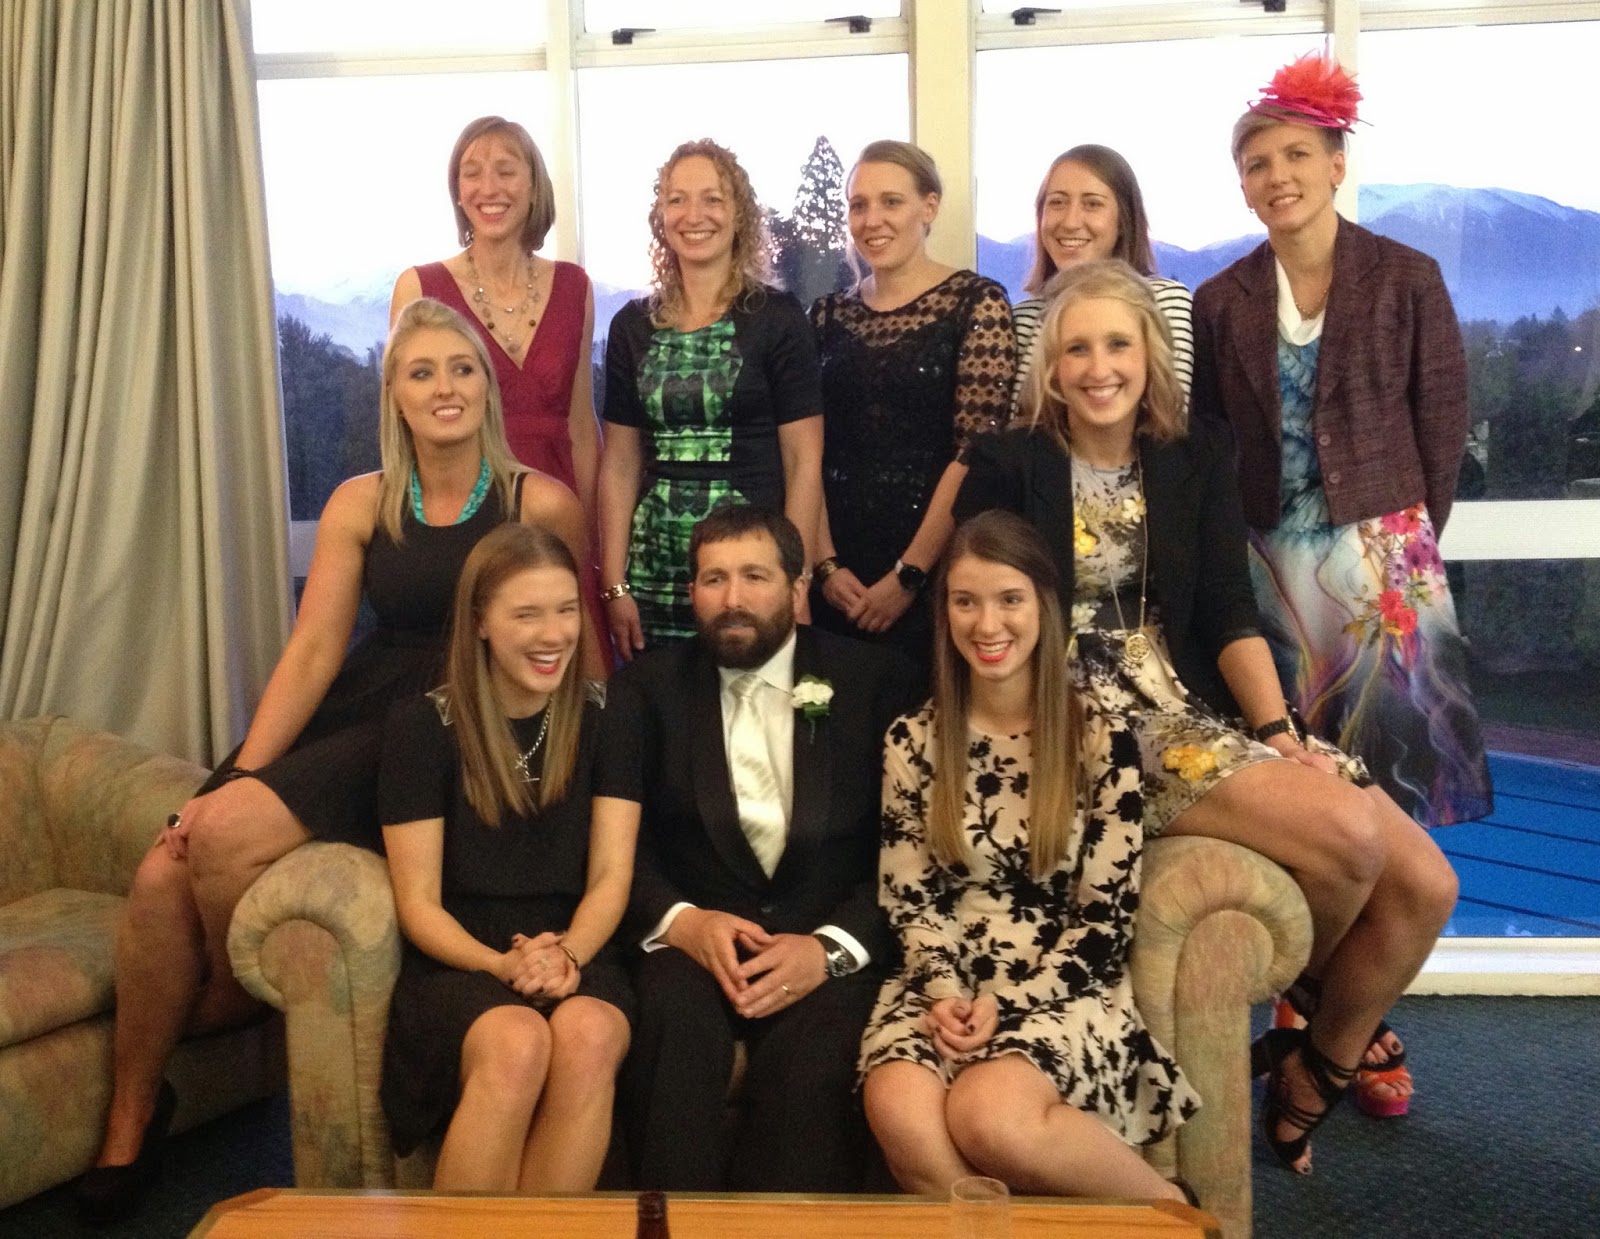
We have all been waiting, sometimes not so patiently, for this day to arrive! On Saturday the 10th my brother Hamish married his lovely partner Emily. It was a great family celebration of the marriage of two great people.
Our beautiful cousins.
Our little blossom snuggling up with Daddy.
The ceremony was held at the cute rural Green Street church.
Mother, daughter selfie.
Hanging around with the little people.
The happy couple.
Little buddies at the children's table.
We all made a layer of the cake. Mine was the teeny weeny one!
A partial cousins reunion. As you can tell our family is not big on breeding boys.
Our beautiful cousins.
Our little blossom snuggling up with Daddy.
The ceremony was held at the cute rural Green Street church.
Mother, daughter selfie.
Hanging around with the little people.
The happy couple.
Little buddies at the children's table.
We all made a layer of the cake. Mine was the teeny weeny one!
A partial cousins reunion. As you can tell our family is not big on breeding boys.
Tuesday, 6 May 2014
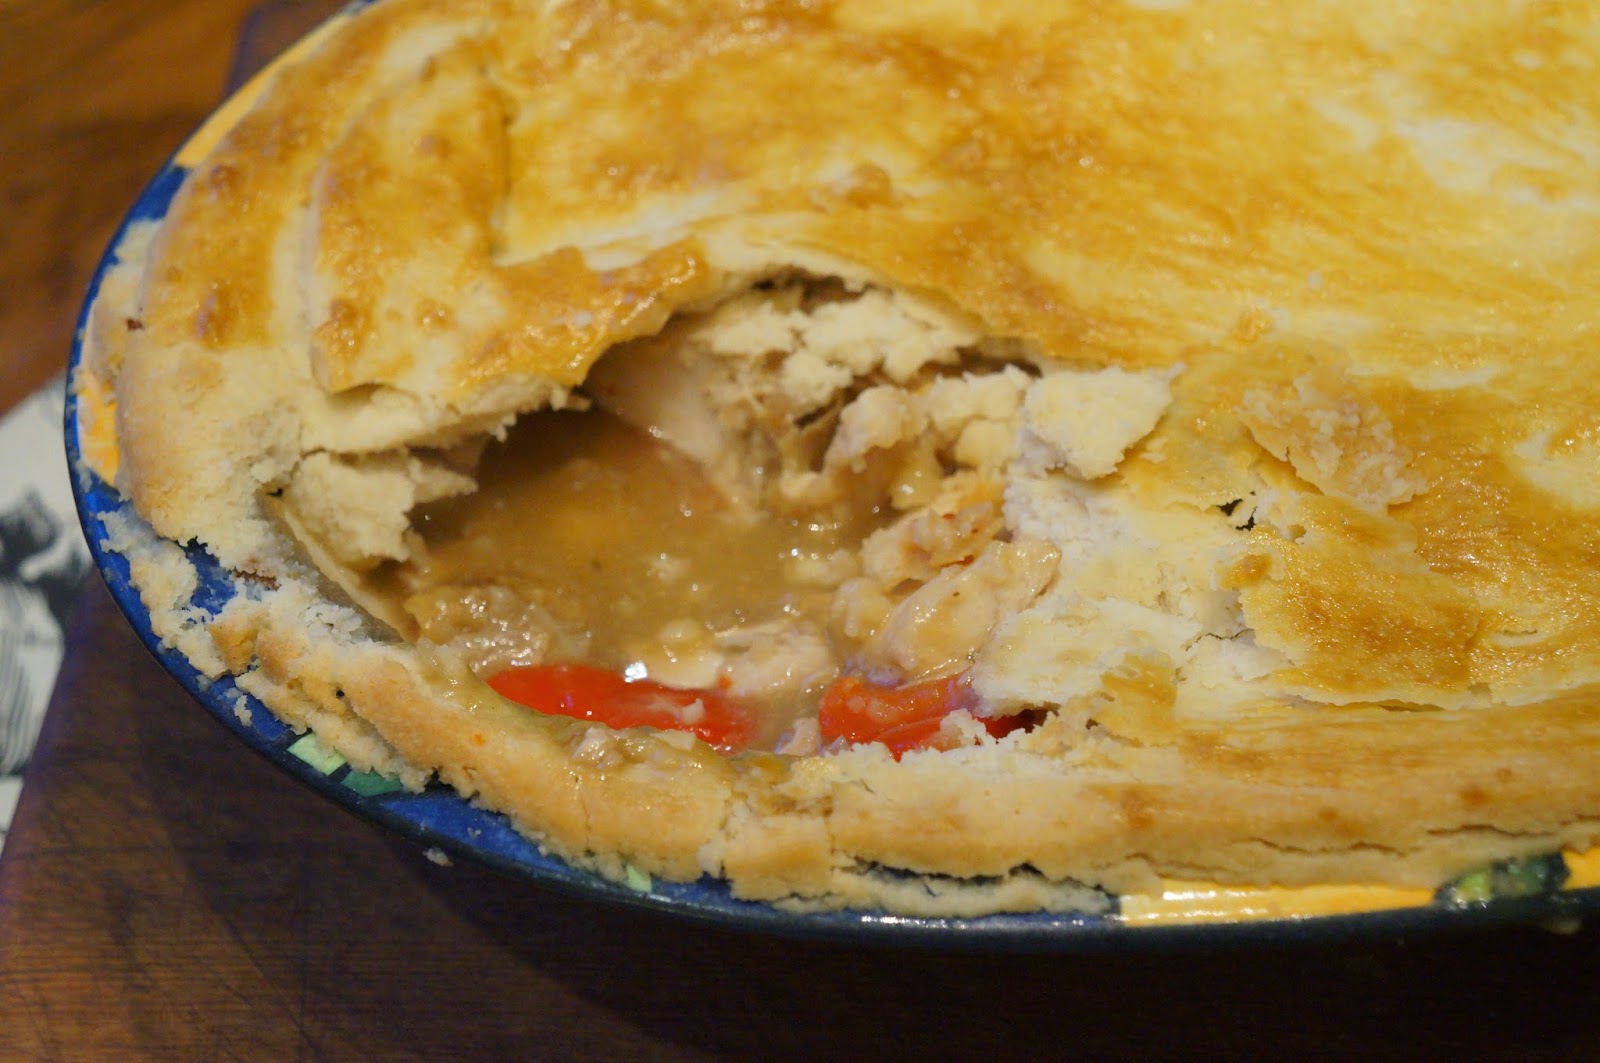
Left Over Roast Chicken Pie made with vegetable oil pastry
If you're not sure what to do with Sunday's left over roast chicken, this pie is a delicious mid-week meal. The next time you feel the need for a roast, it's worth buying an extra large size, so you can make pie with the leftovers. On this occasion we were running short of butter; I couldn't be bothered running to the supermarket, so for a change I made the pastry using just vegetable oil. The oil makes the pastry very short and crunchy. It's hard to handle, but worth the effort if your looking for a lower cholesterol vegetable fat option.
Left Over Roast Chicken Pie, made with vegetable oil pastry
The left over meat from half a large roast chicken
1 red pepper
2 tablespoons oil
1 red onion
2 tablespoons flour
4 rashers bacon or a few slices of pancetta
left over chicken gravy, topped up with water or stock to make 2 cups of liquid
salt and pepper to taste
Vegetable Oil Pastry
290g plain flour
1/2 teaspoon salt
1/2 cup vegetable oil
1 teaspoon lemon oil
sufficient water to stick the dough together and form it into a ball
a beaten egg to glaze
First make the pastry by sifting the flour and salt into a large bowl. Pour in the oil and mix together using your fingertips. Pour in the lemon juice and a splash of water. Use your hands to work the dough into a ball. Add more water if required, and briefly knead together. Chill for half an hour while making the filling.
Preheat the oven to 200deg. C
To make the filling:
Pull the left over meat from the bones and roughly chop it into chunks.
Slice up the red pepper and set both aside in a bowl.
Finely slice the onion and cut the bacon or pancetta into lardons.
Heat the oil in a large saucepan and fry the onion and bacon until the bacon starts to crisp and the onion has softened.
Add the 2 tablespoons of flour and stir until it starts to froth.
Take from the heat and add about a third of the gravy mixture. Stir until a smooth paste is formed, return to the heat and stir constantly until it starts to bubble, add another third of the liquid and repeat the process. Finally add the last portion of gravy and continue to stir constantly to avoid any lumps forming.
If you do have some lumps, swap the spoon for a whisk and beat the sauce vigorously to break them up. Allow the sauce to boil for a few minutes. Taste for seasoning and adjust as required.
Add the chicken and red pepper to the sauce and bring back to the boil.
Place the filling into a large oven proof dish. Set aside to cool a little while you roll out the pastry.
The pastry is quite brittle to work with; lay it between a sheet of baking paper and a layer of plastic wrap, and roll out to about a 4mm thickness.
Peel off the top layer of plastic and using the remaining layer of wrap, lift the pastry onto the pie. Trim around the edges.
Cut a few leaves from the pastry scraps and decorate the pie top.
Brush with the beaten egg to glaze and bake until the pastry is golden brown and crispy, and the pie filling is bubbling.
This pie is fine served on its own for a quick supper or with some mashed potato and a few steamed vegetables.
Left Over Roast Chicken Pie, made with vegetable oil pastry
The left over meat from half a large roast chicken
1 red pepper
2 tablespoons oil
1 red onion
2 tablespoons flour
4 rashers bacon or a few slices of pancetta
left over chicken gravy, topped up with water or stock to make 2 cups of liquid
salt and pepper to taste
Vegetable Oil Pastry
290g plain flour
1/2 teaspoon salt
1/2 cup vegetable oil
1 teaspoon lemon oil
sufficient water to stick the dough together and form it into a ball
a beaten egg to glaze
First make the pastry by sifting the flour and salt into a large bowl. Pour in the oil and mix together using your fingertips. Pour in the lemon juice and a splash of water. Use your hands to work the dough into a ball. Add more water if required, and briefly knead together. Chill for half an hour while making the filling.
Preheat the oven to 200deg. C
To make the filling:
Pull the left over meat from the bones and roughly chop it into chunks.
Slice up the red pepper and set both aside in a bowl.
Finely slice the onion and cut the bacon or pancetta into lardons.
Heat the oil in a large saucepan and fry the onion and bacon until the bacon starts to crisp and the onion has softened.
Add the 2 tablespoons of flour and stir until it starts to froth.
Take from the heat and add about a third of the gravy mixture. Stir until a smooth paste is formed, return to the heat and stir constantly until it starts to bubble, add another third of the liquid and repeat the process. Finally add the last portion of gravy and continue to stir constantly to avoid any lumps forming.
If you do have some lumps, swap the spoon for a whisk and beat the sauce vigorously to break them up. Allow the sauce to boil for a few minutes. Taste for seasoning and adjust as required.
Add the chicken and red pepper to the sauce and bring back to the boil.
Place the filling into a large oven proof dish. Set aside to cool a little while you roll out the pastry.
The pastry is quite brittle to work with; lay it between a sheet of baking paper and a layer of plastic wrap, and roll out to about a 4mm thickness.
Peel off the top layer of plastic and using the remaining layer of wrap, lift the pastry onto the pie. Trim around the edges.
Cut a few leaves from the pastry scraps and decorate the pie top.
Brush with the beaten egg to glaze and bake until the pastry is golden brown and crispy, and the pie filling is bubbling.
This pie is fine served on its own for a quick supper or with some mashed potato and a few steamed vegetables.
Sunday, 4 May 2014
It's Feijoa Season Again: Part 2
Our Little Miss has been eating through our box of feijoas so quickly, we've had to hold some back. We're not sure how she manages to eat so many without getting a tummy ache!
Here's the next instalment of Feijoa fabulousness.
Feijoa and Coconut Shortcake
3/4 cup dark cane sugar
150g butter
2 eggs
3/4 cup thread coconut
2 1/4 cups flour
1 1/2 teaspoons baking powder
2 teaspoons cinnamon
4 large feijoas
the juice from half a lemon
1 tablespoon coffee sugar or any other large granule brown sugar
Preheat the oven to 180deg. C and line a 20cm square baking dish.
Cream the butter and sugar until light and fluffy.
Add the eggs one at a time and beat thoroughly after each addition.
Fold in the coconut, followed by the sifted flour, baking powder and cinnamon.
Spread two-thirds of the mixture into the baking dish.
Set aside the remainder and prepare the feijoas.
Squeeze the lemon juice into a small bowl.
Peel and slice the feijoas into chunks one at a time.
Immediately place into the lemon juice to prevent them from browning.
Spoon the feijoa chunks onto the cake mixture taking care to leave the juice in the bowl.
Little Miss drank the left over juice and declared it delicious.
Now spoon lumps of the remaining cake mixture over the feijoas.
Leave gaps in the mixture so the feijoas can be seen.
Sprinkle over the coffee sugar and bake for 35 to 40 minutes until well risen and a skewer inserted into the mixture comes out clean.
This is a lovely moist cake that can be eaten alone or with cream or yoghurt. We made this for a get together with our Plunket buddies; then took the remainder up to the farm to share with our family. Happy days!
Here's the next instalment of Feijoa fabulousness.
Feijoa and Coconut Shortcake
3/4 cup dark cane sugar
150g butter
2 eggs
3/4 cup thread coconut
2 1/4 cups flour
1 1/2 teaspoons baking powder
2 teaspoons cinnamon
4 large feijoas
the juice from half a lemon
1 tablespoon coffee sugar or any other large granule brown sugar
Preheat the oven to 180deg. C and line a 20cm square baking dish.
Cream the butter and sugar until light and fluffy.
Add the eggs one at a time and beat thoroughly after each addition.
Fold in the coconut, followed by the sifted flour, baking powder and cinnamon.
Set aside the remainder and prepare the feijoas.
Squeeze the lemon juice into a small bowl.
Peel and slice the feijoas into chunks one at a time.
Immediately place into the lemon juice to prevent them from browning.
Spoon the feijoa chunks onto the cake mixture taking care to leave the juice in the bowl.
Little Miss drank the left over juice and declared it delicious.
Now spoon lumps of the remaining cake mixture over the feijoas.
Leave gaps in the mixture so the feijoas can be seen.
Sprinkle over the coffee sugar and bake for 35 to 40 minutes until well risen and a skewer inserted into the mixture comes out clean.
This is a lovely moist cake that can be eaten alone or with cream or yoghurt. We made this for a get together with our Plunket buddies; then took the remainder up to the farm to share with our family. Happy days!
Subscribe to:
Posts (Atom)