Showing posts with label wool. Show all posts

Wednesday, 16 April 2014

Button Cable Scarf

In the last few weeks I've been experimenting with a range of different yarns and scarf patterns. Hand knits are very much on trend this season, and my sister Charmaine is interested in some for her new signature boutique in Dunedin. Northern hemisphere trends have been leaning towards chunkier yarns and lots of stitch detail. Scarves are super easy to design given the repetitive nature of the pattern and fact that the width measurement is not particularly critical to the finished design. So why not give your own winter masterpiece a try!

Here is my first scarf sample: 4 cables with a moss stitch boarder and button and hole fixing.

I used approximately 150g of a 200g hank of chunky 14ply Naturally yarn and 6.5mm (Metric sized) knitting needles. 


New Zealand made of course.


Cable Button Scarf

Using 6.5mm knitting needles and 14 ply wool, cast on 30 stitches.
1st Row: Knit 1, purl 1, repeat until the end of the row
2nd Row: Purl 1, knit 1, repeat until the end of the row
These two rows form the moss stitch pattern. Repeat once more to form the end boarder.

First row of cable pattern: work 3 stitches continuing the moss stitch pattern.  

Now slip the next 3 stitches onto a cable needle. Place the cable needle at the back of the work. 


Knit the next 3 stitches from the left hand needle. 


Now knit the 3 stitches from the cable needle. 


This forms the cable: repeat the sequence 3 more times, then work the last 3 stitches as moss stitch. 


This is the finished cable row. 

2nd row: Work 3 stitches in the moss stitch pattern, followed by 24 purl, then 3 stitches of the moss stitch. 
3rd row: Work 3 stitches in Moss stitch, 24 knit, then 3 moss stitch.
4th row : repeat the 2nd row sequence
5th row: repeat the 3rd row sequence
6th row: repeat the 2nd row sequence

These 6 rows form the cable pattern. 

Repeat them until the desired length is achieved. 
I completed 24 sequences for this scarf.

Final moss stitch boarder and button hole:
Work 2 rows of moss stitch as per the first band. 
3rd row: work 4 stitches moss stitch, yarn over needle, knit 2 stitches together, then resume the moss stitch pattern to complete the row. work one more row moss stitch. Working the yarn over needle will form the button hole.

Last row: cast off in moss stitch. 

Sew the stray yarn ends in and sew the button onto the opposite side and end of the scarf; position it 5 cable sequences up from the end. 

Winter here we come. 

Happy knitting xx

Thursday, 15 August 2013

Blanket Love

I've been channelling the vintage vibe with this traditionally styled check blanket. I just love weaving. It's actually a whole load quicker than knitting and a great opportunity to experiment with colours. Rather than leave the ends as a fringe that's going to tickle half asleep noses, I've bound the ends with some cute floral fabric.

I dragged my trusty Ashford heddle loom out of the spare room and into the lounge and threaded it up with 100% New Zealand wool 8 ply Utuku yarn from The Wool Company in Taihape. Little Miss 4 has had endless trouble resisting the temptation to run her hand over the warp threads. She loves blankets, and can't wait to try out some weaving of her own. She is never very impressed when I tell her that the blanket is to be sold to another family. Though she likes the idea that something created by her mummy is going to keep another child warm and happy.


Ashford have some really good instructional videos on how to thread up a rigid heddle loom.
I used an 8/8 colour pattern and the 7.5dpi reed. Alternating 8 green and 8 pink threads for the warp, and 8 green and 8 pink for the weft threads. I threaded on 192 warp threads in total. Rather than breaking the yarn for the colour change, I wove the alternating yarn up one side of the work by including it with the end warp thread and wrapping the weft thread around at the end of each row.  

I've blogged the instructions for the bound ends in a previous blog. Its super simple and worth the extra effort for the contrasting texture and added cuteness.

One snuggly blanket looking for a cold day and a little companion.

Thursday, 18 July 2013

Shearing Pictures and Mum's Great Afternoon Tea

It's blade sharing time at the farm. That's where the sheep are shorn using hand blades so a thicker layer of wool is left on to keep them warm.

Afternoon tea in the shearing shed on the last day of work at Fighting Hill: Mum made sandwiches, cinnamon oysters with cream and pavlova to celebrate the completion of shearing. To help out I made the carrot cake. All served up on a wool bale.

As it is usually only isolated High Country farms that blade shear, the farmers provide breakfast, morning tea, lunch, afternoon tea and dinner to the shearing gang. That's a lot of catering and this is hungry work. These days, my sister in law helps Mum out, but I remember being on the farm helping my mother and grandmother.    

People often ask why shear them now, in the middle of winter? Left with a full fleece on the wool can get soaked with rain that takes ages to dry. Would you want to wear a thick wet woollen blanket all day?

The wool is sorted into types depending on its condition and where it was located on the sheep.

Then it's bailed to be sold later. As medium micron Romney wool it will be made into carpet, upholstery and furnishing fabric. It's also really good for felting and home spinning.

A beautiful clear winter's day at the farm.

Shearing the black sheep. Without the buzzing of machine shears, the shed is really quiet and the sheep don't get as stressed.

Dad at his wool bail desk, ready to write out the checks to pay the gang for their work.

Little Miss 4 loved watching the shearing, especially when it was her first pet sheep Lola's turn. The recipe for the Carrot Cake batter is on the blog here. Just bake it in a cake pan instead of cup cakes. 

Saturday, 22 December 2012

Relaxing with my Knitting

One of the best things about knitting as a pass time is that it demands that you sit down and surrender to the rhythm and repetition of the stitches.  Knitting cannot be hurried and there are no real quick shortcuts to the end result. It is the opposite of instant gratification, and therefore, when given as a gift it is a true reflection of time invested in honour of another. In the case of this hat, that theory applies doubly as it is made from a mixture of wools recently spun.
We were lucky enough to have a few days of sunshine away at the family farm. In between the usual farm related chores: feeding the chickens, cooking the lunch, cutting up the mutton, chasing after errant sheep, seeing to Dad as he completes his tractor work and tending the garden, I found some time to sit and enjoy the day over a spot of Christmas gift related knitting.  
I used the wool I recently spun to construct this practical winter beanie. (See my previous blog: Homespun and Dyed)

This is the view from my chair on the veranda.

The wool is a thicker gauge than normal 8ply, so I used 4mm needles for the ribbing and 5mm needles for the stocking stitch. I included a section of pattern using some wool spun from a natural light brown coloured fleece.

This hat is a medium size. If you want a large men's hat just start with 100 stitches. A child's hat can be made with 80 stitches. As long as you use the stitches in multiples of 10 the pattern will always work. Just adjust the length accordingly.

Home Spun Hat

Using 4mm needles and light brown yarn, cast on 90 stitches. 
Rib knit (K) 1, purl (P) 1 for 6 rows.
Change to 5 mm needles and white wool yarn; work stocking stitch: 1st row knit, 2nd row purl for 6 rows.

Change to coloured yarn, leaving the white yarn attached, and complete 2 rows. 
Next row: work 1 stitch white, then 1 stitch brown: repeat until the end of the row. 
Following row: alternate white and coloured stitches to match the stitch before. Work 4 rows like this.
Break off the coloured yarn and continue to work stocking stitch until the hat measures 12 cm from the beginning ending with a purl row.


First decrease row:  K8, K2 together (K2tog). Repeat this sequence of 10 stitches until the end of the row.
2nd and every alternative row: purl until end. 
3rd dec. row: K7, K2tog. Repeat sequence until end.
5th dec. row: K6, K2tog. Repeat.
7th dec. row: K5, K2tog. Repeat.
9th dec. row: K4, K2tog. Repeat.
11th dec. row: K3, K2tog. Repeat.
13th dec. row: K2, K2tog. Repeat.
15th dec. row: K1, K2tog. Repeat.
17th dec. row: K2 tog. Repeat.
18th row: purl.
Next row: K2tog. Repeat.
Continue to K2tog on knit rows until 3 stitches remain. Knit a cord by passing the knit stitches onto the left needle and knitting through them again. Continue to do this until the cord is the required length.
I changed back to the coloured yarn to complete the very top of the hat.


Press the hat and then use a darning needle and mattress stitch to sew up the side seam. Tie in the loose ends. You can make the cord as long or short as you want. I have previously made them long enough to tie a knot in.
With the larger needles I had the whole hat knitted by bed time.What better way to spend a peaceful afternoon.

Monday, 17 December 2012

Home Spun and Dyed

Everyone is familiar with the calender-esk images of happy, fluffy sheep grazing in sunny fields. But these days sheep are not really associated with clothing so much as lamb chops. We have become detached from the reality of where things come from. In fact, such is the success of the merino advertising, that some people don't even realise that merino's are in fact sheep. In New Zealand, low density pasture based farming practises mean that our sheep are far more environmentally friendly than many of their inside dwelling, prepared feed eating European counterparts. Yet despite its environmental credentials, mid-micron wool currently fetches next-to-nothing for the grower at the market. A situation not totally dissimilar to many other primary producers around the globe. So where does the alternative fibre - usually polyester or nylon - come from? This is not a question the average person asks themselves when they are sliding around the mall looking for the latest micro-trend. The answer is the same unfortunate truth as many other materials we encounter throughout our everyday lives - oil. So its not at all surprising that many among us are looking for a natural alternative fibre in which to cover our backs.  

This wool comes from the family farm. It's from the Romney bred of sheep and is a mid-micron weight. The fleece was washed and carded by Tai Tapu Wool carders, and then spun and dyed by me.

 The width of the fibre is measured and expressed in microns. Because this is a mid-micron fleece, it lends itself to a medium weight yarn.

As is customary, I started by spinning a single thread, then plied then together by spinning two strands together.


That's my lovely old Ashford traveller spinning wheel in the background. I got it from an auction  clearing house many years ago and it's so durable it will probably see me out.

I learnt to spin many years ago as a teenager. It's like riding a bike; once you learn you never forget how, no matter how many years intervene. If your keen to learn I suggest cruising the on-line auction sites for a second-hand bargain; as spinning wheels can vary in nature, you will want to stick to the same one until your confident and competent. Try finding an expert to help you learn. The majority of spinners tend to be woman in their 50s and 60s, and most are overjoyed to help a keen young learner.

 This is my Lazy Kate. Its job is to hold the spools of wool during the plying process.


This is the finished plied wool on the spool.


The next step is to reel the wool off onto the Niddy Noddy. I have to confess I don't know the origin of the name. It is extremely effective.
Once its been coiled into a hank, its all ready for dying. I used Dylon dye sachets and followed the simple directions on the packet. I usually only dye a small amount at a time, and half a sachet is sufficient to get the result I want. Be careful to measure out the correct quantities as the mixture calls for precision.


My three finished hanks. I haven't decided what to knit with them yet. I want to add another lovely soft colour and work on a stripe inspired pattern. All in good time... 

Monday, 29 October 2012

Crochet Nana Squares

Once the sole preserve of Nana's and Great Aunts, the crochet square is becoming the blanket material of choice for Mummy's around the globe. It has many positive attributes. Its warm and snugly, thanks to the air trapping properties of its textured finish; it comes in a variety of cheerful colours; its environmentally friendly, because it uses up all the odd bits of left over wool; and it reminds you of outings with your Nana and Poppa because they always carried one in the back seat of the car.

Overcome by a wave of nostalgia, I decided it was about time for a Nana craft revival:

I used a 3.5mm crochet hook and scraps of 8 and 12 ply yarn. If your using 12 ply, restrict it to the same number of rounds per square or the squares will end up different sizes.

Start by forming a loop and working 6 chain (ch). Join to the end to form a loop.
Now work in rounds:


Round 1: Work 3 ch, 2 triple crochet stitches (tc), 2 ch, 3 tc, 2 ch, 3 tc, 2 ch, 3 tc, 2 ch, join the chain to the first group of stitches to form a circle.


Round 2: Turn the work over and crochet the next row on the other side of the work. Change colours.
Work 3 ch, 2 tc passing the hook under the chain from the previous row, 2 ch, 3 tc through the same chain, 2 ch, 3 tc through the second corner of chain stitches, 2 ch, 3 tc, 2 ch, 3 tc through the third corner, 2 ch, 3 tc, 2 ch, 3 tc through last corner, 2 ch, 3 tc, 2 ch, join onto the first group of stitches.


Round 3: Turn the work over and crochet the next row on the other side of the work. Change colours.
Work this round in the same way as the previous one. The only difference being that one extra set of 3 tc is worked in the middle of each side of the square as shown in the photo.


Round 4:  Turn the work over and change colours. Work using the same pattern as the previous rounds, but add another set of 3 tc into each side of the square, as pictured.

Use a blunt tipped darning needle to work the loose ends of the wool back into the square.

Pressing the square with a warm steamy iron will help to form an even shape and texture.


The Nana squares can be left this size and joined together using the darning needle and matching wool; or an extra row can be crocheted around all the squares, and then they can be sewed up using the darning needle and matching wool.

Mixing the colours with alternating dark, light, dark, light colours and combining different tones of the same colour will make the blanket more attractive.


They are quick to make, so its easy to accumulate enough for a snugly blanket. One of the main advantages is that they are easy to carry around and complete where and whenever the mood takes you. No large project to juggle with your Cafe coffee and cake. Accumulate enough and you will be making your own enviable Nana car rug.

Saturday, 6 October 2012

Crafty Crochet Balls


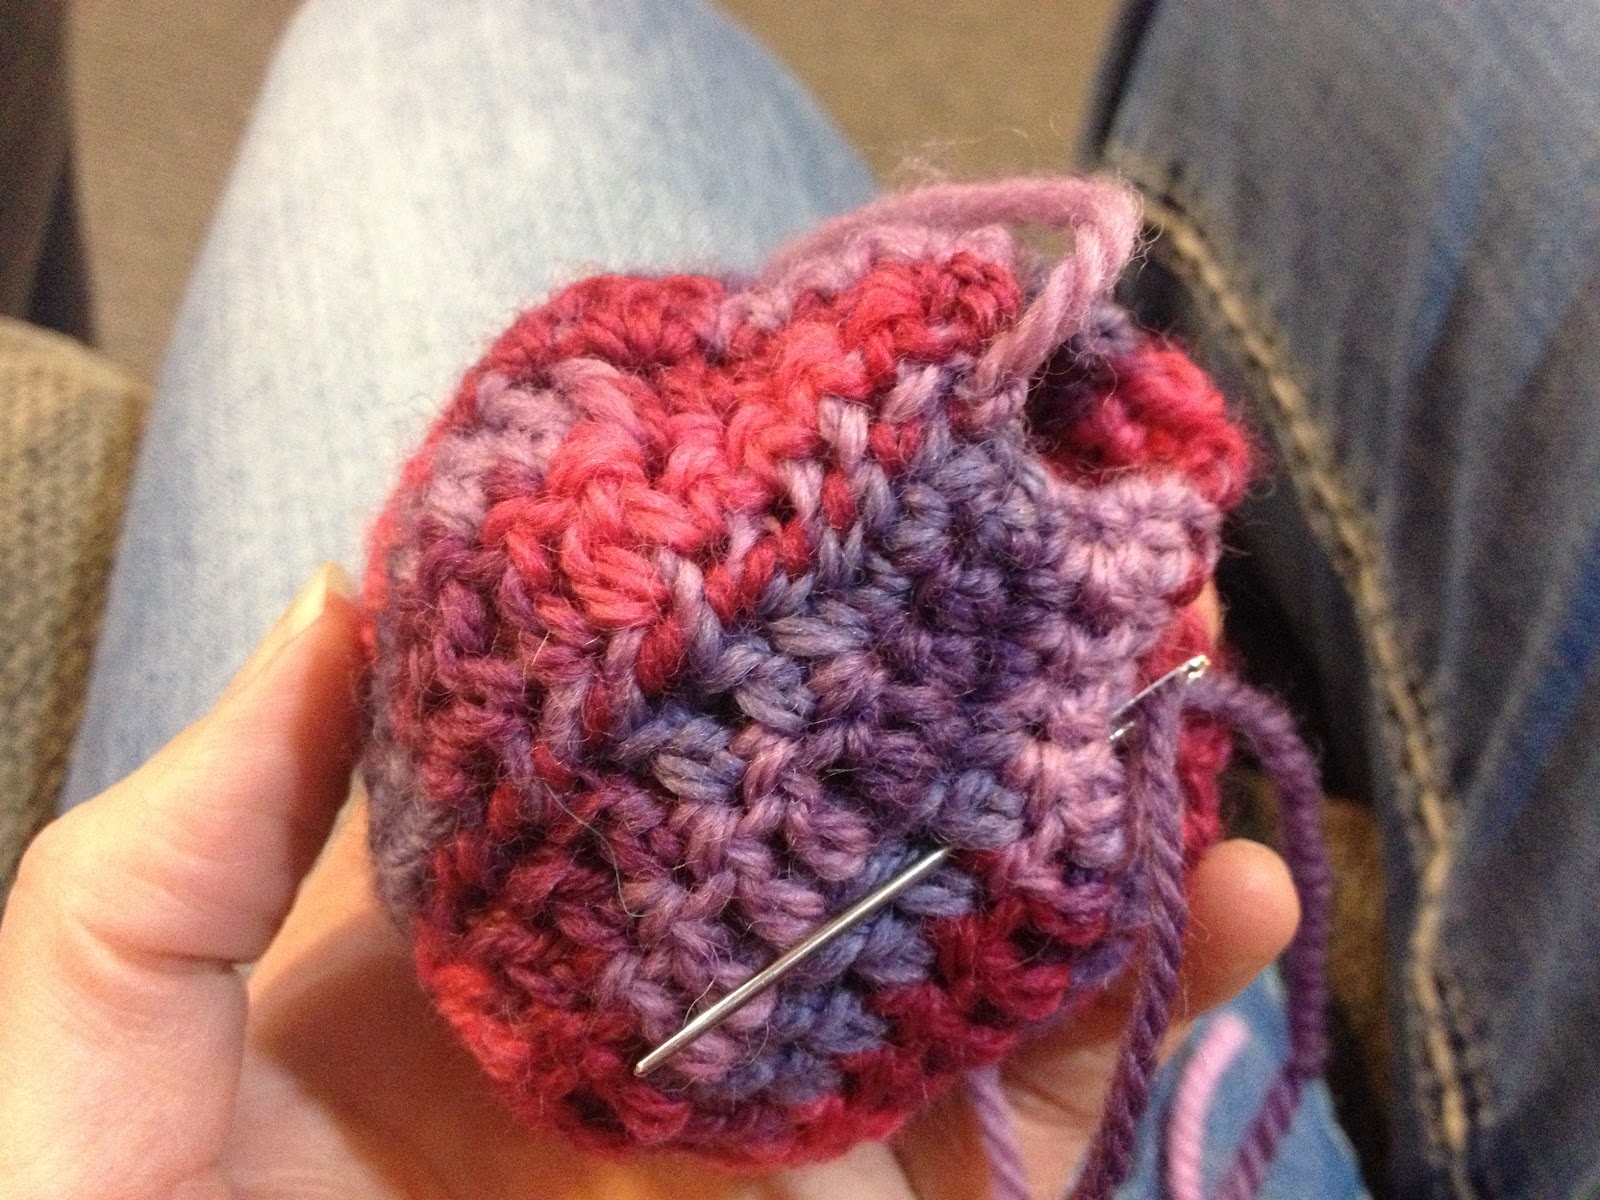
Continuing the theme of stash busting, these cute little projects are a perfect little doddle to occupy the few spare minutes of your day. All that's required is a few spare scraps of yarn, a 3.5omm crochet needle, a darning needle and a hand full or two of stuffing.

I adapted the pattern for these from a school library book. It suggested altering the colours, so the end result looks like a traditional beach ball pattern. I might try that next time; but for now, all that joining sounded like a hassle when I wanted to complete this quick smart.

The wool I have used is from The Wool Company in Taihape. All New Zealand wool, grown, spun and dyed in NZ. They have a fantastic mail order system via their web site: www.thewoolcompany.co.nz


Instructions:
  •  Make a foundation row of 16 chain
  • Row 1: 1 chain (ch), skip 1 chain, 4 double crochet (dc), 8 treble crochet (trc), 4 double crochet, turn.
  • Row 2: 1 ch, 4 dc into next 4 dc, 8 trc into next 8 trc, 4 dc into next 4 dc, turn.
  • These 2 rows form a pattern, and are repeated 9 times to form a ball shape.


Use a blunt pointed darning needle to sew a running stitch around the end of the ball; pull it tight to gather the end.
Sew the side of the ball together.


Leave the other end open and fill the ball with stuffing.
 
For the first one I used old scrapes of yarn collected from the ends of my weaving projects. It seemed like such a waste to throw them away. I am, however, not quite sure how this will hold up to washing, as the wool will need to be perfectly dried after washing to prevent it from later deterioration.
 
For the blue ball I resorted to using poly stuffing, as i know this can easily be washed after little fingers have spread their grimy message.
 
Stuff the ball as tightly as you can, as the stuffing will soften over time.
 
Now sew a running stitch around the open end and draw it up tightly. Sew a couple of times over the end and finish off by stitching over a couple of time in the same place. Stitch the end into the ball and cut off so it sinks in unseen.


Roll the ball around to form a nice even shape.
 
 
The multi coloured wool stuffing blends into the overall colour of the ball better than the poly stuffing.


And its done; all in no time at all.
 
I dare you not to become addicted to making these cute, quick little masterpieces. 

Tuesday, 2 October 2012

Cute Little Sprout Hats


There is something irresistible about little girls' clothes. All cute, pink and miniature. All innocence and joy. Even dirt looks good on them; and cake, especially cake, cheerfully smeared on faces and tops: "don't wipe your hands on your top. Poppa taught you that?"

Summer might be peeping around the corner, but these little hats are an addictive pass time. They are super practical, make great gifts, and are excellent stash busters. The generous shape means they are less inclined to fall from little heads, and they knit up in a flash. The cord on the top can be left short or knitted long and tied in a knot.

The sequence of the shaping makes it easy to adapt the size of the finished hat. Just cast on in multiples of 10 stitches. This one is knitted in 8ply using 3.25 and 4mm needles over 100 stitches. I have used the same pattern for thicker home spun wool using 4.5 and 5mm needles over 70 stitches to achieve a similar size product.

I got the wool from The Wool Company in Taihape. It's actually three colour ways knitted into a stripe: pale pink, pink and purple variegated and blue variegated yarn.


Little Sprout Hat - 8 ply yarn

To fit a large 2 year old or a medium sized 3 year olds head. If in doubt always go for the bigger size: you have put the effort into making it; you want it to last a while. 

Using 3.25mm needles cast on 100 stitches.
Rib knit 1 purl 1 for 8 rows
Change to 4mm needles, increase 1 stitch on the end of the first row, and work stocking stitch (1 row knit stitches, then 1 row purl stitches) for 11cm.

Shape Crown:
Row 1: K8, K2 together, repeat until the end, K1
Row 2 and every alternative row: purl
Row 3: K7, K2 together, repeat until the end, K1
Row 5: K6, K2 together, K1
Row 7: K5, K2 together, K1
Row 9: K3, K2 together, K1
Row 11: K1, K2 together, K1
Row 13: K2 together, repeat.
Repeat the knit together rows until 3 stitches remain.
Knit across the 3 stitches, then pass the stitches from the right needle to the left and knit across the 3 stitches again: effectively knitting them in a round. Repeat until you have the required length. Finish the cord by knitting the first 2 stitches together, knit the third stitch, pass remaining 2 stitches onto the left needle and knit together. Break the wool off, leaving enough wool to stitch the hat up if required, and pass the wool through the last stitch to finish.


I worked the following stripe pattern: 3 blue, 1 purple, 4 pink, 5 purple, 1 blue, 2 pink, 4 blue, 1 pink, 4 purple, 3 pink, 5 blue, 3 purple, remaining hat top rows are pink. 

Join the contrasting stripes on by tying the yarn onto the existing colour at the end of the row. Loosely carry the yarn up the side of the work, taking care not to pull it tight or it will distort the knitting.


Sew up the hat using mattress stitch. Take care to follow the row up the side of the knitting so the join is not visible.
The extra stitch on the end of the shaping makes it easier to sew the hat up without a visible seam in the crown. Thread the yarn at the top of the sprout down through the sprout and sew into the seam.


Sew all the loose ends in, and your finished!


The hat looks equally lovely in stripes or plain.
I usually don't bother to plan the strip in advance. Just choose the colours - an odd number allows you to knit single rows as the different colours can be joined onto both sides of the knitting - and go for it.

The variegated yarn makes the whole hat look random; whereas plain colours look more bold.


Happy knitting!