These grey woollen pants have been rather a long time in the making. At one point I feared they would not be finished before summer rendered them less than useful. Despite the mild winter, I have found them a super useful addition to my working wardrobe. To make them I used the same pattern as the summer floral pants made previously.
No photographs without the small star of the house getting in on the act!
Complete with self styled asymmetry.
Since the fabric has no nap - it looks the same from both grain directions - I could lay the back and front panels out in opposing directions to economise on fabric.
The pocket lining needed to be cut out again - total of 2 pairs of pockets.
 Use a tape measure to ensure the grain lines are straight. The measurement from the grain line to the straight edge of the fabric should be the same at both ends of the garment panel.
All cut out and ready to go. Be sure to mark the notches, dart and pleat markings. It will make the sewing easier and quicker later.
First step: Pin and sew the darts in the back panels. They should be marked with a notch at the fabrics edge and tailors chalk at the end.
Dart markings on the pattern.
The right and wrong side view of the completed darts - pre-ironing
Pin the pleats into place and sew down about 5 cm.
Use a tape measure to ensure the grain lines are straight. The measurement from the grain line to the straight edge of the fabric should be the same at both ends of the garment panel.
All cut out and ready to go. Be sure to mark the notches, dart and pleat markings. It will make the sewing easier and quicker later.
First step: Pin and sew the darts in the back panels. They should be marked with a notch at the fabrics edge and tailors chalk at the end.
Dart markings on the pattern.
The right and wrong side view of the completed darts - pre-ironing
Pin the pleats into place and sew down about 5 cm.
Fold the pleats into place and top stitch across the waist to hold them in place.
To sew in the fly zip:
Separately overlock the centre front seams.
Pin the two front panels, right sides together, around the crutch seam using a standard 1.5cm seam allowance.
Press the seam open along the centre front line all the way to the waist band
Fold the left side flat and use the ironed crease as a guide to pinning the zip on. Position the zip teeth outside the crease line as pictured.
Sew into place using a zipper foot to stitch as close to the zip teeth as practical.
Close up of zip stitching.
Once stitched, fold the zip back and press the original crease out.
This positions the zip far enough inside the centre line that it is not seen during normal wear.
Fold the right side of the front over the zip and position evenly so the centre front crease folds match up.
Pin along the centre front edge of the fly.
Then top stitch through both layers in order to stitch the overlapping layer onto the zip underneath.
Curve the top stitching at the base of the zip, (marked in the picture by the red pin) as is customary with most trousers. Take your time as this top stitching needs to be super neat.
Check that the stitching has caught the zip; otherwise there will be a hole!
Sewing the slanting side pockets:
In this pattern the pocket shape must be marked and cut out as part of the pocket construction.
Cut 2 strips of interfacing to re-enforce the pocket edge.
Pattern piece 7 shows the stitching line for the pocket.
Mark the sewing line with tailors chalk and iron the fusing in place.
Lay the pocket lining piece, right sides together, over the side of the front panel. Sew along the chalked stitching line.
Cut the unwanted excess fabric away and cut notches into the seam so it will sit flat once turned in the right way.
Fold the pocket and front panel out flat and 'understitch' the seam as shown in the picture.
Understitching attaches the facing or lining onto both layers of the underneath seam allowance. This is always sewn with the right side of the garment facing upwards. It holds the lining or facing in place and stops it from peeping out.
This picture shows the inside of the pocket lining with the understitching in place.
Iron the seam into place.
Place the 2nd half of the pocket lining onto the first half and pin the two linings together. The lining should not be pinned nor stitched to the front panel at this stage.
Once stitched, overlock the edges.
Now lay the layers together, iron and pin the top and sides together. Top stitch through all the layers, using a 1 cm seam. This stitching holds the pocket and front panel together until the side seam and band are completed.
Assemble the body of the pants:
Match the centre back seam, right sides together, and sew using the usual seam. Overlock the seam together.
Match up and pin together the completed front and back panels.
Sew the side seams and inside leg seams using the standard 1.5cm seam allowance.
Try the pants on to check for size. At this stage I took mine in a little along the side seams.
Over lock the seams once you are happy with the fit.
Attaching the waistband:
Cut out the iron-on interfacing to match the waist band and iron into place.
Starting from the left side of the garment, leave a 1.5cm seam, put the right sides together, then pin the remainder of the band to the pants - as shown.
The left side of the pants should have an overlap of 3 to 4cm.
Sew the band to the pants using the standard 1.5cm seam.
This picture shows the overlap on the left side of the pants.
Overlock the other side of the band. It will be left flat on the inside of the garment.
To 'bag out' the right end of the band, fold the end of the band - right sides together. The edges of the band must meet exactly.
Pin as shown.
 Sew a 1.5cm seam around the end of the band. Sew right up to the the seam that is holding the band onto the pants. This forms the overlapping tab that the button hole will be sewn into.
The left end of the band does not require an overlapping tab.
Fold it over, right sides together, matching all the edges. Sew across the end using the standard 1.5cm seam.
Turn the left side band end in the right way and position the seams inside the band.
Trim the corners from the the right side band and turn it in the right way.
Position the seams inside the band, leaving the inside edge of the band hanging flat on the inside of the garment.
Get your tape measure out and measure and pin the inside edge of the band onto the pants to form the waistband. The inside edge must overlap the bands stitching line 1.5cm. Iron into place.
Pin it from the outside of the garment as your going to be 'stitching in the ditch' to finish the band.
It could be top stitched if you want to see the stitching; but for this fabric, I would rather hide the stitching line.
Close up of stitching in the ditch to sew the layers of the waistband together.
Finished waist band!
Sew a 1.5cm seam around the end of the band. Sew right up to the the seam that is holding the band onto the pants. This forms the overlapping tab that the button hole will be sewn into.
The left end of the band does not require an overlapping tab.
Fold it over, right sides together, matching all the edges. Sew across the end using the standard 1.5cm seam.
Turn the left side band end in the right way and position the seams inside the band.
Trim the corners from the the right side band and turn it in the right way.
Position the seams inside the band, leaving the inside edge of the band hanging flat on the inside of the garment.
Get your tape measure out and measure and pin the inside edge of the band onto the pants to form the waistband. The inside edge must overlap the bands stitching line 1.5cm. Iron into place.
Pin it from the outside of the garment as your going to be 'stitching in the ditch' to finish the band.
It could be top stitched if you want to see the stitching; but for this fabric, I would rather hide the stitching line.
Close up of stitching in the ditch to sew the layers of the waistband together.
Finished waist band!
 Sew the button hole onto the tab on the right side of the band. The button hole should be a few millimetres bigger than the button, so search out a suitable button before you start.
 Hem the pants and finish the side splits by folding the hem over - right sides together, as shown. Sew down each side of the side split using a 1.5cm seam.
Turn out so the hem is positioned on the inside of the pants and the split edge seams are neatly finished.
Iron the hem up and the split seams back into place.
Hand stitch the hem in place.
Sew on the button, and its all done!
Warm pants on a cold damp day.
Little Miss 4 loves picking dandelions from the lawn. She collects up handfuls of them and I float them in wineglasses of water on the window sill. Winter's not all that bad.

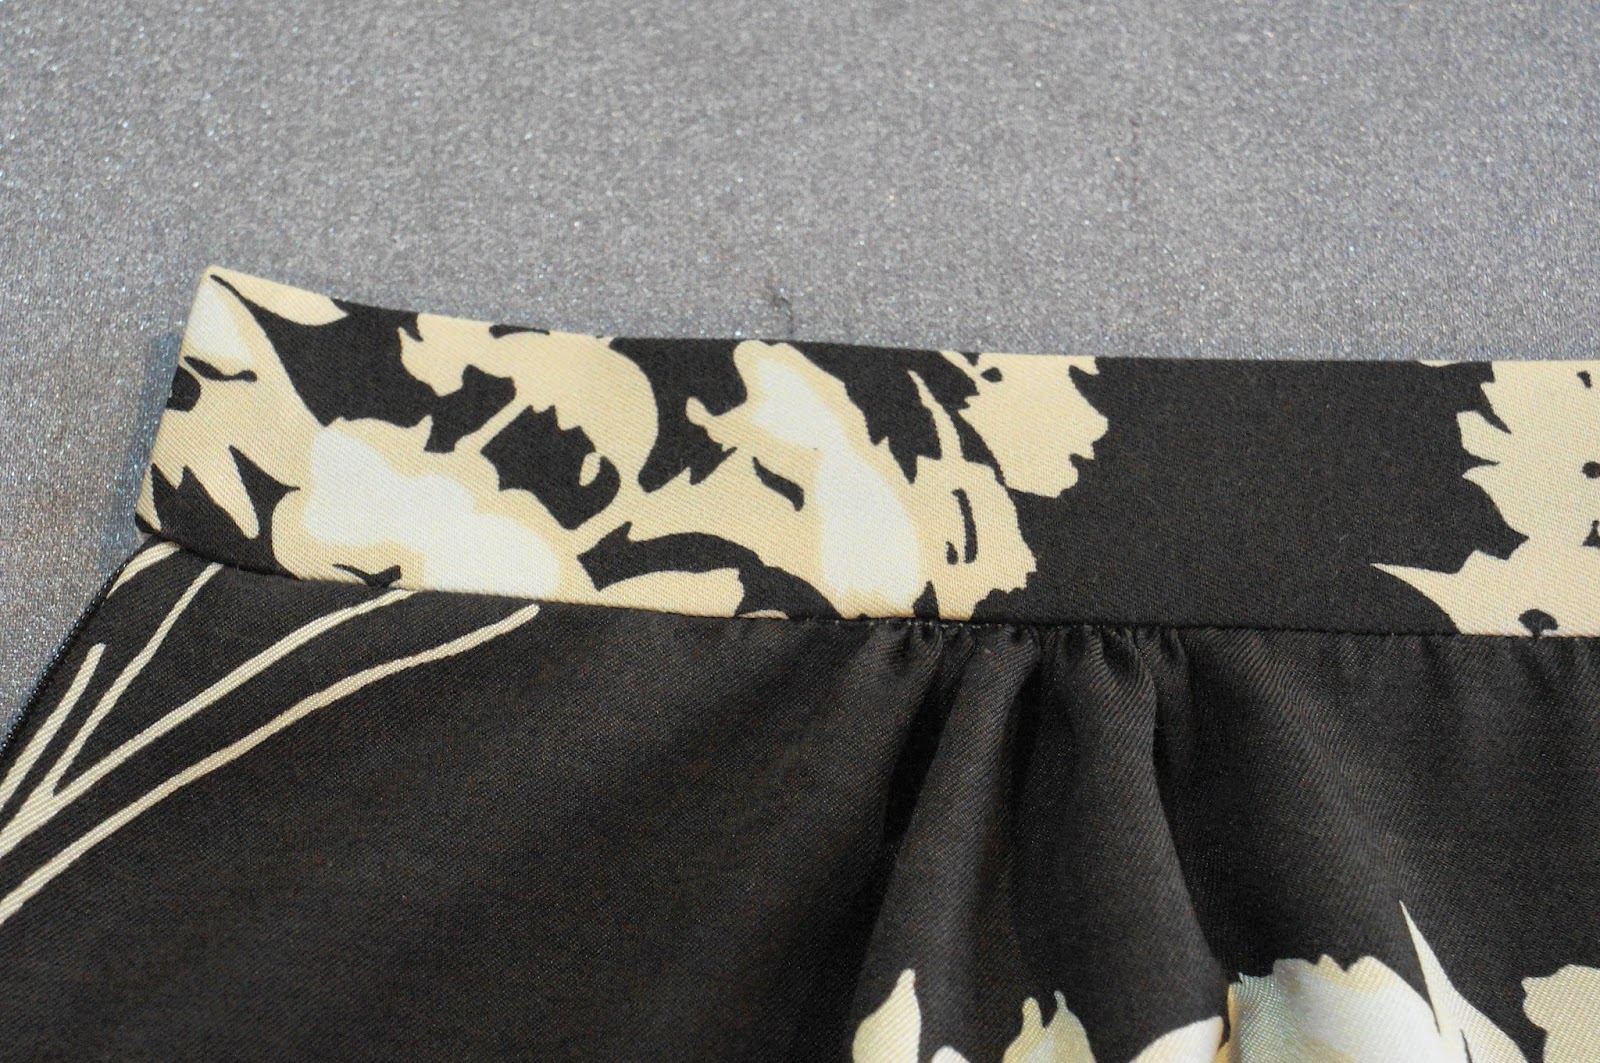
 I used a simple gathered into the waist band style pattern , but changed it slightly by concentrating the gathers into where the darts would normally be sewn.